4
Quick Guide
SeaBat Sonar UI - User Manual
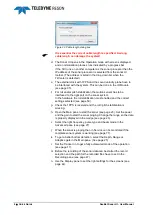
Figure 2-3 Cable length dialog box.
It is essential the correct cable length is specified. A wrong
cable length can damage the system!
d. The Sonar UI opens in the Operation mode with screens displayed
and a normalization process runs indicated by a progress bar.
If the SUI runs on another computer as the sonar processor then the
IP address of the sonar processor is selected from the sonar UI
toolbar. (The address is listed in the drop down list when the
7kCenter is detected).
e. The external clock with 1PPS and the sound velocity probe have to
be interfaced with the system. This can be done in the IO Module
(see page 35).
f.
For roll and/or pitch stabilization the motion sensor has to be
interfaced to the right port on the sonar system.
In the hardware the roll stabilization must enabled and the correct
settings selected (see page 50).
g. Check the 1PPS is received and the roll / pitch stabilization is
working.
h. Open the Main pane to start the sonar (see page 23). Set the power
and the gain to start the sonar pinging. Change the range so the data
is properly displayed in the wedge (see page 23).
i.
Select the right frequency, pulse type and beam mode in the
Advanced pane (see page 27)
j.
When the sonar is pinging then in Service can be monitored if the
complete sonar system is working (see page 77).
k. To get a better bottom detection, select the Depth, Range or
Adaptive gate in the Main pane. (See page 25)
l.
Set the Tracker on to get a fully automated mode of the operation
(see page 17).
m. Before the recording of the sonar data can be started the record
selection and the path for the recorded files have to set in the
Recording pane (see page 47).
n. Use the Display pane to set the right settings for the screens (see
page 44).


