background image

 Remote Diagnostics/Administration 


PVTis16S3IM  


A-2


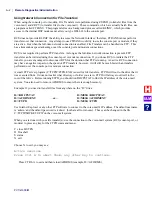
Using Network Connection for File Transfers


When using the console port or modem, File Transfers were performed using ZSEND (to transfer files from the 
voice-mail) and ZRCV (to transfer files to the voice-mail).  These commands, which are actually batch files, use 
a program called FTRANS.  This program relies on a background process called KLINIC, which provides 
access to the internal DSP modem and, after you type HELLO, to the console port.


RCS does not provide KLINIC the ability to access the Network Interface; therefore, FTRANS cannot perform 
transfers over that connection.  Any attempt to use FTRANS would try to use the console port or modem, if they 
are active.  But when the full-time network connection is enabled, File Transfers can be handled via FTP.  This 
has a tremendous speed advantage over the console port and modem connections. 
 
RCS is not required to perform FTP transfers.  As long as the full-time network connection is present, FTP 
transfers can be initiated using the console port or modem connection.  If you do use RCS to initiate the FTP 
transfer, you are encouraged to disconnect RCS for the duration that FTP is running.  An active RCS connection 
may have a negative impact on the speed of FTP transfers; however, it will still be much faster than transfers 
performed over the console port or modem connection. 
 
A small FTP server program (C:\TCPIP\FTPD.EXE) is used for file transfers.  FTPD will root to the drive that it 
was executed from.  It does not matter what directory or folder you are in, FTPD will always root itself to the 
root of that drive.  Before running FTPD, you should run DHCPSTAT to find the IP address of the voice-mail 
system.  You also need to remove AFORMS to ensure there is enough memory. 
 
Example: If you need to transfer files from anywhere on the “D:” drive: 


D:\>DHCPSTAT 

    D:\MESG>DHCPSTAT 


D:\>AFORMEXT  

or… 

  D:\MESG>AFORMEXT 

D:\>FTPD 


D:\MESG>FTPD 


Use Internet Explorer or any other FTP software to connect to the voice-mail’s IP address. The default username 
is ‘admin’ and the default password is ‘admin’  (both are all lower-case).  These can be changed in the file 
C:\TCPIP\SOCKET.UPW on the voice-mail system. 
 
When you are done with your file transfer(s), use the connection to the voice-mail system (RCS, console port, or 
modem) to press any key for the FTPD command menu: 
 
C  close LISTEN 
D  Dos shell 
S  status 
X  exit 
 
Choose X to exit, you may see: 

 
Active sessions 
Press Ctrl A to abort them, any other key to continue… 


Press CTRL-A to exit and then reload AFORMS (example, D:\>AFORMS). 


I&M

?

Summary of Contents for Perfect Voice Tis 16

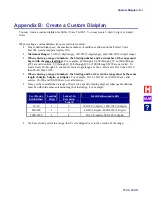
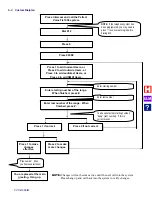
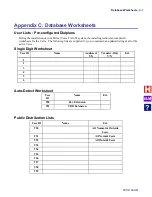
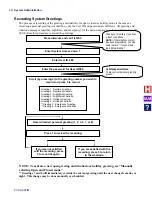
Page 1: ...PVTis16S3IM Revision 1 28 November 2011 Installation Manual I M...

Page 2: ...I M...

Page 3: ...g the System 13 A Set the System Date System Time 14 B Selecting the Telephone System Type 15 Selecting the Telephone System Type Using the Telephone 15 C Selecting a Pre configured Dialplan 16 D Reco...

Page 4: ...reeting Scripts 47 Pre Defined Users For Greetings and Whattodos 47 Recording System Greetings 48 Holiday and Temporary Greetings and Whattodos 49 Holiday Greeting and Whattodo 49 Temporary Greeting a...

Page 5: ...nic 8 File Transfers 9 APPENDIX B CREATE A CUSTOM DIALPLAN 1 APPENDIX C DATABASE WORKSHEETS 1 User Lists Pre configured Dialplans 1 Single Digit Worksheet 1 Auto Detect Worksheet 1 Public Distribution...

Page 6: ...ETL LISTED CONFORMS TO UL STD 60950 1 CERTIFIED TO CAN CSA C22 2 NO 60950 1 I M...

Page 7: ...System See page 13 Hardware Installation B Set the Date and Time 1 Press intercom call the Perfect Voice Tis16S3 system 2 Log in to User ID 900 administrator box 3 Dial 2 to set the current Time 4 Dia...

Page 8: ...call the Perfect Voice Tis16S3 system 2 Log in to User ID 980 3 Press 5 to record current personal greeting s 4 Record greeting s See page 17 D Record System Greetings and Whattodos Set the Business...

Page 9: ...ce Tis16S3 system 2 Log into the single digit User ID to change Users 1 through 6 3 After Login If transfer only Dial 5 Select 8 Enter the extension number followed by pound If audiotext Dial 2 Select...

Page 10: ...Installation Reference Guide PVTis16S3IM 4 This page left intentionally blank I M...

Page 11: ...oice Tis16S3 system If the called extension number is busy or does not answer the caller is prompted to leave a message enter another extension number or press 0 to reach the operator The Normal User...

Page 12: ...ilable If a caller is calling from a rotary dial telephone or does not know how to use the system Perfect Voice Tis16S3 can transfer the caller to an operator If a caller does not know the extension U...

Page 13: ...nstall Perfect Voice Tis16S3 page 12 Step 6 Restart CIX and Verify Perfect Voice Tis16S3 Is Functioning Properly page 12 Step 7 Configuring the System page 13 Step 1 Unpack and Inspect Perfect Voice T...

Page 14: ...s not performed until the Perfect Voice Tis16S3 has been fully programmed and all training is complete This stage often referred to as the cutover is where you actually route and forward calls to the...

Page 15: ...ort CDK does the notification then you must include that port in this program 2 Programs 200 15 for voice mail ports 200 22 for station ports 209 02 209 04 579 10 and 579 16 should all use the same Pi...

Page 16: ...are having problems with the MWI then include the Dedicated Notify Port in the VM Hunt Group and set call blocking on for that station port Part II b System Programming for SMDI Programs 579 580 804 8...

Page 17: ...ed 1200 02 Port Parity Even 03 Data Bits 7 Bits 04 Flow Control None 05 Wait Timer 1 Program 803 SMDI Port Assignments 00 Logical Device Number Select 300 SMDI 0 01 Device Connection RS232 02 Device P...

Page 18: ...rom its protective package Remember to handle the Tis16S3 card with care Wear an anti static wrist strap and hold the card by its edges Insert the Tis16S3 PCB into the appropriate slot and apply firm...

Page 19: ...e System Date and System Time page 14 B Select the Telephone System page 15 C Select the Dialplan page 16 D Record the system greetings and whattodos page 17 E Set Business Hours page 21 F Set Single...

Page 20: ...review the current date and time Thank you for calling If you have a touch tone phone Enter User ID 900 System Administrator Menu For the Current Date and Time press 1 To Change the System Time press...

Page 21: ...24 Toshiba CIX 100 670 Release 4 1 63 extension 64 extension DTMF 3 9424 Toshiba CIX 100 670 Release 4 1 SMDI Rel 3 X or greater SMDI Rel 3 X or greater SMDI Rel 3 X or greater Dial 913 NOTE If the te...

Page 22: ...been created All local configuration information personal greetings names and messages will be lost Single Digit Users may be configured as audiotext or additional Audiotext Users may be added using A...

Page 23: ...the extension number of the person you wish to reach please enter it now For directory assistance press 9 or hold for assistance If single digit options are used they should be included as part of th...

Page 24: ...whattodos daytime nighttime and emergency temporary are recorded from one User ID User ID 980 The greetings and whattodos are recorded as individual greetings UV1 UV4 and UV7 UV8 for this User Greeti...

Page 25: ...rd for User ID 980 Scroll by pressing 4 to the greeting number you wish to record and press 5 to record Record desired personal greeting 1 2 3 4 7 or 8 Call Management Menu To play current personal gr...

Page 26: ...de press 2 To place in holiday mode press 3 To place in workday mode press 4 You have selected If this is correct press 1 If this is not correct press 2 Please wait while your changes are processed If...

Page 27: ...whattodo and another event which places the system in closed mode for after hours operation plays the closed greeting and whattodo Refer to the worksheet below while activating open and closed modes...

Page 28: ...2 for Tuesday etc or 8 for Weekdays To change the open time press 1 or To change the close time press 2 Please enter the hour to open close Enter the hour from 0 to 23 Enter the minute from 0 to 59 Pl...

Page 29: ...intercom and call the Perfect Voice Tis16S3 system Press 8 to Change Extension Number Press 5 for User Setup Enter the Extension Number Press When Finished Enter System Access Code 7 Enter Single Dig...

Page 30: ...ttodo Thank you for calling If you have a touch tone phone NOTE If the telephone system has been programmed you may need to press to cancel auto login before dialing 7 NOTE If you have entered an exte...

Page 31: ...ervice department is logged in call blocking disabled for Single Digit User 2 the call is transferred to extension 205 When the Customer Service department is logged out call blocking enabled for Sing...

Page 32: ...sion 0 for User ID 0 To change this perform the following step Programming the Default Operator s Extension Press 9 to Back out of Message Management Press 5 for User Setup Press 0 to return to the wh...

Page 33: ...fax tone is detected Dial 990 Press intercom and call Perfect Voice Tis16S3 Enter System Access Code 7 Enter Password for User ID 990 Press 5 for User Setup Press 8 to Change the Extension Number Ent...

Page 34: ...DD tones are detected Dial 991 Press intercom and call Perfect Voice Tis16S3 Enter System Access Code 7 Enter Password for User ID 991 Press 5 for User Setup Press 8 to Change the Extension Number Ent...

Page 35: ...l 978 again Hang up after you hear the beeps and whattodo This disables Klinic and starts SMDI on COM 1 It is very important that you HANGUP when you hear the beeps or the process will not be complete...

Page 36: ...ge 9 s will appear on the pager display This is the notification that there are messages in his or her Perfect Voice Tis16S3 mailbox To activate deactivate Pager Notification Log in to Mailbox Press 9...

Page 37: ...ts The table below contains an example of the paging cycle for an un retrieved message left at 9 00 AM Attempt Accumulated Delay Example First No delay 9 00 AM Second 10 Minutes 9 10 AM Third 20 Minut...

Page 38: ...g which allows callers to search by last name only Log in to SCREENS Select RECEPTIONIST Select INSTANCE SETUP Select the Instance for which you would like to change Directory Assistance to use first...

Page 39: ...ct USER DIRECTORY Go to Screen 1 press F4 Edit the DirectoryName field Enter first0last User s first name zero User s last name in this field to search by first or last name The letters you enter in t...

Page 40: ...ifies whether or not to list this User ID in Directory Assistance if no name is recorded Instance Screen 2 Directory Assist This field specifies the selection made by callers and Users to access direc...

Page 41: ...n section of this guide and answer any questions the System Administrator may have The System Administrator is often your primary on site contact It is very important to get this person comfortable wi...

Page 42: ...form the following tasks manually Select a personal greeting Record a personal greeting Listen to messages Delete messages Forward a message to another User Send a message to another User Setup pager...

Page 43: ...cause that is what the system is attempting to do Verify programming in the User ID having trouble When testing the User ID experiencing trouble you always want to start with an empty mailbox Delete a...

Page 44: ...e system programming c Re select telephone system type see Select the Telephone System Type Symptom The auto attendant will not successfully transfer calls Determine if the telephone system is capable...

Page 45: ...p by step detail later in this manual Questions and Answers As the System Administrator you are responsible for answering questions from Users You should have a relatively good working knowledge of ho...

Page 46: ...er error Insufficient training Incorrect system configuration Faulty hardware Faulty software The System Administrator plays a central role in separating those issues that can be addressed within the...

Page 47: ...enables the System Administrator to reset a User ID The User s password name personal greetings messages and mailbox options will be reset 7 Available Recording Space This option tells the System Adm...

Page 48: ...be changed using the SCREENS interface 2 personal greetings 20 seconds in length 25 messages at 120 seconds in length User mode starting menu is the Message Management Menu Pager notification and mess...

Page 49: ...ion Auto Detect Users These types of Users are not associated with a person They allow you to configure Perfect Voice Tis16S3 to automatically transfer to a fax extension or TDD equipment when the app...

Page 50: ...new message 9 s will appear on the pager display This is the notification that there are messages in his or her Perfect Voice Tis16S3 mailbox To activate deactivate Pager Notification Log in to Mailbo...

Page 51: ...tempts The table below contains an example of the paging cycle for an un retrieved message left at 9 00 AM Attempt Accumulated Delay Example First No delay 9 00 AM Second 10 Minutes 9 10 AM Third 20 M...

Page 52: ...ed in the personal greeting number 4 of User 980 The whattodo informs the caller what to do or gives the caller options If you know the extension number of the person you wish to reach please enter it...

Page 53: ...s and whattodos daytime nighttime and emergency temporary are recorded from one User ID User ID 980 The greetings and whattodos are recorded as individual greetings UV1 UV4 and UV7 UV8 for this User G...

Page 54: ...To play current personal greeting press 1 Thank you for calling If you have a touch tone phone NOTE If the telephone system has been programmed you may need to press to cancel auto login before diali...

Page 55: ...s will play until the next scheduled greeting change occurs For example if you plan to be closed on a Thursday record your temporary greeting just after the Thursday open greeting has loaded Perfect V...

Page 56: ...all the Perfect Voice Tis16S3 system Enter 910 To place in open mode press 1 To place in closed mode press 2 To place in holiday mode press 3 To place in workday mode press 4 You have selected If this...

Page 57: ...lowing worksheet Secure someone to record the messages using a quiet environment Follow the steps for recording the audiotext message Audiotext Scripts Instance User ID Description 0 Script Instance U...

Page 58: ...System Access Code 7 Press 1 to review the current date and time Enter User ID 900 System Administrator Menu For the Current Date and Time press 1 To Change the System Time press 2 If satisfied with t...

Page 59: ...com and call Perfect Voice Tis16S3 Enter System Access Code 7 Enter Password for User ID 0 Press 8 to change the extension Enter Extension When finished press Press 5 for User Setup Press 9 to Back ou...

Page 60: ...ling This greeting is only played when call blocking is enabled Enter User ID 0 Press intercom and call Perfect Voice Tis16S3 Enter System Access Code 7 Enter Password for User ID 0 Dial 9 to Back out...

Page 61: ...for Call Management A common scenario is for the operator to turn call blocking on at night disabling transfers to the operator s extension and allowing the caller to leave a message in the operator s...

Page 62: ...or Creating New Public Distribution Lists You may review list members remove members from the distribution list or add new Users to the distribution list Enter Distribution List User ID _______ Press...

Page 63: ...s intercom and call Perfect Voice Tis16S3 Enter System Access Code 7 Enter the Password for the User ID _____ Press 9 to Return to the Main Menu Press 5 to Access User Setup Press 2 to Record Name Rec...

Page 64: ...ator 1 6 Single Digit Users 900 Administrator 980 Open and Close Greeting Recording 950 959 Public Distribution Lists Maintenance Enter the Password for the User ID _____ Enter User ID _____ Press int...

Page 65: ...ase read the next section carefully There are two generic MOH BGM audio files included with the system They are in the C AUDIO directory C AUDIO MOH16 RMS is for the newest hardware that supports 16 k...

Page 66: ...your own custom recording for music on hold please contact technical support for help with conversion into the proper format for Tis16S3 Please be sure to let them know which hardware version you hav...

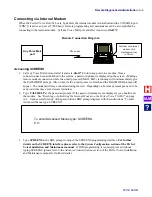
Page 67: ...ase These can be changed in the file C TCPIP SOCKET UPW on the voice mail system Once connected there is no need to type HELLO like when connected via the console port or modem Use CTRL ALT X to end R...

Page 68: ...t FTP is running An active RCS connection may have a negative impact on the speed of FTP transfers however it will still be much faster than transfers performed over the console port or modem connecti...

Page 69: ...rompt Allow time for the e mail process to finish and the PASSWORD prompt will appear The modem will stay connected during the wait Depending on how many messages need to be sent wait time may exceed...

Page 70: ...s can be created by adding an A or S to the command The following table lists the key codes available through Klinic As mentioned above adding a C A or S to the beginning of these codes causes the Con...

Page 71: ...ice Tis16S3 To reset or initialize a modem on the Perfect Voice Tis16S3 first dial the system From the list below dial the appropriate code followed by the confirmation code the codes are the same You...

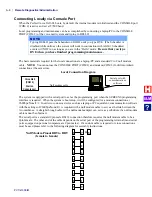
Page 72: ...ystem is equipped with a serial port to act as the programming port when the SCREENS programming interface is required When the system is booted up it will be configured for a modem connection at 9600...

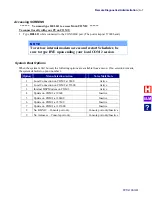
Page 73: ...n the system is first booted the following options are available from a menu If no selection is made the system defaults to option number 3 Option Menu Selection Action Voice Mail State 1 Local Connec...

Page 74: ...s can be created by adding an A or S to the command The following table lists the key codes available through Klinic As mentioned above adding a C A or S to the beginning of these codes causes the Con...

Page 75: ...erfect Voice Tis16S3 system to the local PC ZRCV Initiate a ZMODEM file transfer to receive a file from the local PC to the Perfect Voice Tis16S3 system To transfer a file run the appropriate program...

Page 76: ...Remote Diagnostics Administration PVTis16S3IM A 10 This page intentionally left blank I M...

Page 77: ...9 or 2000 through 5999 are not valid To create Users 20 through 59 you must enter a single range at a time First enter 20 29 then 30 39 then 40 49 then 50 59 When entering a range of numbers the Start...

Page 78: ...n finished press Enter last number You have selected starting number beep last number If this is correct press 1 Press 1 if correct Press 2 if not correct Press 1 to make changes effective Press 2 to...

Page 79: ...the Users The following lists are supplied for you to maintain an updated listing of all of the active Users Single Digit Worksheet User ID Name Audiotext Y N Transfer Only Y N Ext 1 2 3 4 5 6 Auto De...

Page 80: ...rmal User Worksheet 2 Digit The pre configured 2 digit Normal Users range from 10 to 59 Make additional copies of this worksheet as needed User ID Name Pager Number Ext 0 0 Extension may be changed Se...

Page 81: ...Depending on the pre configured dialplan you selected the Normal Users may range from 100 199 200 299 or 300 399 Make additional copies of this worksheet as needed User ID Name Pager Number Ext 0 0 E...

Page 82: ...Database Worksheets PVTis16S3IM C 4 Outside User Worksheet The pre configured Outside Users range from 600 to 649 Make additional copies of this worksheet as needed User ID Name Pager Number I M...

Page 83: ...owing steps to install Hyperterminal 1 Turn on the computer and start Windows 2 Insert the diskette into the appropriate disk drive 3 Click the Start button and select Run A dialog box appears Click B...

Page 84: ...16S3IM D 2 7 Click Next The License Agreement screen is displayed 8 Select I accept the terms of the license agreement and click Next You will be asked if you personally own the computer where HyperTe...

Page 85: ...Installing Hyperterminal PVTis16S3IM D 3 9 Answer appropriately and click Next 10 Specify where to install HyperTerminal Private Edition and click Next 11 Click Proceed I M...

Page 86: ...Installing Hyperterminal PVTis16S3IM D 4 12 Click Finish I M...

Page 87: ...time Then you may easily create specific customer files by saving the template file under another name and editing the telephone number To start HyperTerminal Click the Windows Start button select Pro...

Page 88: ...Installing Hyperterminal PVTis16S3IM D 6 3 Enter a telephone number no dashes and click OK 4 Click Modify 5 On the Connect To tab click Configure I M...

Page 89: ...Installing Hyperterminal PVTis16S3IM D 7 6 Select the maximum speed your system will support and click OK 7 On the Settings tab set Emulation to VT100 and click OK 8 Click Cancel I M...

Page 90: ...e action specifying keys with braces For example press F 1 on the keyboard Below is a list of the keys you need to map For more information on how key mapping works see Working Remotely earlier in thi...

Page 91: ...e template to a new session To copy From the HyperTerminal window above right click the Remote Connection Template icon and select Copy Then right click in the window and select Paste A copy will appe...

Page 92: ...Installing Hyperterminal PVTis16S3IM D 10 This page intentionally left blank I M...
Page 93: ...ntication vm2em smail yourdomain com fvmemail yourdomain com ausername ppassword If you are not using e mail notification at this time you may leave the information as is Ask your email administrator...

Page 94: ...n below Packet driver settings IP Address for DHCP ip address 0 0 0 1 Removed the hash from the beginning of this line IP Address for Toshiba ip address 192 168 254 252 Added the hash to the beginning...

Page 95: ...t be disabled and Notify COS 401 must be enabled for use Log in to SCREENS Select NOTIFY Select NOTIFICATION Select Notify COS 400 Voicemail to Email w Attachment On Screen 1 press F4 and edit the Ena...

Page 96: ...Email Notification PVTis16S3IM E 4 This page intentionally left blank I M...
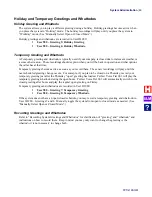
Page 97: ...sation you need to program Perfect Voice Tis16S3 to play a live record beep Log into SCREENS Select Receptionist Select User Directory Go to Screen 2 press F4 Edit the Application or ID field This fie...

Page 98: ...Call Record PVTis16S3IM F 2 This page intentionally left blank I M...
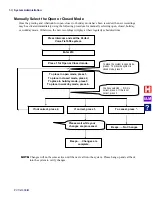
Page 99: ...which callers are transferred to a User s extension after entering his or her User ID voice messaging A function of Perfect Voice Tis16S3 in which messages are recorded for a User or group of Users D...

Page 100: ...immediately plays the personal greeting for the mailbox and allows the caller to leave a message or dial another extension The Normal User and Outside Mailbox User IDs may be two three or four digit...

Page 101: ...PVTis16S3IM Revision 1 28 November 2011 430 Woodruff Road Suite 300 Greenville SC USA 29607 1 864 297 4401 www teleco com I M...

Reviews: