


Maintenance, Service, and Repair
Brakes
Page 7
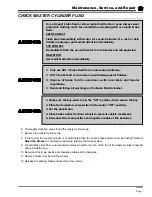
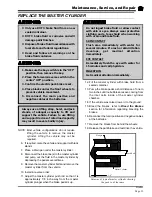
CHECK MASTER CYLINDER FLUID
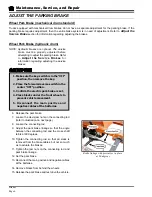
6. Thoroughly clean the area around the master cylinder cap.
7. Remove the master cylinder cap.
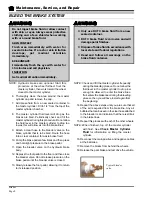
8. If the fluid in the master cylinder is contaminated then the entire brake system must be flushed. Refer to
Bleed the Brakes
for information regarding flushing the brake system.
9. Fill with brake fluid from a new sealed container to within 1/4-inch of the top of the master cylinder chamber
and reinstall the cap.
10. Reconnect the main positive and negative cables at the batteries.
11. Remove blocks from behind the wheels.
12. Release the parking brake and test drive the vehicle.
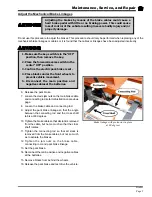
•
Only use DOT 3 brake fluid from a new sealed container.
•
DOT 3 brake fluid is corrosive and will damage paint finishes.
•
Dispose of brake fluid in accordance with local state and federal
regulations.
•
Read and follow all warnings on the brake fluid container.
Do not ingest brake fluid or allow contact with skin or eyes. Always wear
protective clothing and a face shield when working with or around brake
fluid.
SKIN CONTACT
Flush area immediately with water for several minutes. If a rash or skin
irritation develops, get medical attention immediately.
EYE CONTACT
Immediately flush the eye with water for 15 minutes and call physician.
INGESTION
Get medical attention immediately.
1. Make sure the key-switch is in the “OFF” position, then remove the key.
2. Place the forward-reverse switch in the center “OFF” position.
3. Set the park brake.
4. Place blocks under the front wheels to prevent vehicle movement.
5. Disconnect the main positive and negative cables at the batteries.
Summary of Contents for B 1-50
Page 2: ......
Page 6: ...TAYLOR DUNN ...
Page 14: ...Model B 1 00 ...
Page 30: ...TAYLOR DUNN ...
Page 36: ...TAYLOR DUNN ...
Page 52: ...TAYLOR DUNN ...
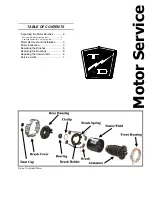
Page 66: ...Maintenance Service and Repair Steering Page 14 Exploded View of Steering Gear ...
Page 90: ...TAYLOR DUNN ...
Page 124: ...TAYLOR DUNN ...
Page 130: ...TAYLOR DUNN ...
Page 161: ...Wire Diagrams ...
Page 194: ...Illustrated Parts PARTS PAGE 10 Front Suspension 4 3 2 1 5 10 6 8 9 7 11 12 ...
Page 202: ...Illustrated Parts PARTS PAGE 18 Motor 2 3 5 6 4 7 8 1 9 10 Armature 9 ...
Page 206: ...Illustrated Parts PARTS PAGE 22 Wheels and Tires Ref wheel hub 1 2 5 assembly 4 3 6 7 8 9 ...
Page 208: ...Illustrated Parts PARTS PAGE 24 Instrument Panel dash ...
Page 217: ...Illustrated Parts PARTS PAGE 33 This page intentionaly left blank ...
Page 220: ...Illustrated Parts PARTS PAGE 36 Seat Cushions Deck and Lights B 1 50 ...
Page 222: ...Illustrated Parts PARTS PAGE 38 Seat Cushions Deck and Lights MX 1600 ...
Page 224: ...Illustrated Parts PARTS PAGE 40 Decals B 1 50 VIEW FROM INSIDE OF COWL 1 2 3 4 5 6 7 8 9 ...
Page 230: ...Illustrated Parts PARTS PAGE 46 Stake Sides B 1 50 1 2 3 4 5 6 7 8 ...


