

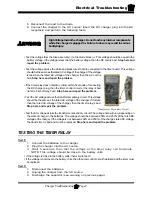
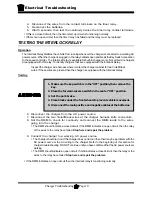
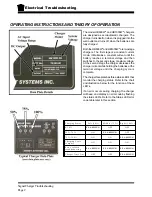


Electrical Troubleshooting
Signet Charger Troubleshooting
Page 5
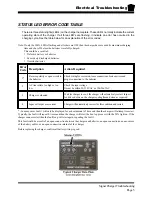
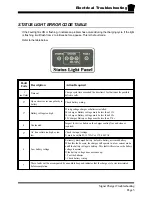
STATUS LIGHT ERROR CODE TABLE
If the Fault light is ON or flashing, it indicates a problem has occured during the charging cycle. If the light
is flashing, it will flash from 2 to 6 times before a pause. This is the fault code.
Refer to the table below.
Fault
Code
Description
Action Required
1
(no flash)
Time out
Charge cycle time exceeded the time limit. Test batteries for possible
defictive cells.
2*
Open circuit or reverse polarity to
battery
Check battery wiring.
3*
Battery voltage too high
Wrong voltage charger or batteries installed.
24v charger: Battery voltage must be less than 33.7v
36v charger: Battery voltage must be less than 43.2v
48v charger: Battery voltage must be less than 57.6v
4
Overheated
Inspect for dirt or debris on the charger cooling fins and clean as
required.
5*
AC line voltate too high or too
low
Check the input voltage.
It must be within 85-137VAC or 170-264VAC
6
Low battery voltage
Extremely discharged battery, defective battery, miswired battery.
When this fault occurs, the charger will operate in a low current mode
untill the battery voltage is built up. This fault will reset once the battery
voltage is normal.
If the battery voltage does not come up:
> Test the batteries
> Check battery wiring
*
These faults will be accompanied by an audible beep and indicates that the charge cycle was termintated
before completion.
Summary of Contents for B 1-50
Page 2: ......
Page 6: ...TAYLOR DUNN ...
Page 14: ...Model B 1 00 ...
Page 30: ...TAYLOR DUNN ...
Page 36: ...TAYLOR DUNN ...
Page 52: ...TAYLOR DUNN ...
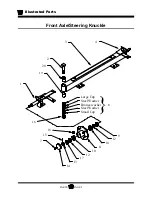
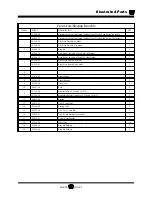
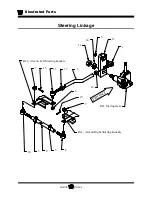
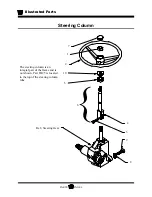
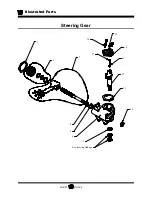
Page 66: ...Maintenance Service and Repair Steering Page 14 Exploded View of Steering Gear ...
Page 90: ...TAYLOR DUNN ...
Page 124: ...TAYLOR DUNN ...
Page 130: ...TAYLOR DUNN ...
Page 161: ...Wire Diagrams ...
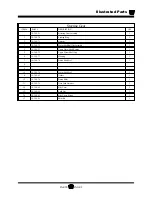
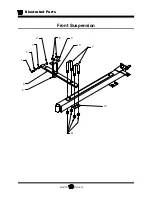
Page 194: ...Illustrated Parts PARTS PAGE 10 Front Suspension 4 3 2 1 5 10 6 8 9 7 11 12 ...
Page 202: ...Illustrated Parts PARTS PAGE 18 Motor 2 3 5 6 4 7 8 1 9 10 Armature 9 ...
Page 206: ...Illustrated Parts PARTS PAGE 22 Wheels and Tires Ref wheel hub 1 2 5 assembly 4 3 6 7 8 9 ...
Page 208: ...Illustrated Parts PARTS PAGE 24 Instrument Panel dash ...
Page 217: ...Illustrated Parts PARTS PAGE 33 This page intentionaly left blank ...
Page 220: ...Illustrated Parts PARTS PAGE 36 Seat Cushions Deck and Lights B 1 50 ...
Page 222: ...Illustrated Parts PARTS PAGE 38 Seat Cushions Deck and Lights MX 1600 ...
Page 224: ...Illustrated Parts PARTS PAGE 40 Decals B 1 50 VIEW FROM INSIDE OF COWL 1 2 3 4 5 6 7 8 9 ...
Page 230: ...Illustrated Parts PARTS PAGE 46 Stake Sides B 1 50 1 2 3 4 5 6 7 8 ...


