


Electrical Troubleshooting
Signet Charger Troubleshooting
Page 5
STATUS LED ERROR CODE TABLE
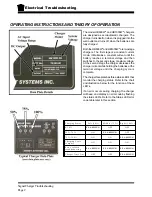
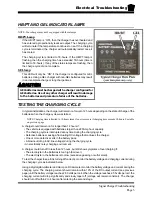
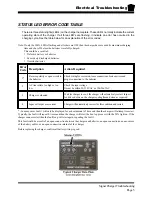
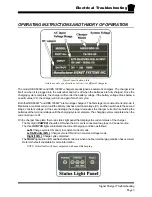
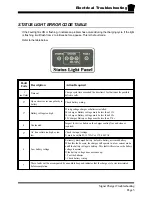
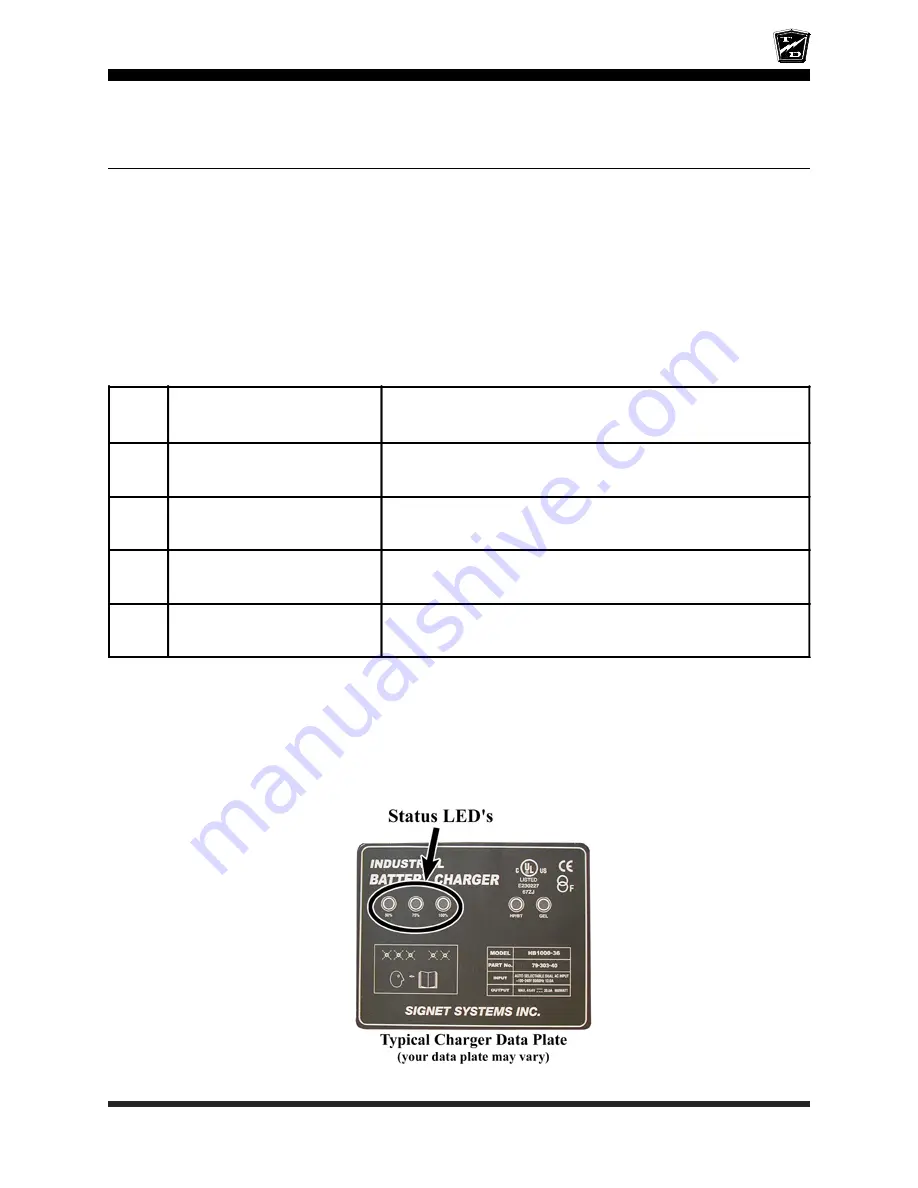
There are three status lights (LED’s) on the charger name plate. These LED’s normally indicate the current
operating state of the charger. If all three LED’s are flashing, it indicate an error has occurred in the
charging cycle. See the table below for an explanation of the error codes:
Error
Code
Description
Action Required
1*
Reverse polarity or open circuit to
the batteries
Check wiring for corrosion, loose connections. broken wires and
proper connection to the batteries
2
AC line voltate too high or too
low
Check the input voltage.
It must be within 96-132VAC or 196-266VAC
3
Charger overheated
Wait for charger to cool, the charger will automaticaly restart. Inspect
for dirt or debris on the charger cooling fins and clean as required.
4
Input or Output over current
Charger will automaticaly correct for this condition and restart
Note: If only the 100% LED is flashing and all others are OFF then the charger has exceeded its maximum charging
time and shut off before the batteries were fully charged.
This could be a result of:
•
Defective battery or batteries
•
Excessively discharged batteries
•
Oversize batteries
* - In many cases fault 1 will only be displayed for a short amount of time and then the charger will attempt to restart.
Typically, the fault will repeat 8-times and then the charger will start the boot up process with the 50% light on. If the
charger cannot restart then the fault loop will start again, repeating the fault 1.
This fault could be a result of an open connection between the charger and batteries, an open connection on one or more
of the battery cables, or an open connection internal of the charger.
Before replacing the charger, confirm all battery wiring is good.
Summary of Contents for B 1-50
Page 2: ......
Page 6: ...TAYLOR DUNN ...
Page 14: ...Model B 1 00 ...
Page 30: ...TAYLOR DUNN ...
Page 36: ...TAYLOR DUNN ...
Page 52: ...TAYLOR DUNN ...
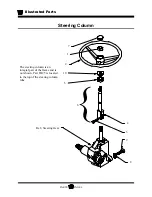
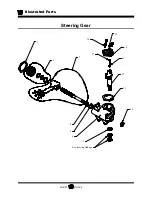
Page 66: ...Maintenance Service and Repair Steering Page 14 Exploded View of Steering Gear ...
Page 90: ...TAYLOR DUNN ...
Page 124: ...TAYLOR DUNN ...
Page 130: ...TAYLOR DUNN ...
Page 161: ...Wire Diagrams ...
Page 194: ...Illustrated Parts PARTS PAGE 10 Front Suspension 4 3 2 1 5 10 6 8 9 7 11 12 ...
Page 202: ...Illustrated Parts PARTS PAGE 18 Motor 2 3 5 6 4 7 8 1 9 10 Armature 9 ...
Page 206: ...Illustrated Parts PARTS PAGE 22 Wheels and Tires Ref wheel hub 1 2 5 assembly 4 3 6 7 8 9 ...
Page 208: ...Illustrated Parts PARTS PAGE 24 Instrument Panel dash ...
Page 217: ...Illustrated Parts PARTS PAGE 33 This page intentionaly left blank ...
Page 220: ...Illustrated Parts PARTS PAGE 36 Seat Cushions Deck and Lights B 1 50 ...
Page 222: ...Illustrated Parts PARTS PAGE 38 Seat Cushions Deck and Lights MX 1600 ...
Page 224: ...Illustrated Parts PARTS PAGE 40 Decals B 1 50 VIEW FROM INSIDE OF COWL 1 2 3 4 5 6 7 8 9 ...
Page 230: ...Illustrated Parts PARTS PAGE 46 Stake Sides B 1 50 1 2 3 4 5 6 7 8 ...


