


10-12 DICOM
(3) Retrieve
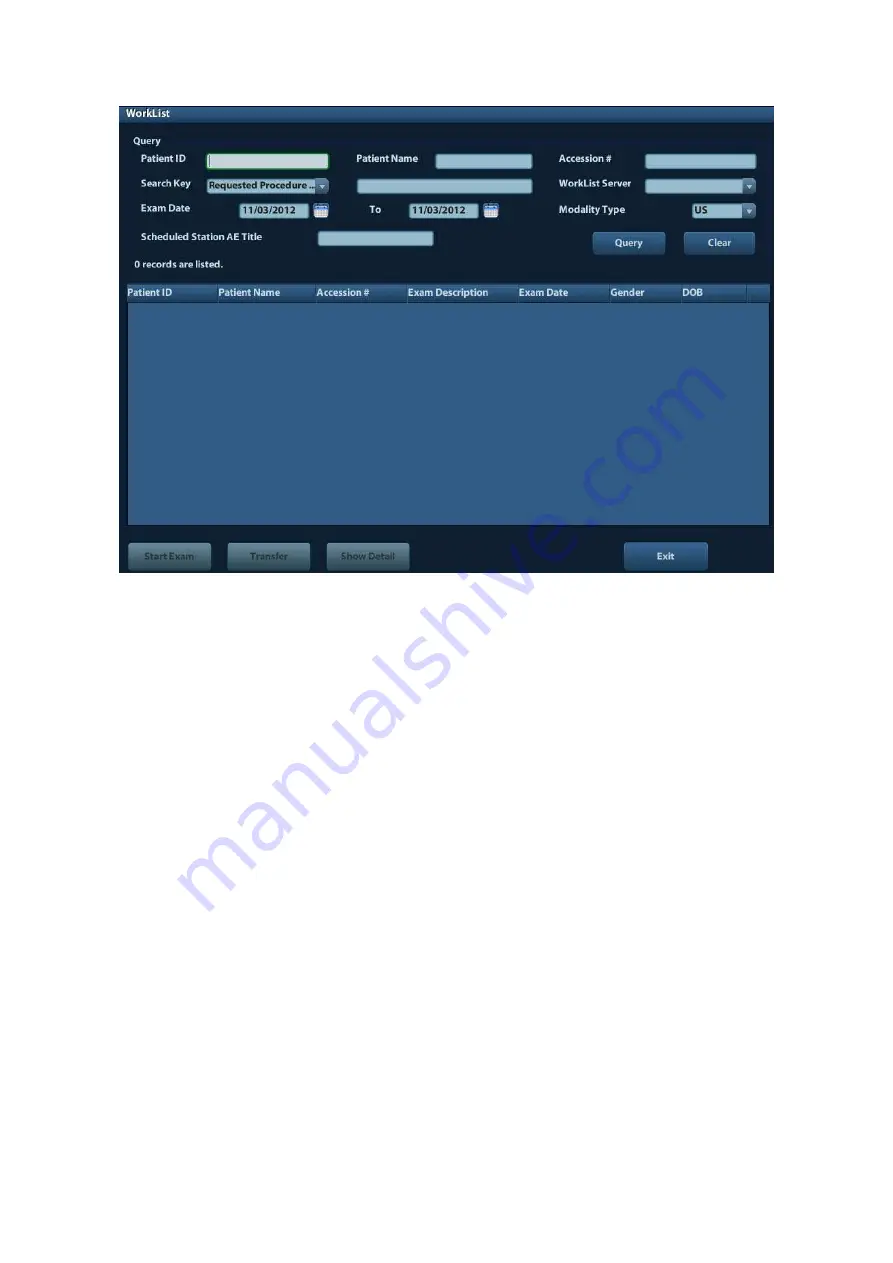
Patient Information
a) Set query criteria among Patient ID, Patient Name, Accession #, Search Key,
Worklist Server or Exam Date. The default exam date is the current date.
b) Click
[Query].
c) The scheduled patients, which meet the criteria, are displayed in the lower part of
the screen.
d) After the first query, you can perform the second query based on the preview
results. The scheduled patients in the list will update in real time.
(4) Select the desired patient record in the displayed patient list, and
Select the desired patient and click [Start Exam], the patient information is imported
into the system and then an exam is started.
Click [Transfer], the patient information is imported into the Patient Info screen. Edit
the patient information in the Patient Info screen, and select [OK] to start a new exam.
(5) To show patient information in details:
a) Click to select a patient record.
b) Click [Show Detail] to view the detailed patient information and properties.
Use the automatic query function via Worklist server
(1) Enter DICOM Service Preset screen, and open the Worklist page: [Setup]
→
[DICOM
Preset]
→
[Set DICOM Service]
→
“Worklist”.
(2) Select an item in the service list, and click [Default] to set the server to be the default
service.
(3) Click [Exit] and click [Save] in the Setup menu.
(4) Press <Patient> to enter Patient Info screen.
(5) Click [WorkList] to enter the WorkList page.
(6) The system queries intraday patients via Worklist server automatically and the patient
records will appear in the list.


