1-15
BEFORE USING THE MACHINE
Contents
TURNING THE POWER ON AND OFF
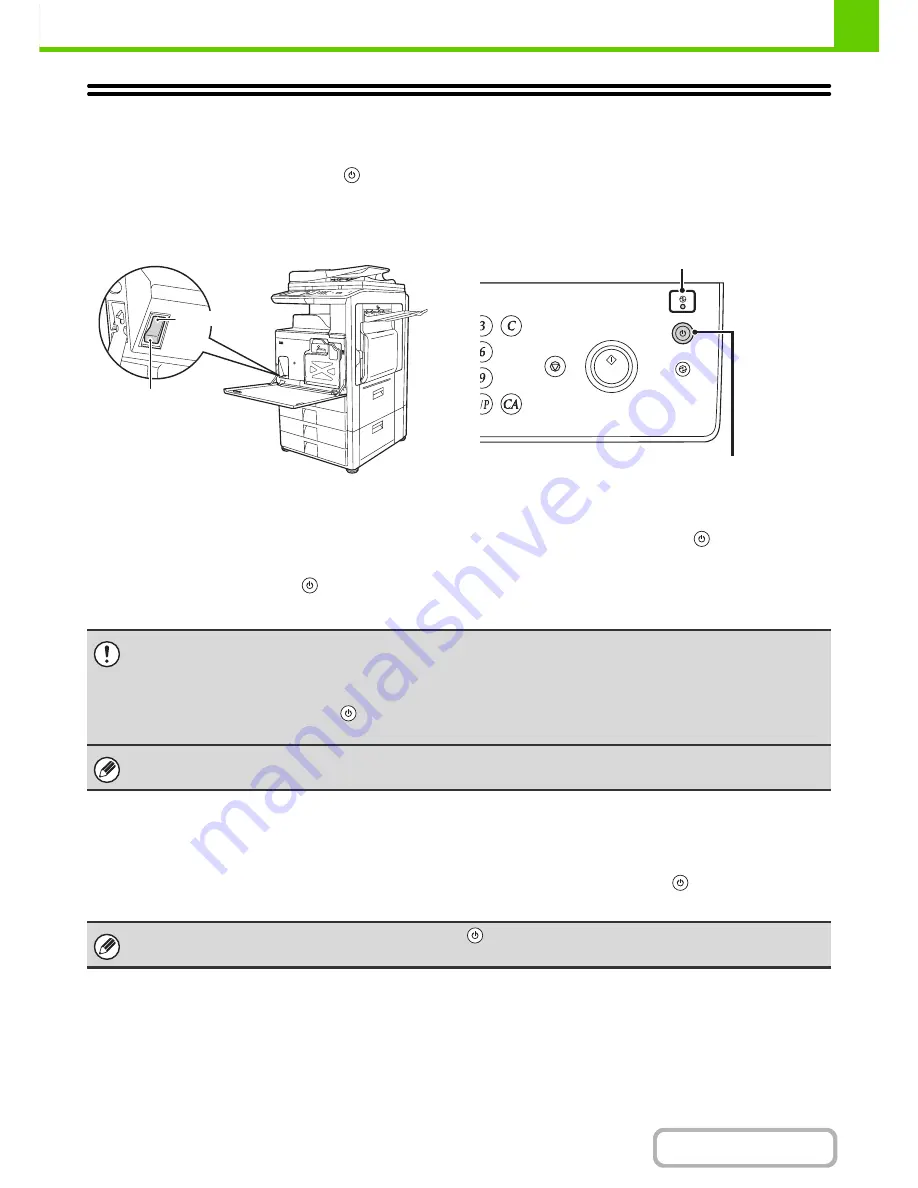
The machine has two power switches. The main power switch is at the lower left after the front cover is opened. The
other power switch is the [POWER] key (
) on the operation panel at the top right.
Main power switch
When the main power switch is switched on, the main
power indicator on the operation panel lights up.
[POWER] key
Turning on the power
(1) Switch the main power switch to the "on"
position.
(2) Press the [POWER] key (
) to turn on the
power.
Turning off the power
(1) Press the [POWER] key (
) to turn off the
power.
(2) Switch the main power switch to the "off"
position.
Restarting the machine
In order for some settings to take effect, the machine must be restarted.
If a message in the touch panel prompts you to restart the machine, press the [POWER] key (
) to turn off the power
and then press the key again to turn the power back on.
"On" position
"Off" position
Main power indicator
[POWER] key
• Before switching off the main power switch, make sure that the DATA indicator for printing and the DATA and LINE
indicators for image send are not lit or blinking on the operation panel.
Switching off the main power switch or removing the power cord from the outlet while any of the indicators are lit or blinking
may damage the hard drive and cause data to be lost.
• Switch off both the [POWER] key (
) and the main power switch and unplug the power cord if you suspect a machine
failure, if there is a bad thunderstorm nearby, or when you are moving the machine.
When using the fax or Internet fax function, always keep the main power switch in the "on" position.
In some states of the machine, pressing the [POWER] key (
) to restart will not make the settings take effect. In this case,
use the main power switch to switch the power off and then on.
Summary of Contents for MX-M283
Page 11: ...Conserve Print on both sides of the paper Print multiple pages on one side of the paper ...
Page 35: ...Organize my files Delete a file Delete all files Periodically delete files Change the folder ...
Page 277: ...3 18 PRINTER Contents 4 Click the Print button Printing begins ...
Page 850: ......
Page 851: ......
Page 882: ......
Page 883: ......


