


5-34
SCANNER/INTERNET FAX
Contents
7
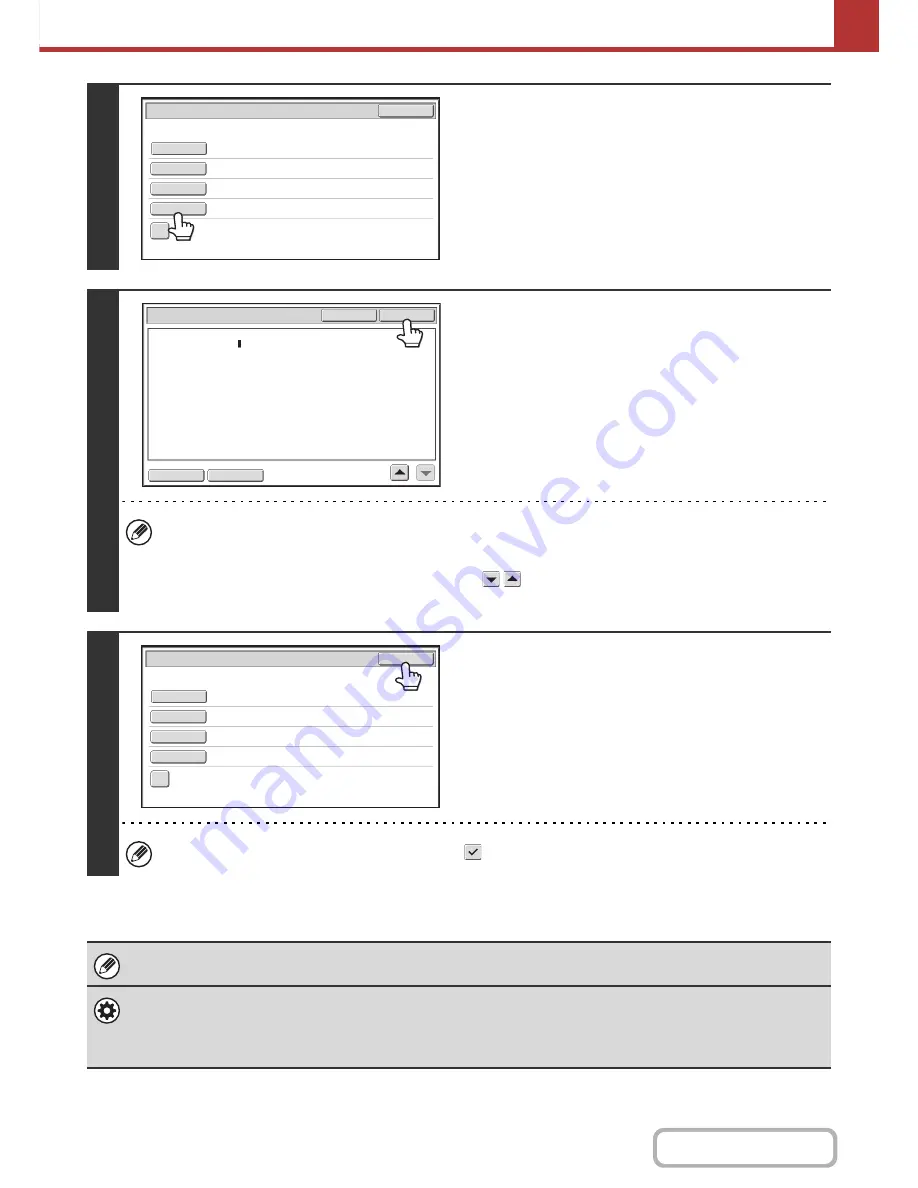
To change the body text, touch the
[Body Text] key.
8
Enter the body text and touch the [OK]
key.
• To select a pre-set text previously stored in the Web page,
touch the [Pre-Set Select] key.
• To directly enter the body text, touch the [Edit] key.
• 1800 characters can be entered. (A line break counts as one character.)
• To clear all entered text, touch the [Clear All] key. When this key is touched, the entire body of the message is
erased immediately; not just the selected line.
• Each line of the entered text can be selected with the
keys. To edit the selected line, touch the [Edit] key.
The text entry screen will appear with the selected text entered.
9
Touch the [OK] key.
The [Add 'Reply to' to Cc] checkbox can be selected
to send a Cc copy to the sender.
When storing pre-set text for the subject and file name in the Web pages, up to 80 characters can be entered.
•
System Settings (Administrator): The Number of File Name/Subject/Body Keys Displayed Setting
The setting for the number of subject keys and file name keys displayed in one screen can be changed to 6, 12, or 18.
•
System Settings (Administrator): Default Sender Set
This is used to store the sender name and e-mail address that is used when a sender is not selected.
Sub
:
Sc
h
e
d
ule
coor
d
ination
meeting
Material
f
or
planning
meeting
AAA
AAA
Sen
d
Settings
O
K
Sub
j
ect
File
Name
R
eply
-
To
B
o
d
y
Text
A
dd 'R
eply
to
'
to
Cc
B
o
d
y
Entry
T
h
an
k
you
f
or
your
continuous
support.
We
h
a
v
e
attac
h
e
d
scanne
d d
ata
,
wh
ic
h
you
h
a
v
e
re
q
ueste
d
.
Clear
All
O
K
E
d
it
Pre
-
Set
Select
Sub
:
Sc
h
e
d
ule
coor
d
ination
meeting
Material
f
or
planning
meeting
AAA
AAA
T
h
an
k
you
f
or
your
continuous
support.
We
h
a
v
e
attac
h
e
d
sca
Sen
d
Settings
O
K
Sub
j
ect
File
Name
R
eply
-
To
B
o
d
y
Text
A
dd 'R
eply
to
'
to
Cc
Summary of Contents for MX-C301W
Page 6: ...Make a copy on this type of paper Envelopes and other special media Transparency film ...
Page 8: ...Assemble output into a pamphlet Create a pamphlet Create a blank margin for punching ...
Page 11: ...Conserve Print on both sides of the paper Print multiple pages on one side of the paper ...
Page 35: ...Organize my files Delete a file Delete all files Periodically delete files Change the folder ...
Page 159: ...2 63 COPIER Contents To cancel Stamp Touch the Cancel key in the screen of step 3 ...
Page 230: ...3 19 PRINTER Contents 4 Click the Print button Printing begins ...