


4
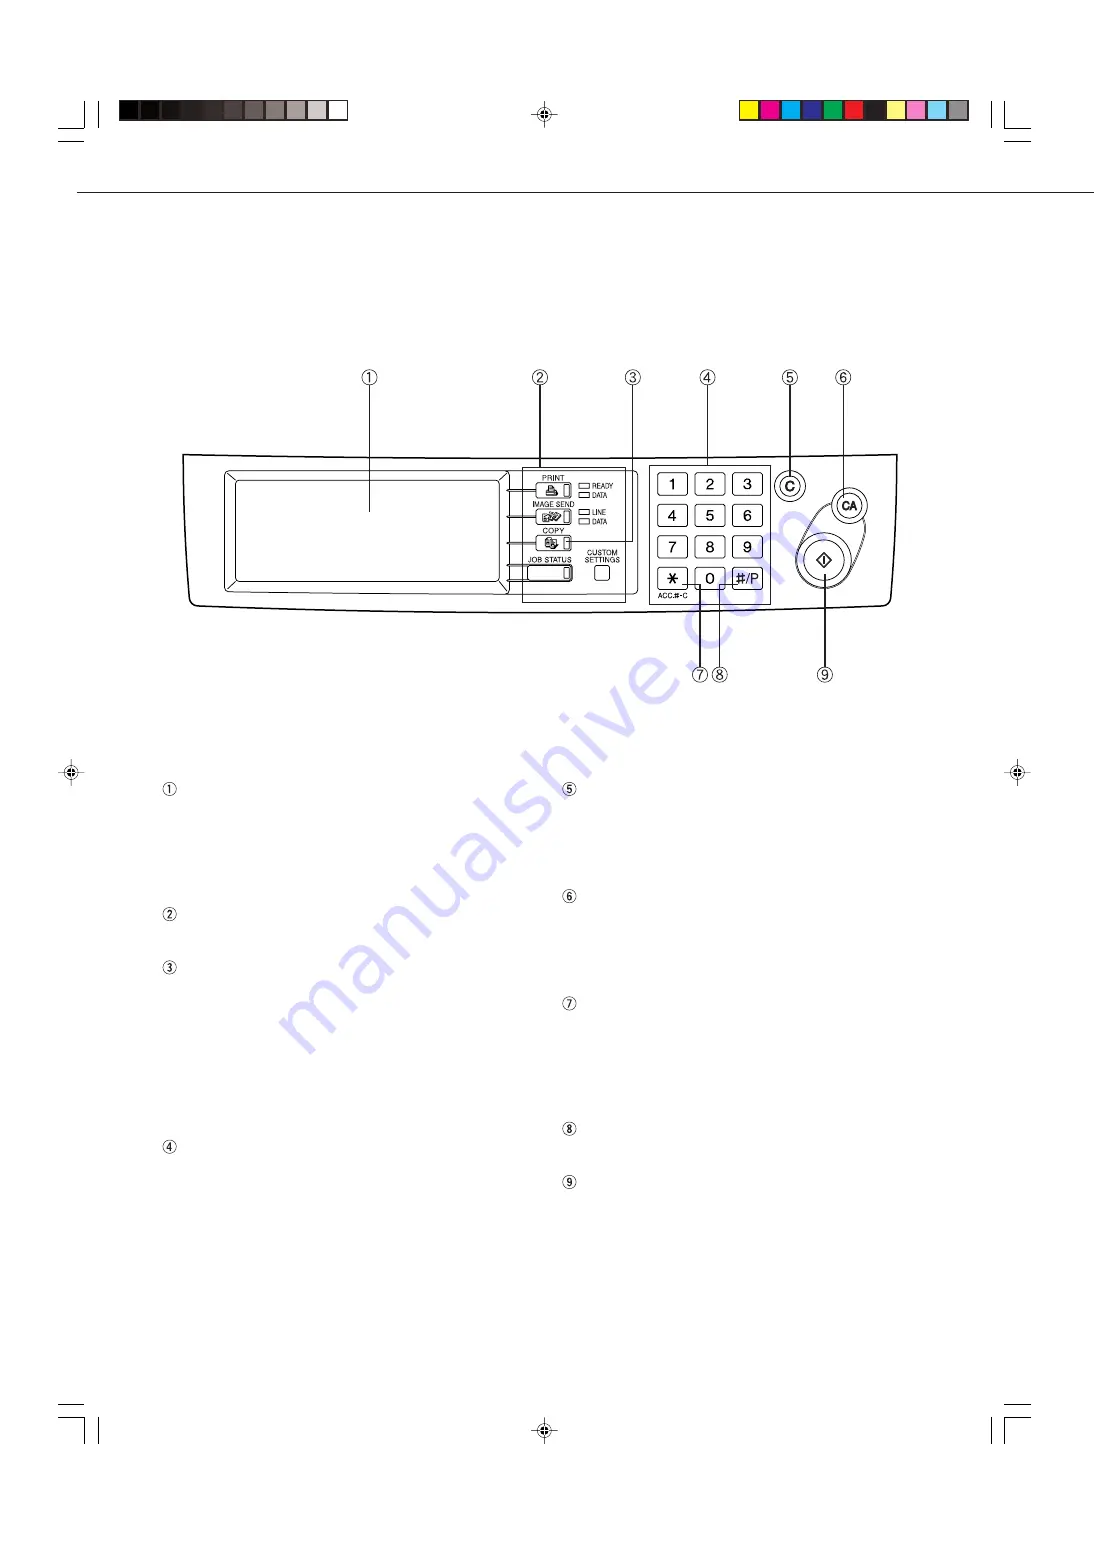
Touch panel
(next page)
The machine status, messages and touch keys are
displayed on the panel. When the machine is in the
standby state, the display will change if the [PRINT]
key, [IMAGE SEND] key or [COPY] key is pressed
to show the current status of these modes.
Mode select keys
Use to select the basic modes of the product.
[COPY] key
Press to select the copy mode and display the basic
screen of the copy mode. (next page)
Even when the machine is busy in another mode,
the basic copy mode screen will appear when the
[COPY] key is pressed. If this key is pressed and
held while the basic screen of the copy mode is
displayed, the total output count and the quantity of
toner remaining (percentage) will be displayed.
Numeric keys
Use to select the number of copies and to make
numerical entries for setting operations.
[C] key (clear key)
Press to clear a copy quantity entry. If this key is
pressed while the automatic document feeder is
being used, any originals in progress will be
automatically output.
[CA] key (clear all key)
Press to clear all selected settings and return the
machine to the initial settings for the currently
selected mode. Before starting a copy operation,
press the [CA] key first.
[ACC.#-C] key
If the auditing mode has been set, press this key to
close an open account after finishing a copy,
facsimile scanning or network scanning job. For
setting of the auditing mode, see page 7 of the Key
Operator’s Guide.
[#/P] key
(page 26)
Press to select the job memory mode.
[START] key
(page 10)
When the indicator is lit, copying, facsimile scanning
and network scanning jobs can be started. Press to
start copying.
PART NAMES AND FUNCTIONS
Operation Panel
copy-1_Ep.P65
2/04/01, 19:17
4
Summary of Contents for DM-3551
Page 2: ...cover1 p65 2 04 01 19 17 2 ...
Page 37: ...cover4 p65 2 04 01 19 18 1 ...
Page 40: ......
Page 69: ......
Page 90: ......
Page 98: ......
Page 120: ......
Page 126: ......
Page 159: ...9 3 9 NOTE ...
Page 160: ...9 4 NOTE ...
Page 161: ......
Page 178: ...1 6 Part names and functions of peripheral devices PART NAMES AND FUNCTIONS ...
Page 198: ...1 26 ...
Page 218: ...2 20 ...
Page 226: ......
Page 238: ......
Page 273: ......
Page 285: ......