Operating Instructions
Samsung Electronics
3-23
ENGLISH
53
Playing back the Tape
Viewing on the LCD
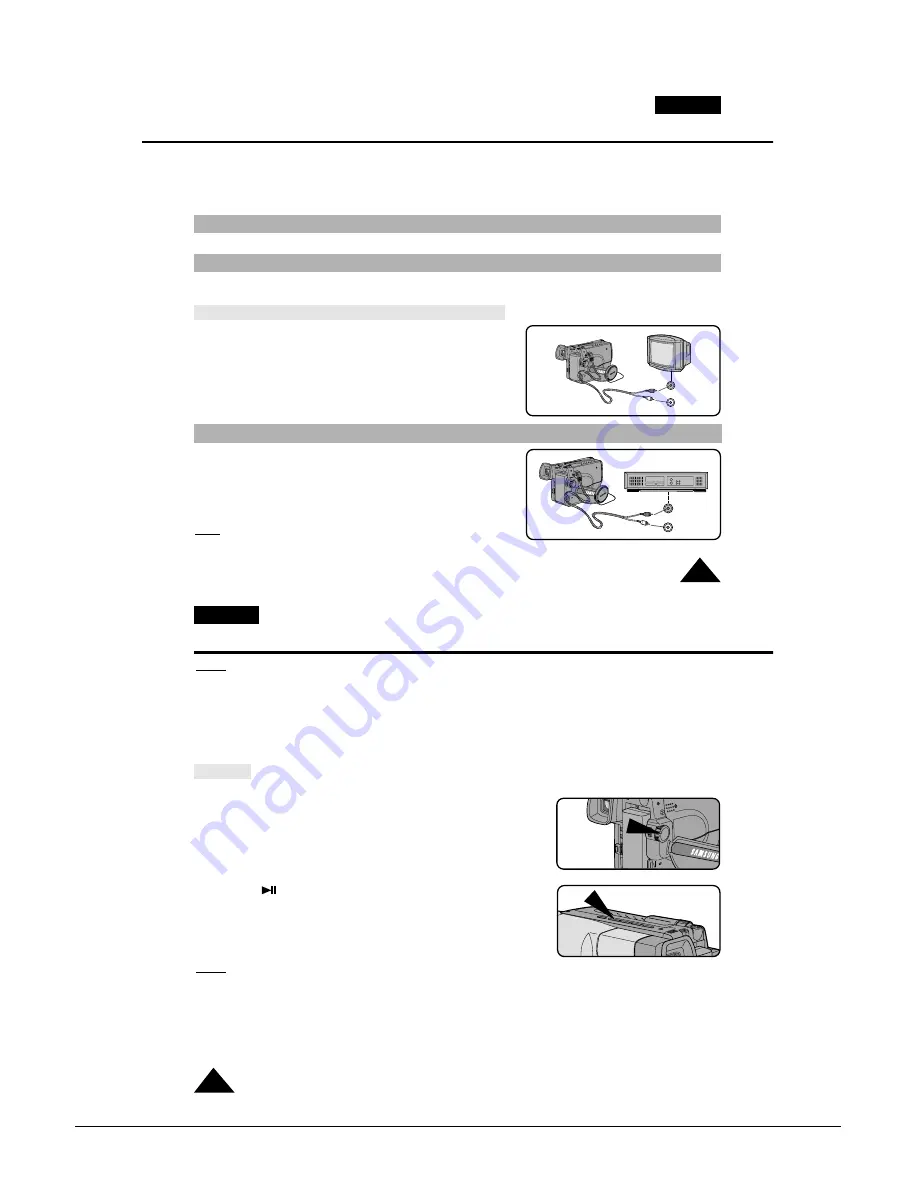
Viewing on a TV
Connecting to a TV which has no Audio and Video input jack
✤
To view a tape that you have recorded.
✤
Playback function works in PLAYER mode only.
✤
There are two ways to see a tape;
■
To view on the LCD: recommended for outdoor use.
■
To view on a TV monitor: recommended for indoor use.
✤
It is practical to view a tape using the LCD Screen if away from a tv or outdoors. (see page 28)
✤
It is better to use a TV monitor to view tapes indoors.
✤
To play a tape back, the TV must feature a compatible colour system. (see page 63)
Connecting to a TV which has an Audio and Video input jack
✤
Use the Audio/Video cable supplied with your camcorder.
■
The yellow one: Video
■
The white one: Audio(L)
✤
You can use a SCART adapter, supplied optionally.
✤
If provided, a SCART adapter would be one of the following two types.
■
Stereo type
■
Mono type
✤
You can connect your camcorder to a TV through a VCR.
■
Set the input selector on the VCR to LINE.
■
The yellow one: Video
■
The white one: Audio(L)
■
You can use a SCARTadapter. (supplied optionally)
Note:
To view the cassette on the television screen, select
the channel reserved for your VCR on the television.
(Refer to your VCR or television instruction book)
ENGLISH
54
54
Playing back the Tape
Notes:
■
VP-L900/L906/L907 feature a monaural audio system.
If your TV or VCR are stereo, connect the audio cable to the input “L” of TV or VCR.
■
In case of VP-L900/L906/L907, you can use an S-VIDEO cable to obtain better quality of pictures if you have a
S-VIDEO connector on your TV.
■
Close the LCD panel while viewing playback on a TV screen in order to avoid picture distortion.
PLAYER
PLAY/STILL
Playback
1. Use the TV/VIDEO button to select VIDEO on your TV.
2. Connect a power source (battery or AC Power Adapter) to the camcorder.
Set the power switch to PLAYER mode.
3. Insert the tape you want to watch.
■
Make sure that STOP is displayed.
4. Press the
(PLAY/STILL) button.
■
The picture should appear on the TV after 2 to 3 seconds.
■
Press
■
(STOP) to stop playing.
■
If the tape reaches its end during playback, the tape
will rewind automatically.
Notes:
■
Vibration from the built-in speaker can cause picture distortion.
■
It is best to turn the built-in speaker off when your camcorder is connected to the TV.
■
The playback system (Hi8/8mm) is selected automatically, depending on the tape format.
■
VP-L900/L906/L907 can playback both Hi8 and 8mm.
■
This camcorder does not support LP recording and playback.
Summary of Contents for VP-L900
Page 5: ...Product Specification 2 2 MEMO ...
Page 51: ...4 18 Disassembly and Reassembly Samsung Electronics MEMO ...
Page 79: ...5 28 Alignment and Adjustments Samsung Electronics MEMO ...
Page 109: ...Circuit Operating Description 6 30 Samsung Electronics MEMO ...
Page 124: ...Deck Operating Description Samsung Electronics 7 15 Fig 7 14 ...
Page 126: ...Deck Operating Description Samsung Electronics 7 17 Fig 7 16 ...
Page 128: ...Deck Operating Description Samsung Electronics 7 19 Fig 7 17 ...
Page 130: ...Deck Operating Description Samsung Electronics 7 21 Fig 7 18 ...
Page 132: ...Deck Operating Description Samsung Electronics 7 23 Fig 7 19 ...
Page 134: ...Deck Operating Description Samsung Electronics 7 25 Fig 7 20 ...
Page 136: ...Deck Operating Description Samsung Electronics 7 27 Fig 7 21 ...
Page 138: ...Deck Operating Description Samsung Electronics 7 29 Fig 7 22 ...
Page 139: ...Deck Operating Description 7 30 Samsung Electronics MEMO ...
Page 142: ...Samsung Electronics 10 1 10 Wiring Diagram ...
Page 143: ...Wiring Diagram 10 2 Samsung Electronics MEMO ...
Page 145: ...PCB Diagrams 11 2 Samsung Electronics COMPONENT SIDE 11 1 Main PCB ...
Page 146: ...PCB Diagrams Samsung Electronics 11 3 CONDUCTOR SIDE ...
Page 149: ...PCB Diagrams 11 6 Samsung Electronics 11 6 Front PCB 11 7 Function PCB ...


