Operating Instructions
Samsung Electronics
3-13
ENGLISH
33
Advanced Shooting
EASY Mode (for Beginners)
✤
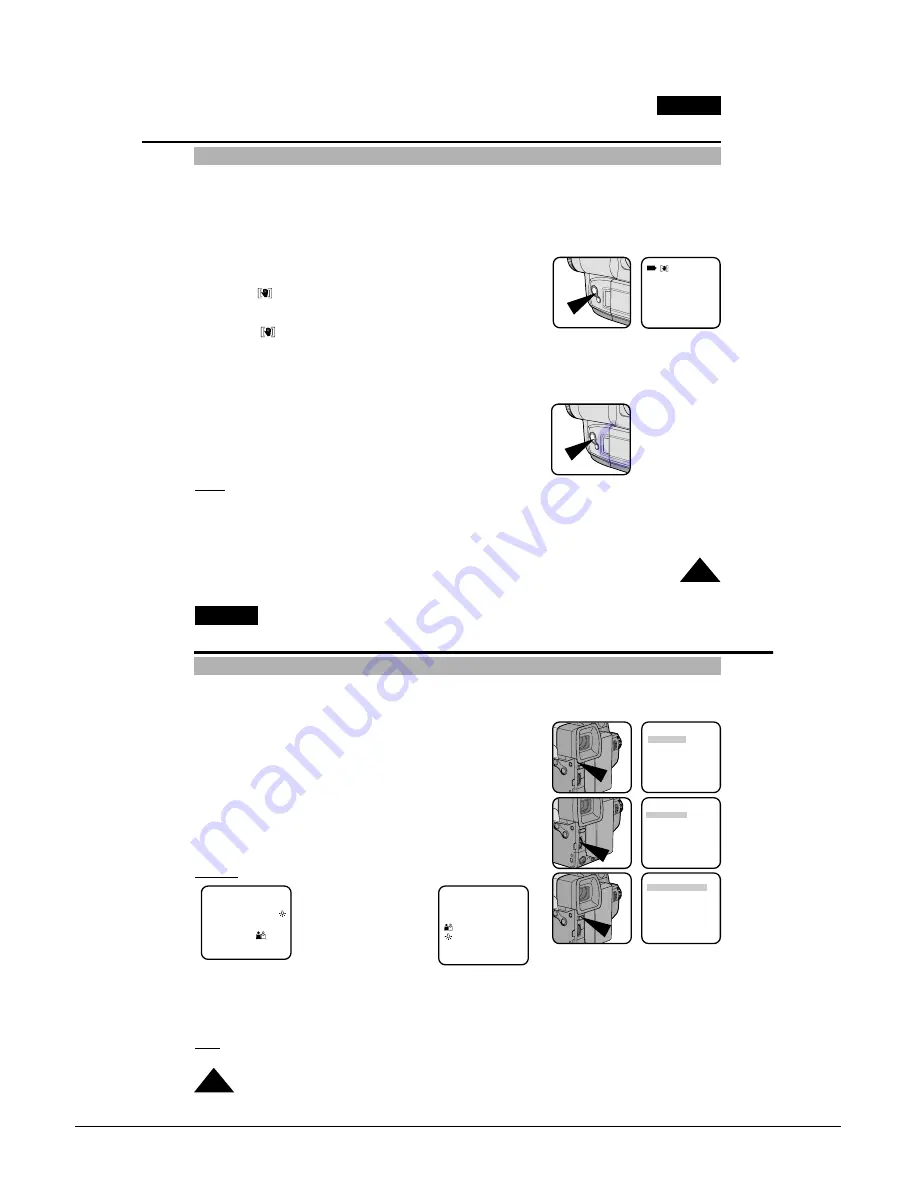
Even a beginner can easily make a recording using the EASY mode.
■
The EASY mode only operates in CAMERA mode.
1. Set the power switch to CAMERA mode (see page 18).
2. By pressing the EASY button, all the functions of the camera will be set
to off and the recording settings will be set to the lowing basic mode.
■
Battery level, recording mode, counter, date/time,
DIS ( ) will be displayed as the camcorder starts to run.
■
The word “EASY” will appear on the LCD at the same time.
However, the Date/Time will only be seen if it has been previously set.
(DIS ( ) will be displayed on VP-L906/L907 only)
3. Press the START/STOP button to start recording.
■
Recording will begin using the basic automatic environment settings.
4. Pressing the EASY button again turns the EASY mode off.
■
The camera will return to the settings that were set prior to
the EASY mode being switched on.
Notes:
■
In the EASY mode, the MENU, MF, DSE, P.AE and BLC functions are not available.
■
If you want to use these functions, you must first switch the EASY mode off.
■
The EASY mode settings are stored in the camera (provided a good lithium battery has been installed).
STBY
X:XX:XX
EASY
31. JAN. 2004
CUSTOM-Creating your own customized recording settings
ENGLISH
34
Advanced Shooting
✤
You can customize the settings and save them for future use.
■
The CUSTOM function only operates in CAMERA mode.
1. Set the power switch to CAMERA mode. (see page 18)
2. Press the MENU ON/OFF button, to bring up the MENU list.
3. Turn the UP/DOWN dial until CUSTOM SET is highlighted.
4. Press the ENTER button, the CUSTOM menu will appear.
■
Set the status of each item to what you want.
5. To exit the menu, press the MENU ON/OFF button twice.
6. By pressing the CUSTOM button, the CUSTOM settings will come up.
■
Date/Time and Title will only appear if these have been set in advance.
■
The word “CUSTOM” will be displayed on the LCD at the same time.
Example: When the CUSTOM SET is set as follows;
7. Press the START/STOP button to start recording.
■
Recording will begin using the new CUSTOM settings.
8. To switch Custom off, press the CUSTOM button once.
■
The camera will revert to the settings that were set prior to the CUSTOM mode being switched on.
Note:
■
The CUSTOM settings will be stored in the camera (providing a good lithium battery has been installed).
CUSTOM SETTING
DIS ......................ON
D.ZOOM ..............OFF
WHITE BAL. ........AUTO
D/TIME ................OFF
TITLE ..................OFF
PROGRAM AE ....AUTO
DSE SELECT ......OFF
EXIT: MENU
MENU
LCD ADJUST
DIS .....................OFF
D.ZOOM .............OFF
WHITE BAL........AUTO
DISPLAY ............ON
LANGUAGE .......ENGLISH
WL.REMOCON ..ON
EXIT: MENU
MENU
CUSTOM SET
CLOCK SET
TITLE SET
TITLE ..................OFF
D/TITLE COLOUR ..WHITE
C.RESET..............0:00:00
DEMO ..................OFF
EXIT: MENU
CUSTOM SETTING
DIS ......................ON
D.ZOOM ..............ON
WHITE BAL. ........INDOOR
DATE/TIME ..........DATE/TIME
TITLE ..................CONTINUE
PROGRAM AE ....
DSE SELECT ......SEPIA
EXIT: MENU
STBY
880x -0:00:03
SEPIA CUSTOM
TITLE 13:00
CONTINUE
1.JAN.2004
Pressing the CUSTOM button,
displays
Summary of Contents for VP-L900
Page 5: ...Product Specification 2 2 MEMO ...
Page 51: ...4 18 Disassembly and Reassembly Samsung Electronics MEMO ...
Page 79: ...5 28 Alignment and Adjustments Samsung Electronics MEMO ...
Page 109: ...Circuit Operating Description 6 30 Samsung Electronics MEMO ...
Page 124: ...Deck Operating Description Samsung Electronics 7 15 Fig 7 14 ...
Page 126: ...Deck Operating Description Samsung Electronics 7 17 Fig 7 16 ...
Page 128: ...Deck Operating Description Samsung Electronics 7 19 Fig 7 17 ...
Page 130: ...Deck Operating Description Samsung Electronics 7 21 Fig 7 18 ...
Page 132: ...Deck Operating Description Samsung Electronics 7 23 Fig 7 19 ...
Page 134: ...Deck Operating Description Samsung Electronics 7 25 Fig 7 20 ...
Page 136: ...Deck Operating Description Samsung Electronics 7 27 Fig 7 21 ...
Page 138: ...Deck Operating Description Samsung Electronics 7 29 Fig 7 22 ...
Page 139: ...Deck Operating Description 7 30 Samsung Electronics MEMO ...
Page 142: ...Samsung Electronics 10 1 10 Wiring Diagram ...
Page 143: ...Wiring Diagram 10 2 Samsung Electronics MEMO ...
Page 145: ...PCB Diagrams 11 2 Samsung Electronics COMPONENT SIDE 11 1 Main PCB ...
Page 146: ...PCB Diagrams Samsung Electronics 11 3 CONDUCTOR SIDE ...
Page 149: ...PCB Diagrams 11 6 Samsung Electronics 11 6 Front PCB 11 7 Function PCB ...


