Operating Instructions
Samsung Electronics
3-21
Advanced Shooting
ENGLISH
49
Selecting the OSD LANGUAGE
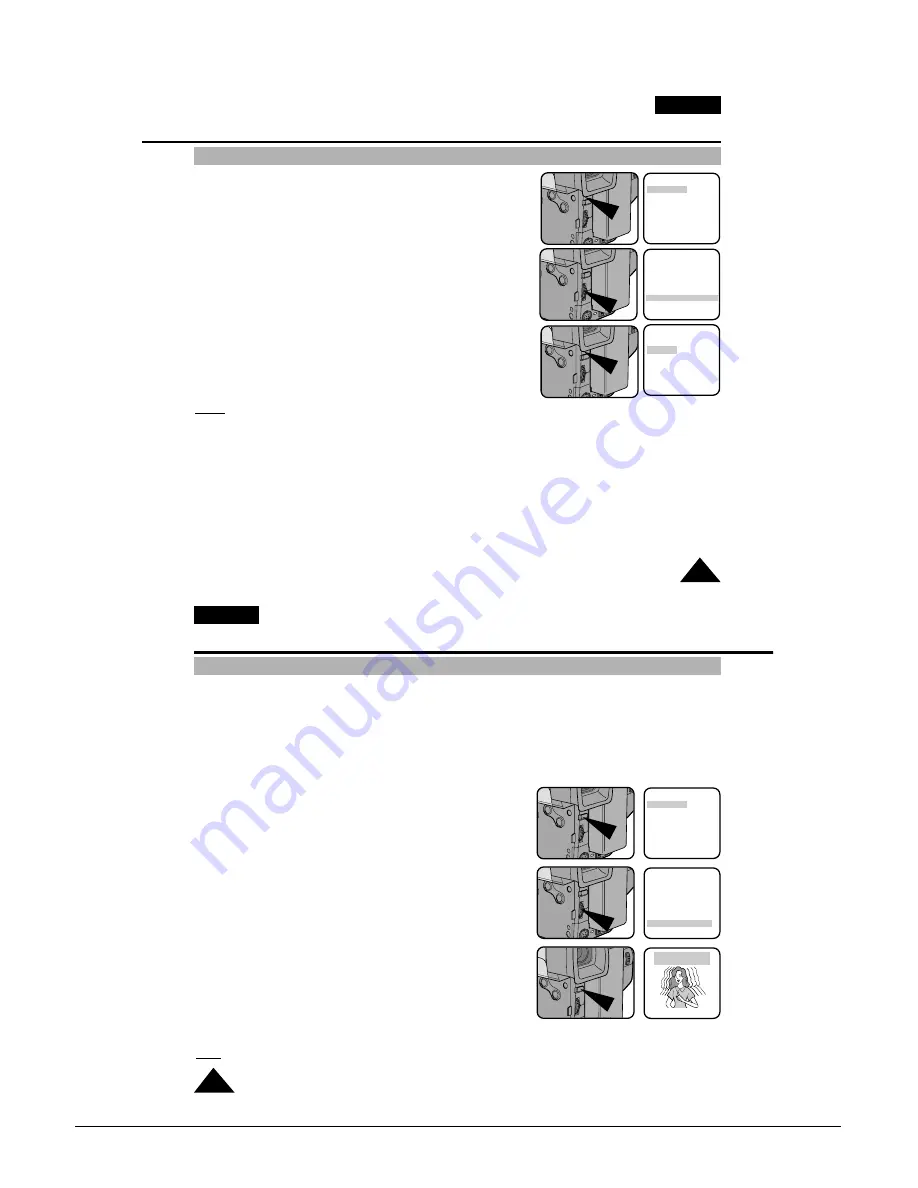
1. Press the MENU ON/OFF button.
■
The MENU list will appear.
2. Turn the UP/DOWN dial to LANGUAGE and press the ENTER button.
3. Turn the UP/DOWN dial to select the appropriate language.
■
You may select languages from ENGLISH/FRANÇAIS/ESPAÑOL.
4. Press the ENTER button.
5. To exit the menu, press the MENU ON/OFF button.
■
The OSD changes with the language which is selected.
Notes:
■
The factory default language is ENGLISH.
You can change the language.
■
Selecting a language is possible in CAMERA mode or VCR mode.
MENU
LCD ADJUST
DIS........................OFF
D.ZOOM................OFF
WHITE BAL ..........AUTO
DISPLAY ..............ON
LANGUAGE ..........ENGLISH
WL REMOCON ....ON
EXIT: MENU
MENU
LCD ADJUST
DIS........................OFF
D.ZOOM................OFF
WHITE BAL ..........AUTO
DISPLAY ..............ON
LANGUAGE ..........ENGLISH
WL REMOCON ....ON
EXIT: MENU
LANGUAGE SELECT
[ENGLISH]
ENGLISH
FRANÇAIS
ESPAÑOL
EXIT: MENU
ENGLISH
50
Demonstration
Advanced Shooting
✤
Demonstration automatically shows you the major functions that are included with your camcorder so that you may
use them more easily.
✤
The DEMO function is only available in CAMERA mode when a tape is not in the camcorder.
✤
The Demonstration operates repeatedly until the POWER switch is set to OFF.
1. Set the power switch to CAMERA mode.
2. Press MENU ON/OFF button, then the MENU list will appear.
3. Turn the UP/DOWN dial until DEMO is highlighted.
4. Press ENTER to select ON.
■
Demonstration will start.
5. Set the power switch to OFF to end the Demonstration.
Note: The MENU ON/OFF function will not operate in EASY or REC mode.
MENU
LCD ADJUST
DIS .....................OFF
D.ZOOM .............OFF
WHITE BAL. ......AUTO
DISPLAY ............ON
LANGUAGE .......ENGLISH
WL.REMOCON ..ON
EXIT: MENU
MENU
CUSTOM SET
CLOCK SET
TITLE SET
TITLE ....................OFF
D/TITLE COLOUR ..WHITE
C.RESET ..............0:00:00
DEMO ..................OFF
EXIT: MENU
SAMSUNG
DEMONSTRATION
Summary of Contents for VP-L900
Page 5: ...Product Specification 2 2 MEMO ...
Page 51: ...4 18 Disassembly and Reassembly Samsung Electronics MEMO ...
Page 79: ...5 28 Alignment and Adjustments Samsung Electronics MEMO ...
Page 109: ...Circuit Operating Description 6 30 Samsung Electronics MEMO ...
Page 124: ...Deck Operating Description Samsung Electronics 7 15 Fig 7 14 ...
Page 126: ...Deck Operating Description Samsung Electronics 7 17 Fig 7 16 ...
Page 128: ...Deck Operating Description Samsung Electronics 7 19 Fig 7 17 ...
Page 130: ...Deck Operating Description Samsung Electronics 7 21 Fig 7 18 ...
Page 132: ...Deck Operating Description Samsung Electronics 7 23 Fig 7 19 ...
Page 134: ...Deck Operating Description Samsung Electronics 7 25 Fig 7 20 ...
Page 136: ...Deck Operating Description Samsung Electronics 7 27 Fig 7 21 ...
Page 138: ...Deck Operating Description Samsung Electronics 7 29 Fig 7 22 ...
Page 139: ...Deck Operating Description 7 30 Samsung Electronics MEMO ...
Page 142: ...Samsung Electronics 10 1 10 Wiring Diagram ...
Page 143: ...Wiring Diagram 10 2 Samsung Electronics MEMO ...
Page 145: ...PCB Diagrams 11 2 Samsung Electronics COMPONENT SIDE 11 1 Main PCB ...
Page 146: ...PCB Diagrams Samsung Electronics 11 3 CONDUCTOR SIDE ...
Page 149: ...PCB Diagrams 11 6 Samsung Electronics 11 6 Front PCB 11 7 Function PCB ...


