background image

How to Modify an Existing Operator

To modify an existing Operator:

1.

As supervisor (see 

How to Log in as Supervisor

 on page 154):

Press 

 and select the path:

Account management 

Manage operators

The Manage Operator Wizard window opens.

2.

Select 

Operator List.

3.

Select the operator and select Edit / Del..

4.

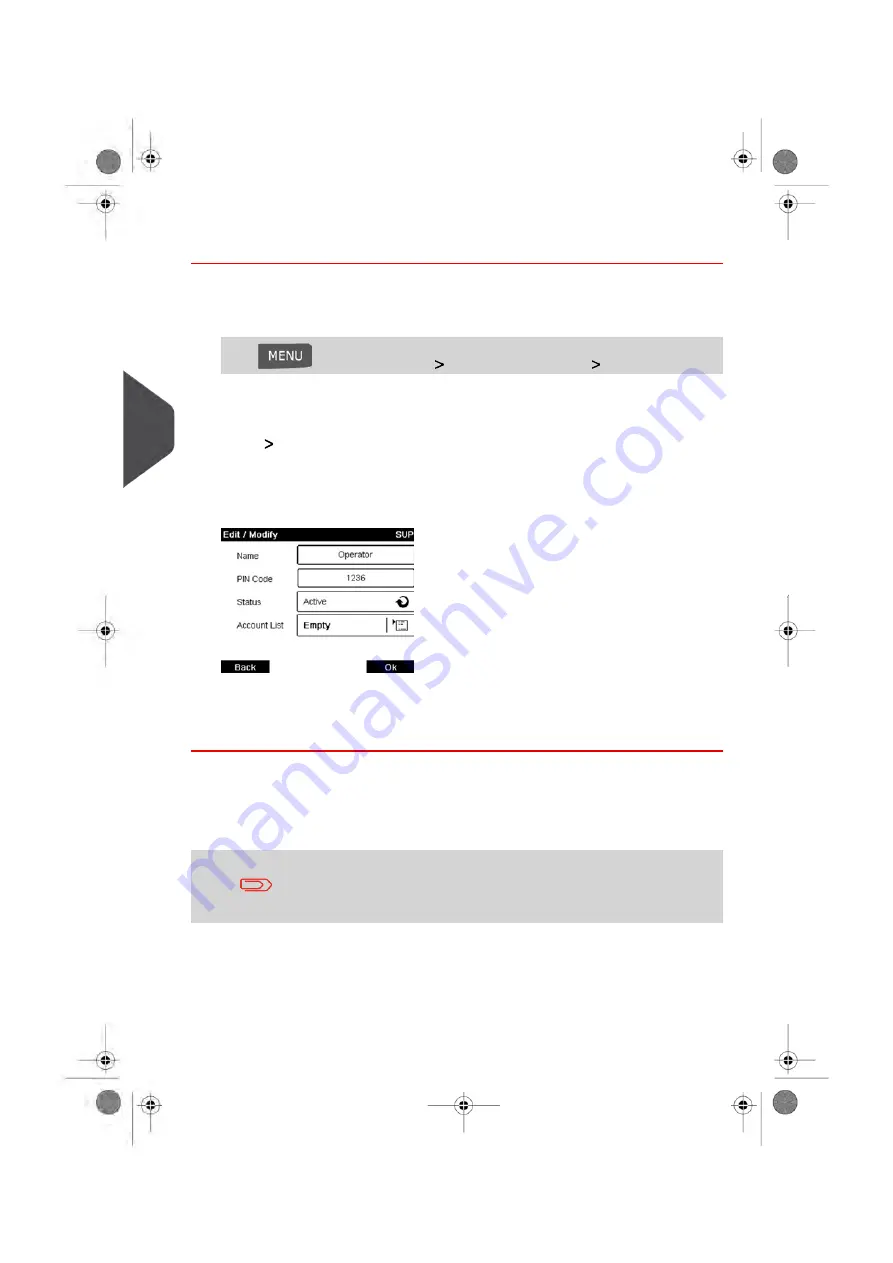
Select Edit / Modify.

The Edit / Modify screen is displayed.

5.

Change the operator options as needed and press [OK] to display the Operator
modification summary screen (Use key [C] to clear characters).

6.

Press [OK] to accept your changes.

Assigning Accounts to Operators

You can define the Accounts Access to each operator, by assigning accounts to each
operator.

On user screens, only accounts are displayed.

116

|   Page 116 | Jan-13-2017 10:45 |

5

Mana

ging Accounts and Assigning Rights

Summary of Contents for IN-600

Page 1: ...User Guide IN 600 Mailing Systems ...

Page 2: ...ing Permit Mail 46 3 5 Date Correction Mode 51 3 6 Postage Value Correction Mode 55 3 7 Printing a Manifest Statement of Mailing 59 3 8 Printing Incoming Mail with RECEIVED RECU Mode 62 3 9 Running Seal Only Mail 65 3 10 Settings Details 68 3 11 Advanced Operations 81 Postage Funds Management 85 4 4 1 Overview 87 4 2 Managing Your Postage Funds 88 4 3 Unlocking the PSD Postal Inspection 92 Managin...

Page 3: ...as the Supervisor 154 8 3 Changing Languages 156 8 4 Enabling Disabling Sounds 158 8 5 Display Settings 159 8 6 System Time outs and Settings 161 8 7 High Value Low Funds Warnings and PIN Codes 164 8 8 Weighing Settings 166 8 9 Default Impression Settings 174 8 10 Impression Memories 178 8 11 Connection Settings 181 8 12 Time and Date Management 183 Options and Updates 185 9 9 1 Overview 187 9 2 U...

Page 4: ...bleshooting 221 11 11 1 Paper Jamming 223 11 2 Label Jamming 227 11 3 Weighing Problems 228 11 4 Diagnostics and System Data 230 Specifications 235 12 12 1 Mail Specifications 237 12 2 Recommended Operating Conditions 241 12 3 Technical Specifications 242 12 4 Operating Specifications 243 Page 3 TOC Jan 13 2017 10 45 ...

Page 5: ... Page 4 TOC Jan 13 2017 10 45 ...

Page 6: ...ion about recommended safety precautions and the best environmental conditions in which to operate your system 1 1 What you will find in this Manual 3 1 2 Safety Requirements 6 How to Disconnect your Mailing System 8 1 Page 1 Read this First Jan 13 2017 10 45 ...

Page 7: ......

Page 8: ... sealing your mail running batches of mail etc Section 4 Money Operations Loading Postage Funds into your Mailing System Section 5 Managing Accounts and Assigning Rights Changing Accounts as a User setting up Accounts and Assigning access to the Mailing System as the Supervisor Section 6 Reports How to generate and print reports Section 7 myEquipment E Services Accessing to E Services Section 8 Co...

Page 9: ...ime when processing your mail SUPERVISOR indicates that you have to log in as the supervisor using the supervisor PIN to perform the procedure Postage functions of the Mailing System are not accessible in this mode Glossary This manual uses the acronyms listed below Description Acronym Automatic Label Dispenser ALD Total postage used Ascending Postage amount available Descending IDentification ID ...

Page 10: ...Personal Computer PC Personal Identification Number PIN Postal Security Device Postage Meter PSD Canada Post Corporation CPC Weighing Platform WP 1 Read this First 5 Page 5 Jan 13 2017 10 45 ...

Page 11: ...t the power plug to an outlet provided with a protective ground contact To reduce the risk of fire use only the power cord supplied with the Mailing System Do not use ground adaptors Do not use this product on a wet floor or near water In case of liquid spillage disconnect the power cord from the outlet and proceed with cleaning Compliance Energy Star compliance Office equipment is generally power...

Page 12: ...r office equipment when using your Mailing System To avoid damaging vital system components only use Neopost Canada Post approved supplies ink tape cleaners Follow the additional safety precautions below Do not place lit candles cigarettes cigars etc on the Mailing System When removing jammed material avoid using too much force to prevent personal injury and damaging components When lifting covers...

Page 13: ...Disconnect the LAN cable from the wall before moving your system Disconnecting your Mailing System How to Disconnect your Mailing System 1 First switch your Mailing System to OFF mode see How to Turn Your Mailing System OFF on page 21 Only unplug the power cord when the Mailing System is OFF or in Sleep mode to avoid keeping the ink cartridge in an unprotected position where the ink may dry out an...

Page 14: ...ystem in this section 2 1 System Layout 11 2 2 Accessories 14 2 3 Control Panel Features 15 2 4 Connections 18 2 5 Power Management 20 How to Activate Sleep Mode 21 How to Turn Your Mailing System OFF 21 9 Page 9 Meet Your Mailing System Jan 13 2017 10 45 ...

Page 15: ......

Page 16: ...s the weight of mail pieces Weighing Platform Allows you to set up job runs and change system settings and features as needed Control Panel Beginning of mail transport path Feeder Guides envelopes into the feeder Rear Guide Wall Holds large envelopes in place for feeding Side Guide Allows you to remove jammed envelopes or labels Jam Release Handle Receives mail pieces after processing Catch Tray 1...

Page 17: ...eight of mail pieces Weighing Platform Allows you to set up job runs and change system settings and features as needed Control Panel Beginning of mail transport path Feeder Guides envelopes into the feeder Rear Guide Wall Holds large envelopes in place for feeding Side Guide Allows you to remove jammed envelopes or labels Jam Release Handle Receives mail pieces after processing Catch Tray 12 Page ...

Page 18: ... used to print a postage impression on an envelope or Label Ink Cartridge Stores postage funds and tracks postage usage Postal Security Device PSD Lift from the front to open Top Cover 2 Meet Your Mailing System 13 Page 13 Jan 13 2017 10 45 ...

Page 19: ...tem for printing mailing related reports For more information about compatible printers that can connect to your mailing system please contact technical support Barcode Scanner option This scanner is used to identify accounts through barcodes 14 Page 14 Jan 13 2017 10 45 2 Meet Your Mailing System ...

Page 20: ...data reports Item Counter Reset When displayed indicates that the Mailing System will print a label Label Indicator Indicates unread messages in message box Mailbox Indicates the amount to be printed on the envelope Postage Value Moves the impression to the left to compensate for thick envelopes Print Offset Indicates the Postage Rate and the Special Postage Options selected Postage Rates and Opti...

Page 21: ...r Impression Build Impres sion Opens the weighing mode selection menu Standard Weighing Differential Weighing Manual weight entry Weighing Mode KEYPAD Allows the entry of alpha or numeric values accounts or other set up information Press a key several times to dis play other characters Alphanumeric Keys Clears keypad entries existing data in entry fields and re sets the Postage Rate to your system...

Page 22: ...Use For different contexts the table below indicates the successive characters you may obtain by pressing keys several times in a row Alpha numeric Key 1 1 2ABCabc 2 3DEFdef 3 4GHIghi 4 5JKLjkl 5 6MNOmno 6 7PQRSpqrs 7 8TUVtuv 8 9WXYZwxyz 9 0 0 Clear function C 2 Meet Your Mailing System 17 Page 17 Jan 13 2017 10 45 ...

Page 23: ...to a printer or a USB memory key Connects to a wall socket Power Connector Weighing Platform s connection COM2 3 To auto feeder COM1 Base to Neopost secure server MAS connection LAN Port Memory device or printer connection USB Ports 18 Page 18 Jan 13 2017 10 45 2 Meet Your Mailing System ...

Page 24: ...to Weighing Platform s connection COM2 3 Power Source Wall Socket Feeder to Base connection COM1 Power connectors Power connectors are shown in section Connectors on page 18 2 Meet Your Mailing System 19 Page 19 Jan 13 2017 10 45 ...

Page 25: ...System is an Energy Star qualified Mailing System that automatically goes into a low power Sleep mode after a period of inactivity Spending a large portion of time in low power mode not only saves energy but helps your equipment run cooler and last longer Sleep Mode Sleep Mode can be activated automatically by your system or manually by a user To change the period of time after which the System ac...

Page 26: ...ng the system OFF Mode To turn OFF your system you can use the ON OFF button located on the right side of the power cord How to Turn Your Mailing System OFF 1 Activate Sleep Mode see How to Activate Sleep Mode on page 21 2 Be sure that the light located next to the key at the top right corner of the control panel is Amber meaning that the Mailing System is in Sleep mode 3 Turn Off your Mailing Sys...

Page 27: ......

Page 28: ... for Standard Mail 37 How to Process Standard Mail 41 3 4 Printing Permit Mail 46 How to Set Postage for Permit Mail 46 How to Process Permit Mail 48 3 5 Date Correction Mode 51 How to Set Date Correction Mode 51 How to Process Mail in Date Correction Mode 53 3 6 Postage Value Correction Mode 55 How to Set Postage Value Correction Mode 56 How to Process Mail in Postage Value Correction Mode 57 3 7...

Page 29: ...ion 71 How to Change the Weighing Mode 74 How to Enter the Weight Manually 75 How to Change the Date 77 How to Add or Remove a Slogan 78 How to Move the Meter Impression Print Offset 79 How to Use an Impression Memory 80 3 11 Advanced Operations 81 How to Enable an Emergency Stop 81 How to Reset Batch Counters 82 How to Count Mail pieces by Weighing 83 How to Fill the Automatic Label Dispenser 83 ...

Page 30: ... and Configuration Menu Each type of Meter Impression available on your system is associated with A specific Home Screen that displays current impression configuration weight postage A specific Build Impression Menu that allows you to view edit or select a new impression For direct access to the Build Impression Menu press Shortcut Key on the Control Panel Your system has five Shortcut Keys for di...

Page 31: ...se depending on the type of job you want to run The column on the right indicates the options available for each type of Meter Impression If you do not set up any options the Mailing System will use your Default Impression Settings to complete the impression set up 26 Page 26 Jan 13 2017 10 45 3 Processing Mail ...

Page 32: ...unt print on back of envelope Manual entry of postage Date advance Print offset Sealing off Statement of mail ing Printing the Manifest Statement of Mailing on page 61 Printing a Statement of mail ing Statement amount manual Date advance Received Printing Incoming Mail with RECEIVED Printing RECEIVED RECU or the date on incoming mail Print date and or RE CEIVED RECU Print offset Print counter RECU...

Page 33: ...The Default Meter Impression at start up is a Standard Meter Impression unless you have changed your Default Settings 28 Page 28 Jan 13 2017 10 45 3 Processing Mail ...

Page 34: ...eter Impression on page 33 Checking additional issues concerning your Mailing System ink level funds Frequently Asked Questions on page 34 This section also provides instructions on how to use your automatic feeder Using the Feeder on page 35 Sorting Mail by Type and Task To save time sort your mail in groups that have similar characteristics This will prevent you from having to change your job se...

Page 35: ...page 68 4 Postage Rates to apply and Special Options to add 5 Physical characteristics Separate mail pieces that exceed the weight size or thickness allowed in the system mail path see Mail Specifications on page 237 6 Finally sort each stack by item size Turning On Your System and Starting a Job Run Turning on your system automatically starts a job set up using your Default System Settings Depend...

Page 36: ... and Start a Job To log in as a user 1 Press to wake up the system The system may display one of the following screens Home Screen Standard Login Screen Account Screen 3 Processing Mail 31 Page 31 Jan 13 2017 10 45 ...

Page 37: ...r account The Homescreen Standard page is displayed The job run starts To find an account To locate an Account quickly type the Account Number or Name tap column headers to switch between number and name or use a Barcode Scanner To type letters instead of figures using the keypad press the corresponding key several times in a row Example For N press the 6 key three times Accounting information To ...

Page 38: ...on Once you are logged in as user 1 Either Press and select Build Impression Press or The Build impression screen is displayed 2 Select Impression Type The Type of impression screen is displayed 3 Select the type of impression in the list and press OK The Build Impression screen is updated and displays the menu items that allow you to modify the impression options 4 Press to return to the home scr...

Page 39: ...atch Counters on page 82 Do I need to clear the Batch Counter For sealing envelopes For sealer equipped feeders see How to Fill the Sealer Bottle on page 211 Is the Sealing Fluid Container properly filled Before placing envelope s on the Weighing Platform your Home Screen should display 0 g If __g is dis played press and hold the key to zero the WP See How to Rezero the Weighing Platform on page 1...

Page 40: ...envelopes one by one or place a stack of envelopes in the Feeder Each stack may contain a mix of envelopes of different thicknesses and sizes How to Use the Feeder Feeding a stack of mail pieces 1 Fan the envelopes to separate them 2 Bevel the edge of the stack 3 Place the envelopes in the feeder their upper edge resting against the rear guide 3 Processing Mail 35 Page 35 Jan 13 2017 10 45 ...

Page 41: ...hickness Setting Depending on the thickness of your envelopes you may have to adjust the thickness setting of the Feeder Change this setting to process several stacks of thin envelopes or to remove thick envelopes blocked at the entrance of the mail path 1 Open Feeder Cover 2 Change lever position 1 for thin envelopes 2 for thick envelopes 3 Close the Feeder Cover 36 Page 36 Jan 13 2017 10 45 3 Pr...

Page 42: ...nt a Meter Impression As mail requirements differ from day to day some of the Impression Options may not be necessary or their order may vary Begin by selecting a Meter Impression to gain access to the Impression Options that you may need to process your mail Make sure you have already completed the preparation steps mentioned in Preparing and Starting your Job Run on page 29 How to Set Postage fo...

Page 43: ...n To change the type of impression select Impression type and then select Standard in the Type of impression screen For more details see How to Change a Meter Impression on page 33 To select an option in the screen Use related keys located on right hand side of display 38 Page 38 Jan 13 2017 10 45 3 Processing Mail ...

Page 44: ...tion displayed on the Date Advance Screen For more details see How to Change the Date on page 77 Press to return to the home screen 4 Select a Postage Rate and add Options Press to open the Rate selection screen Type a rate number to select a rate or display new rate options Select Other selections to gain access to the Postage Rate History or Rate wizard options that follow Select Postage Rate Hi...

Page 45: ...page 74 If the WP automatic selection is activated see Weighing Platform Automatic Selection on page 167 you can change from the home screen the weighing mode to Standard Weighing WP by putting a mail piece on the Weighing Platform You can also apply the following optional setting s 1 Move the impression away from the envelope edge for thick envelopes see How to Move the Meter Impression Print Off...

Page 46: ... Mail Mail processing mainly depends on the weighing method you have chosen It is indicated by the icon in the Weighing Mode zone of the screen If you need to change the current account before applying postage on account enabled configurations see How to Change Account on page 68 How to Process Standard Mail In mode Standard Weighing From the Standard home screen to print postage directly on mail ...

Page 47: ...ay and put stack aside to let envelopes dry If you want to print several identical labels 1 Press and enter the number of labels Make sure there is enough labels are available in the label dispenser see Filling the Label Dispenser on page 83 2 Press to print the labels In optional mode Differential Weighing From the Standard home screen 1 Place the stack of mail to process on the Weighing Platform...

Page 48: ...t object from the Weighing Platform the Mailing System will ask if you want to print it You can answer Yes or No In optional mode Differential Weighing Automatic Label From the Standard home screen 1 Place the stack of mail you to process on the weighing platform and then follow the instructions on the screen or the steps below 2 Withdraw the first mail piece from the top of the stack The Mailing ...

Page 49: ...art running 2 Insert the envelope into the mail path against the rear guide wall side to be printed facing upwards If a mail piece is bigger than mail path maximum thickness press to print a label The label is printed To know the maximum thickness see Mail Specifications on page 237 3 The Mailing System applies postage and the mail piece or label is sent to the catch tray When using the Sealer col...

Page 50: ...cal labels 1 Press and enter the number of labels Make sure the labels are available in the label dispenser see Filling the Label Dispenser on page 83 2 Press to print the labels 3 Processing Mail 45 Page 45 Jan 13 2017 10 45 ...

Page 51: ...ements differ from day to day some of the Impression Options may not be necessary or their order may vary Begin by selecting a Meter Impression to gain access to the Impression Options that you may need to process your Permit Mail Make sure you have completed the preparation steps mentioned in Preparing and Starting your Job Run on page 29 How to Set Postage for Permit Mail Required settings 1 Che...

Page 52: ... the quantity and type of mail you have to process you can choose an efficient weighing method that uses the weighing platform to save time see Choosing a Weighing Mode on page 72 To change the current weighing method press and select a weighing mode in the Weighing mode screen For more details see How to Change the Weighing Mode on page 74 3 Processing Mail 47 Page 47 Jan 13 2017 10 45 ...

Page 53: ...er you have completed the sequence in How to Set Postage for Permit Mail on page 46 If you need to change the Account to allocate the postage costs to on Account enabled configurations see How to Change Account on page 68 How to Process Permit Mail In mode Standard weighing From the home screen 1 Put the mail piece on the Weighing Platform The weight of the mail piece is displayed in the Weight ar...

Page 54: ...and the mail piece or label is sent to the catch tray When using sealer collect the mail piece stack in the catch tray and put stack aside to let envelopes dry Otherwise if you want to print several identical labels 1 Press and enter the number of labels Make sure the labels are available in the label dispenser see Filling the Label Dispenser on page 83 2 Press to print the labels In other modes M...

Page 55: ... The Mailing System applies postage and the mail piece or label is sent to the catch tray Otherwise if you want to print several identical labels 1 Press and enter the number of labels Make sure the labels are available in the label dispenser see Filling the Label Dispenser on page 83 2 Press to print the labels When using sealer collect the mail piece stack in the catch tray and put stack aside t...

Page 56: ...orrection Mode The instructions below outline the steps that you need to complete to set up your system to print a Date Correction Meter Impression As mail requirements differ from day to day some of the Impression Options may not be necessary or their order may vary Begin by selecting a Meter Impression to gain access to the Impression Options that you may need to process your mail Make sure you ...

Page 57: ...ocated on right hand side of display Select Date correction and press OK to validate 3 Change the postage date Today s date is printed by default To change the date press to access the Build Impression screen and then select Date to display the Date Advance Screen Select a date Press OK to return to the home screen For details see How to Change the Date on page 77 You are now ready to print the en...

Page 58: ...ate or Advanced Date 1 Press The system motors start running 2 Insert the mail piece s into the mail path against the rear guide wall side to be printed facing upwards see How to Use the Feeder on page 35 The Mailing System applies the impression and the mail piece or label is sent to the catch tray If mail piece is bigger than mail path maximum thickness see Mail Specifications on page 237 press ...

Page 59: ...everal identical labels 1 Press and enter the number of labels Make sure the labels are available in the label dispenser see Filling the Label Dispenser on page 83 2 Press to print labels 54 Page 54 Jan 13 2017 10 45 3 Processing Mail ...

Page 60: ...alue Correction Mode The instructions below outline the steps that you need to complete to set up your system to print a Postage Value Correction Meter Impression As mail requirements differ from day to day some of the Impression Options may not be necessary or their order may vary Begin by selecting a Meter Impression to gain access to the Impression Options that you may need to process your mail...

Page 61: ...of meter impression if you are not in Postage Value Correction mode Press to access the Build Impression screen and then press the Impression Type button to display the Type of impression screen Select Postage Correction in the list and press OK to validate To select an option in the screen use related keys located on right hand side of display 56 Page 56 Jan 13 2017 10 45 3 Processing Mail ...

Page 62: ...to validate Press to return to the home screen You are now ready to print the envelopes Processing Mail in Postage Value Correction Mode To run mail follow the procedure below after you have completed the steps in Setting Postage Value Correction Mode on page 55 How to Process Mail in Postage Value Correction Mode To print a Postage Value Correction Impression 1 Press The system motors start runni...

Page 63: ...h tray If mail piece is bigger than mail path maximum thickness see Mail Specifications on page 237 press before you press to print a label The label is printed Otherwise if you want to print several identical labels 1 Press and enter the number of labels Make sure the labels are available in the label dispenser see Filling the Label Dispenser on page 83 2 Press to print labels 58 Page 58 Jan 13 2...

Page 64: ...nifest Statement of Mailing See also How to Change a Meter Impression on page 33 Setting a Manifest Make sure you have completed the preparation steps mentioned in Preparing and Starting your Job Run on page 29 How to Set a Manifest Statement of Mailing Required settings 1 Make sure you are on the home screen of the Statement of mailing type of impression as illustrated below 59 Page 59 Jan 13 201...

Page 65: ...ide of display 3 Enter the statement of mailing amount From the home screen Begin to type in the statement of mailing amount keys 1 to 9 or dot The Amount entry screen is displayed Type the amount in and press OK to validate and return to the home screen From the Build Impression screen Select the Amount line Type the amount in and press OK to validate Press to return to the home screen You are no...

Page 66: ...How to Print a Manifest Statement of Mailing To print the statement of mailing 1 Press and enter the number of labels you wish to print 2 Make sure the labels are available in the label dispenser see Filling the Label Dispenser on page 83 The Mailing System prints the statement of mailing and the label is sent to the catch tray 3 Processing Mail 61 Page 61 Jan 13 2017 10 45 ...

Page 67: ...D RECU Mode printing The instructions below outline the steps that you need to complete to set up your system to print a Received Meter Impression As mail requirements differ from day to day some of the Impression Options may not be necessary or their order may vary Begin by selecting a Meter Impression to gain access to the Impression Options that you may need to process your mail with a Received...

Page 68: ...on select Impression type and then select Received in the Type of impression screen For more details see How to Change a Meter Impression on page 33 Additionally you can Activate or deactivate printing the date Activate or deactivate printing RECEIVED RECU Activate left and or right slogan Activate Print Counter and enter a value Press to return to the home screen To select an option on the screen...

Page 69: ... to print Processing RECEIVED RECU Mail To run mail follow the procedure below after you have completed the steps in How to Set RECEIVED RECU Mode printing on page 63 How to Process RECEIVED RECU Mail On the Received home screen 1 Press System motors start running 2 Insert the mail piece into the mail path against the rear guide wall side to be printed facing upwards The Mailing System applies the...

Page 70: ... Impression see How to Choose a Meter Impression on page 25 Setting Seal Only Mail processing The instructions below outline the steps that you need to complete to set up your system to run in Seal Only Mode As mail requirements differ from day to day some of the Impression Options may not be necessary or their order may vary Begin by selecting a Meter Impression to gain access to the Impression O...

Page 71: ...de Press to access the Build Impression screen To change the type of impression select Impression type and then select Seal Only in the Type of impression screen For more details see How to Change a Meter Impression on page 33 3 Press to return to the home screen If you want to seal envelopes without printing you must turn the sealer lever on see Using the Sealing Function on page 80 You are now r...

Page 72: ...d the steps in How to Set Seal Only Mail on page 66 How to Process Seal Only Mail 1 Press System motors start running 2 Insert the mail piece s into the mail path against the rear guide wall facing upwards see How to Use the Feeder on page 35 3 Processing Mail 67 Page 67 Jan 13 2017 10 45 ...

Page 73: ...count The list of accounts that are available is displayed 2 Select the account you want to use and press OK 3 Press to return to the home screen The current account number is displayed Using Barcode Scanner to Change Account The accounts are listed on the screen in the order they were set up see Managing Accounts on page 105 A barcode scanner can be used for One Click entry of accounts into your ...

Page 74: ... key in the rate selection screen Using the rate wizard that asks you to choose all the rate parameters class destination format services in complete lists of options Using a list of the last 10 selected postage rates from the postage rate history On the home screen press to select the default postage rate and refresh weight How to Select a Postage Rate To select a postage rate 1 Either Press and ...

Page 75: ...es that will guide you through the rate selection process of all types of mail Rate Wizard screens Selecting a Mail Class All Postage Rate Mail Classes loaded in the system are displayed in the list Selecting a Destination For Domestic Mail Classes you may be prompted to enter the destination postal or zone code Use the C key to delete the existing postal or zone code if any and enter the new dest...

Page 76: ...Permit Mail type of impression a default permit impression is automatically selected See also How to Change the Default Permit Impression on page 175 Managing Permit Impressions on page 197 How to Select a Permit Impression To select a Permit Impression From the Permit mail home screen 1 As a user Press on the keyboard and then select Permit number The Select Permit Impression screen is displayed ...

Page 77: ...ing on the type of mail you want to process choose a weighing method according to the recommendations in the table below Select the method For weighing Standard Weighing Items one by one Differential Weighing Items stacked on the Weighing Platform The recommendations in the table only apply to items processed with the same postage rate The Weighing mode icon on the screen indicates the weighing me...

Page 78: ...ngle step Simply place your mail into the mail path to print an Impression or print a Label Differential Weighing optional This mode speeds up the weighing process and increases your efficiency all the mail pieces are stacked together on the Weighing Platform Remove the pieces one by one and put them into the mail path The Mailing System calculates the postage and prints the mail piece automatical...

Page 79: ...ange the weighing mode from the home screen 1 Either Press and select the path System Settings Weighing Modes Press or The Weighing mode screen is displayed The options actually displayed in the screen depend on the weighing devices that are connected to your Mailing System and on features that are activated 2 Select the weighing mode If you select the option Differential Weighing Automatic tape m...

Page 80: ...ht Manually To enter the weight manually from the home screen you must first select the Postage Rate 1 Either Press and select the path System settings Weighing Modes Press or The Weighing mode screen is displayed 2 Select Manual weight entry The Manual weight entry screen is displayed 3 Enter the weight in _g and press OK to validate The home screen displays the Manual Weight Entry icon and the w...

Page 81: ...ion Menus When you have selected the Type of impression To access the Meter Impression Configuration menu press To return to the Meter Impression home screen press Advancing the Date The Date Advance function allows you to change the date printed on mail pieces You can set the date advance feature from supervisor mode to change at a fixed time This is useful if you process mail after the last mail...

Page 82: ...played 3 On the Date Advance screen you can Choose another day select the corresponding item in the list The icon indicates the current selection The date can be advanced up to 30 days from today s date 4 Press OK to apply changes and return to the configuration menu Adding Slogans You can add two slogans to the left of the meter impression as illustrated below 3 Processing Mail 77 Page 77 Jan 13 ...

Page 83: ...n The Select Slogan screen is displayed 3 Select the slogan in the list or select None for printing no slogan The icon indicates the current selection See also Managing Slogans on page 192 Moving the Meter Impression Print Offset You can move the impression away from the edge of the envelope when printing on thick envelopes with rounded edges 1 Impression printing offset 78 Page 78 Jan 13 2017 10 ...

Page 84: ...ermit allowing you to recall common jobs from the memory of your Mailing System In Account activated configurations impression memories allow you to assign your postage costs to pre selected Accounts If your mail requires different settings then the impression memories are the solution all your settings are stored in a single memory Just press the impression memory key instead of multiple keystrok...

Page 85: ... memory zone Mem of the home screen displays the current impression memory name Using the Sealing Function Auto Feeder Sealer Your Auto Feeder can seal envelopes while printing postage or for seal only usage Move the selector at the front of the Feeder right or left to change the sealing mode Sealer OFF Sealer ON Do not insert sealed envelopes in the Feeder when the Sealing Function is ON the enve...

Page 86: ...perations 3 11 Emergency Stop If you want to stop the system in the event of an emergency How to Enable an Emergency Stop To stop the run process immediately 1 Press 81 Page 81 Jan 13 2017 10 45 3 Processing Mail ...

Page 87: ...ssociated to counters see Reports on page 119 How to Reset Batch Counters To reset a Counter 1 On the Homescreen display Press the Reset counter button The counter is reset or 1 As a user Press and select the path System settings Start batch counter 2 Select the counter you wish to reset and press OK 82 Page 82 Jan 13 2017 10 45 3 Processing Mail ...

Page 88: ...n the Weigh Platform and press OK 5 The total number of items is displayed You must first weigh 10 ten items in order to get the count of the total number of items Filling the Label Dispenser How to Fill the Automatic Label Dispenser To fill the Label Dispenser 1 Stack the labels and insert them in the dispenser the printing side should face to the right with the peel off tab on the top 2 Push the...

Page 89: ...The Label Dispenser can hold up to 40 labels 84 Page 84 Jan 13 2017 10 45 3 Processing Mail ...

Page 90: ...in your Mailing System to allow postage operations 4 1 Overview 87 4 2 Managing Your Postage Funds 88 How to Check your Postage Funds 88 How to Add Postage Funds 90 4 3 Unlocking the PSD Postal Inspection 92 How to Unlock the PSD 92 85 Page 85 Postage Funds Management Jan 13 2017 10 45 ...

Page 91: ......

Page 92: ... see Connection Settings on page 181 Managing Your Postage Funds When logging in as a User you can carry out the following postage funds operations Check the available postage funds in your Postage Meter Add more postage funds to your Postage Meter All funding operations trigger a connection of your Mailing System to our Postage Servers via your internet LAN connection Tracking Your Postage Funds ...

Page 93: ... to complete your current task Remaining funds are continuously displayed at the bottom of the home screen see Control Panel Features on page 15 You can also use the procedure below How to Check your Postage Funds To check available postage funds 1 Either Press and select the path My Funds Press or The Funds Menu is displayed 88 Page 88 Jan 13 2017 10 45 4 Postage Funds Management ...

Page 94: ...elect the menu path Funds used Funds available The screen displays your postage funds as shown below Ascending funds used Descending funds available 4 Postage Funds Management 89 Page 89 Jan 13 2017 10 45 ...

Page 95: ... Cancel a Postage Account PIN Code on page 165 How to Add Postage Funds To add funds to the Postage Meter 1 Either Press and select the path My Funds Press or 2 Select Add Funds 3 If the system asks for a PIN code enter the code using the keypad and press OK The Funds Screen is displayed By default the system displays the value of the previous transaction 4 Enter the amount of postage to add using...

Page 96: ...ommunication error the amount previously entered cannot be changed Check connection settings see Connection Settings on page 181 6 You can open the Funds Used Funds Available screen to check your account balance once the transaction is complete see How to Check your Postage Funds on page 88 See also As supervisor you can set the Mailing System to ask for a PIN code for crediting see How to Set Can...

Page 97: ...ailing System time after Daylight Savings Time transitions the server connection synchronizes the Mailing System time and date How to Unlock the PSD To unlock the PSD and manually connect to the Postal Server 1 Either Press and select the path My Funds Press or 2 Select Postal Inspection The system asks for confirmation 3 Press OK to connect to the Postal Server If the audit is successful the syst...

Page 98: ... to Change a Shared PIN Code 100 5 4 Managing Accounts 105 How to Create an Account 107 How to View Edit Account Information 108 How to Activate Deactivate an Account 109 How to Delete an Account 110 How to Export an Account List 111 How to Import Accounts 112 5 5 Managing Operators 113 How to Create an Operator 114 How to Modify an Existing Operator 116 How to Assign Accounts to an Operator 117 H...

Page 99: ......

Page 100: ...vating the Accounts Function in the Mailing System is a convenient way to monitor track and control postage expenses by for example associating accounts to departments in your organization Marketing Sales etc or to different companies if the Mailing System is shared When the Accounts Function is activated the currently selected account is charged each time the user applies postage to mail You can ...

Page 101: ... of your funds The different access control policies you can implement as the supervisor are No PIN code unlimited access Shared System PIN Code users enter a PIN code to access the system Operator PIN codes users enter their own PIN code to access the system In this last mode the operators use only the accounts you allow them access to 96 Page 96 Jan 13 2017 10 45 5 Managing Accounts and Assignin...

Page 102: ...ccounting application and should be set up by an authorized Neopost service representative Account Modes table The table below summarizes the Account mode options available and the function of each option on the user and supervisor points of view Action required to access the system Function Account mode Unlimited access to the sys tem No postage tracking No access control No Accounts Type a PIN c...

Page 103: ... see How to Log in as Supervisor on page 154 Press and select the path Account Management Account Mode Selection The Account Mode Selection screen is displayed with the current Account Mode shown 2 Select another Account mode 3 Press OK to confirm 4 If required enter the PIN code and press OK The Mailing System then confirms that the Account Mode has been changed If you have selected the Remote Ac...

Page 104: ... System functions No Accounts Mode is the default mode of your Mailing System Activating No Accounts Follow the procedure How to Display and Change the Account Mode on page 98 and select the No Accounts mode No Accounts Management Menu In No Accounts mode No other setting is necessary for the No Accounts mode 99 Page 99 Jan 13 2017 10 45 5 Managing Accounts and Assigning Rights ...

Page 105: ...Control please see How to Display and Change the Account Mode on page 98 and select the No Accounts with Access Control Mode 2 Enter the 4 digit shared PIN code the users will enter at log in No Accounts with Access Control Management Menu In No Accounts with Access Control mode the menu allows you to change the shared PIN code How to Change a Shared PIN Code 1 As the supervisor see How to Log in ...

Page 106: ...activate an Account please see How to Display and Change the Account Mode on page 98 and select the Accounts Mode 2 Create accounts as indicated in How to Create an Account on page 107 When you activate the Accounts Mode the system creates an account by default Accounts Mode Management Menu In Accounts Mode the menu allows you to manage your accounts See also To add modify or delete accounts see M...

Page 107: ...e Mailing System automatically selects it at start up Activating Accounts with Access Control 1 Select the Accounts with Access Control mode see How to Display and Change the Account Mode on page 98 2 Create the accounts you wish to implement see How to Create an Account on page 107 3 Create the Operator PIN codes you wish to implement see How to Create an Operator on page 114 At the same time ass...

Page 108: ...emote Account Management allows you to manage accounts and or operator PINs from a PC based software program MAS The PC application provides advanced postal and or shipping expense management in order to monitor track and control your mailing and shipping costs You can allow the Mailing System to be used even when not connected to the PC In this Disconnected Mode only one account and operator are ...

Page 109: ...iling System activate the mode Remote Account Management see How to Display and Change the Account Mode on page 98 3 Configure the required Accounts and the active Operators in MAS for details please see the MAS User Guide If operators or accounts are already created on the Mailing System they will be deleted when switching to Remote Account Management mode 104 Page 104 Jan 13 2017 10 45 5 Managin...

Page 110: ...er of accounts you can create is set to 35 by default and can be increased to 500 if required Every account includes the following information which is displayed on the Add account screen Account summary Description Format Account Item Number of the account Two accounts cannot have the same number An account number cannot be modified after the account is created However the account can be deleted ...

Page 111: ...e also About changing the maximum number of accounts see Account level on page 149 Printing the current account list Account List Report on page 133 Account Management Follow the steps below to create modify activate deactivate or delete accounts You can also import a list of accounts See Importing Exporting Account Lists on page 111 See also Account Information on page 105 106 Page 106 Jan 13 201...

Page 112: ...pervisor see How to Log in as Supervisor on page 154 Press and select the path Account Management Manage Accounts Account List The Account list screen is displayed 2 Select Add Account 3 Enter the account Number and Name using the keypad and press OK Select the Account Status the button displays the current status Active or Inactive 5 Managing Accounts and Assigning Rights 107 Page 107 Jan 13 2017...

Page 113: ...low to modify an Account Name or Account Status The account number cannot be edited once it is created How to View Edit Account Information To view or edit an account 1 As supervisor see How to Log in as Supervisor on page 154 Press and select the path Account management Manage accounts Account list The Account list screen is displayed 2 Select the account or type the account number and press OK 1...

Page 114: ...prevent them being used before your account structure is complete How to Activate Deactivate an Account To activate or deactivate an account 1 Perform procedure How to View Edit Account Information on page 108 2 Change the account status the button displays the current status active or inactive and press OK 3 Accept the changes by pressing OK on the Account modification summary If an account is de...

Page 115: ...page 108 2 On the Account management screen select Delete instead of Edit Modify A confirmation of account deletion is displayed An account number cannot be modified If you want to modify the account number first delete the account and then create a new account with a new account number 110 Page 110 Jan 13 2017 10 45 5 Managing Accounts and Assigning Rights ...

Page 116: ...ist You can export an account list as a CSV file for use as back up or to modify it to create new accounts How to Export an Account List To export an account list on a USB memory key 1 As supervisor see How to Log in as Supervisor on page 154 Press and select the path Account management Manage accounts Export Account list 2 Insert the USB memory key into the USB port of the base at rear left and p...

Page 117: ... before re importing it into the Mailing System See also Maximum number of accounts Account Information on page 105 How to Import Accounts To import accounts from a CSV file 1 As supervisor see How to Log in as Supervisor on page 154 Press and select the path Account management Manage accounts Import Accounts 2 Insert your USB memory key into the USB port of the base at rear left and press OK 3 Se...

Page 118: ...perator Options The following options must be specified when creating operators Description Format Option Operator PIN code Two Operators cannot have the same PIN code 4 digit PIN code Operator name Two Operators cannot have the same name 20 alphanumeric characters Name Users can only log in using active Operator s PIN codes Active Inactive Status Accounts that the Operator may use List of account...

Page 119: ... to create an operator you must first set up an Accounts with Access Control in Account Mode Management Mode How to Create an Operator To create an Operator 1 As supervisor see How to Log in as Supervisor on page 154 Press and select the path Account management Manage operators The Manage Operator screen is displayed 2 Select Operator List The Operator list screen is displayed 114 Page 114 Jan 13 ...

Page 120: ...ect the accounts that the operator will be allowed to use You can complete this step later see How to Assign Accounts to an Operator on page 117 6 Press OK The Operator creation summary screen is displayed 7 Press OK to create the Operator Modifying Operators Follow the steps listed below to modify operator s name PIN code status or assigned accounts 5 Managing Accounts and Assigning Rights 115 Pa...

Page 121: ...elect Edit Del 4 Select Edit Modify The Edit Modify screen is displayed 5 Change the operator options as needed and press OK to display the Operator modification summary screen Use key C to clear characters 6 Press OK to accept your changes Assigning Accounts to Operators You can define the Accounts Access to each operator by assigning accounts to each operator On user screens only accounts are di...

Page 122: ...perators The ability to select the status of an operator allows you to create as many operators as you need in advance Users cannot use deactivated operator PIN codes for new operators How to Activate Deactivate an Operator To activate or deactivate an Operator 1 Perform procedure How to Modify an Existing Operator on page 116 2 In the operator options select the line Status to activate or deactiv...

Page 123: ...rator To delete an Operator 1 Perform procedure How to Modify an Existing Operator on page 116 2 Select Delete instead of Edit Modify The Delete confirmation screen is displayed 3 Press OK to delete the operator otherwise press 118 Page 118 Jan 13 2017 10 45 5 Managing Accounts and Assigning Rights ...

Page 124: ...How to Generate a Report as Supervisor 125 6 3 Processing Activity Data 126 6 4 Mail Processing Data 128 6 5 Postage Funds Data 131 6 6 Account Data 133 How to Generate the Account List Report 133 How to Generate the Operator List Report 136 6 7 System Data 137 How to Generate a IP Configuration Report 140 How to Generate a Proxy Configuration Report 140 119 Page 119 Reports Jan 13 2017 10 45 ...

Page 125: ......

Page 126: ... the purchase of MAS For more information on MAS please contact your Neopost Sales Representative or visit us at neopost ca List of Reports Output on L label or envelope S screen P USB printer M USB memory key Page Output Devices Report description Report name PROCESSING DATA Batch Re port on page 126 SP Batch Counter and corresponding postage for outgoing mail since the last reset Batch Data Rece...

Page 127: ...CCOUNT DATA Account List Re port on page 133 PM List of accounts in the system supervisor only Account List Single Ac count Re port on page 134 S Usage for a specific account selected in an account list for a selected period Single Account Multi Ac count Re port on page 135 PM Usage on all accounts in a selected peri od Multi Account Operator List Re port on page 136 PM Operator list with PIN code...

Page 128: ...r service assistance only supervisor only Base Events Postage Meter Events IP Config uration Report on page 139 L IP configuration settings IP Configuration Re port Proxy Configura tion Re port on page 140 L Proxy configuration settings Proxy Configuration Report 6 Reports 123 Page 123 Jan 13 2017 10 45 ...

Page 129: ... is displayed 3 Select the report type and press OK 4 Depending on the report type the system may ask for preferences such as Period of time targeted start date end date Desired account etc Select or type the required parameters and press OK The Output selection screen is displayed Use the C key to clear displayed parameter data from right to left and then enter the new parameter data you want 5 S...

Page 130: ... To generate a Report 1 As supervisor see How to Log in as Supervisor on page 154 Press and select the path Reports 2 Resume with the steps outlined in How to Generate a Report as a User on page 124 6 Reports 125 Page 125 Jan 13 2017 10 45 ...

Page 131: ...logged in as a user You must be in Standard impression type to view the outgoing mail batch counter Output Screen USB printer Content Comments Fields Begin Date of last reset End Current date Period On printed report only Meter Serial number Number of items without 0 00 items Total value of items After issuing reports like Batch Data or Received Batch Data you may wish to reset the batch counters ...

Page 132: ... type to view incoming mail batch counter Output Screen USB printer Content Comments Fields Begin Date of the last reset End Current date Period Number of items Incoming Mail After issuing reports like Batch Data or Received Batch Data you may wish to reset the batch counters so that your next reports restart from zero at the current date See Using Batch Counters on page 82 6 Reports 127 Page 127 ...

Page 133: ...in date and the End date of the report The default End date is then 31 days later You can specify another End date Default period Begin 1st day of the current month End Current day Output Screen USB printer USB memory key Content Comments Fields On printed report only Meter Serial number For each day in the period Day number Number of items processed zero and non zero Total postage value for this ...

Page 134: ... selection of month and year Default period Begin Current month of the previous year End Current month Output Screen USB printer USB memory key This will generate a report from March 2015 to March 2016 Content Comments Fields On printed report only Meter Serial number For the period for each month presented in data collected Month name and year Total number of items processed Total postage value f...

Page 135: ... this report you have to be logged in as a user Output Screen USB printer Content Comments Fields For each permit impression including date only permit if present Permit name Permit mail piece total count Total weight Grand total mail piece count for all the permit mail 130 Page 130 Jan 13 2017 10 45 6 Reports ...

Page 136: ...put On label Screen USB printer Content Comments Fields Printed report only Current date and time Printed report only PSD status Printed report only Meter Serial number Total postage printed by the system Funds used ascending Postage available in the system to print Funds available descending Total funds downloaded into the system Must be equal to ascending descending Control total Total number of...

Page 137: ...s a supervisor Output Screen USB printer USB memory key Content Comments Fields Period Default period Begin Current date 6 months End Current date On printed report only Meter Serial number Represents the new total amount available in the mailing system For each postage download performed Download date time Funding amount New descending 132 Page 132 Jan 13 2017 10 45 6 Reports ...

Page 138: ...or Accounts with Access Control Output Printer USB memory key Content Data For each account Account number Account name Status How to Generate the Account List Report To generate the Account List Report 1 As supervisor see How to Log in as Supervisor on page 154 Press and select the path Account management Manage accounts Account report 2 Select an Output and then press OK 133 Page 133 Jan 13 2017...

Page 139: ...s to be Accounts or Accounts with Access Control You have to select an account in the list of accounts then the Begin date and the End date of the report Default period Begin 1st day of the current month End Current date Output Screen Content Comments Fields Period printed report only Meter Serial number Account number Account name Number of items processed zero non zero items Total postage value ...

Page 140: ... with Access Control You have to specify the period for the report Begin and End dates Default period Begin 1st day of current month End Current date Output Screen USB printer USB memory key Content Comments Fields Period On printed report only Meter Serial number If in the period some items were printed using a mode without accounts default ac count these items appear in the report un der the nam...

Page 141: ...e Status Activated Deactivated Active account assigned status if there is at least one active account assigned to the operator the value is Yes otherwise the value is No How to Generate the Operator List Report To generate the operator list report 1 As supervisor see How to Log in as Supervisor on page 154 Press and select the path Account management Manage operator Operator report 2 Select the Ou...

Page 142: ...ey Content Fields Meter Impression default settings Default Slogan Default Postage Rate Date advance parameters Postage funds settings High Value Low Funds Connections settings System settings including for example MMI settings language default home screen sleep mode timeout contrast Weighing settings Geo code Connection settings See also Generating a Report on page 124 137 Page 137 Jan 13 2017 10...

Page 143: ...B Key If you use screen to see this report Scroll the errors using the arrow keys and Press if you want to go back to the selection of the output Content Comments Fields Reference code of the base error BAS XX YYY XX is a 2 digit number YYY is a 3 digit number Code Date when error occurred Date Number of impression when this error occurred Cycles See also Generating a Report on page 124 138 Page 1...

Page 144: ...Content Comments Fields Reference code of the meter error PSD XX YYY XX is a 2 digit num ber YYY is a 3 digit number Code Date when error occurred Date Number of impression when this error occurred Cycles See also Generating a Report on page 124 IP Configuration Report Requirements To generate this report you must be logged in as Supervisor the mailing system must be connected to the network with ...

Page 145: ...ting a Report on page 124 Proxy Configuration Report Requirements To generate this report you must be logged in as a supervisor Output The Proxy Configuration report output is Label How to Generate a Proxy Configuration Report To generate a Proxy Configuration Report 1 See Generating a Report on page 124 140 Page 140 Jan 13 2017 10 45 6 Reports ...

Page 146: ...e your system s performance 7 1 E Services Overview 143 7 2 Connecting to E Services 144 How to Call E Services Manually as a User 144 How to Call E Services Manually as Supervisor 145 How to Test the Connection to E Services 146 7 3 Uploading Statistics 147 How to Upload Report Data to the E Services Server 147 7 4 E Services available on your System 148 141 Page 141 myEquipment E Services Jan 13...

Page 147: ......

Page 148: ...This information can be printed on labels or exported into other software programs for review and analysis Messages on Demand Neopost can send messages directly to your Mailing System console that will allow us to inform you if there is a problem with your system if we have a new program in place that will save you money etc All you have to do is open the message on your console when the message a...

Page 149: ...ed on in sleep mode and connected to a network during the night to allow the connection to the E Services Server to occur automatically Manual Calls Manual calls allow you to connect to the E Services Server in order to retrieve new information update postage rates slogan or messages or to enable features and options weigh platform capacity number of accounts differential weighing etc You can init...

Page 150: ...Mailing System Testing the Connection to E Services You may test the connection to the E Services server via the commands in the E Services menu Ping server Establishes a connection and checks whether the server answers to a ping command This test Validates connection parameters see Connection Settings on page 181 Indicates that the server can be contacted Test server Establishes a connection and ...

Page 151: ...e 154 Press and select the path E Services Ping server To test the server 1 As a user Press and select the path E Services Test server 2 Or as supervisor see How to Log in as Supervisor on page 154 Press and select the path E Services Test server The call process starts and displays its sequence of operations on the screen 146 Page 146 Jan 13 2017 10 45 7 myEquipment E Services ...

Page 152: ...ploads are initiated after the end of each month Your system uploads basic statistic data for basic postal expense management reporting Enhanced reporting is optional See Activating New Options on page 191 How to Upload Report Data to the E Services Server To upload report data 1 As a user Press and select the path E Services Standard Call 2 As supervisor see How to Log in as Supervisor on page 15...

Page 153: ...on your Ink Management Service please contact our Customer Service Centre Rate Protection Rate Protection ensures that the latest Canada Post postal rates are installed on your Mailing System When Canada Post announces changes to their rate and fee structure the E Services Server downloads the new rates into your Mailing System on a scheduled date at a scheduled time Your Mailing System will autom...

Page 154: ...ade the number of Accounts available on your system at anytime using E Services To upgrade the number of Accounts on your system please contact our Customer Service Centre 7 myEquipment E Services 149 Page 149 Jan 13 2017 10 45 ...

Page 155: ......

Page 156: ... Enable Disable Sounds 158 How to Change the Default Sound Settings 158 8 5 Display Settings 159 How to Adjust the Display Contrast 159 How to Change the Default Contrast Setting 159 8 6 System Time outs and Settings 161 How to Adjust the Time outs 162 How to Change System Time Outs 163 8 7 High Value Low Funds Warnings and PIN Codes 164 How to Set the High Value Warning Amount 164 How to Set the ...

Page 157: ...e the Default Permit Impression 175 How to Change the Default Slogans 175 How to Set the Automatic Date Advance Time 176 How to Set the Default Printing Offset 177 8 10 Impression Memories 178 How to Create an Impression Memory 179 How to Edit Modify an Impression Memory 179 How to Delete an Impression Memory 180 8 11 Connection Settings 181 How to Set the Postage E Services Connection 181 How to ...

Page 158: ...lerts and Error Alerts Supervisor Settings Your Mailing System has one supervisor PIN code that allows you to configure the default settings and perform other functions such as managing accounts and access rights generating certain reports etc The Supervisor PIN code of the system has been provided to your organization in a separate distribution The supervisor settings allow you to Change the defa...

Page 159: ...logged in as supervisor only the supervisor menu is available Printing postage is not possible while logged in as supervisor How to Log in as Supervisor To log in as Supervisor when you are already logged in as a user 1 As a user Press and select the path Supervisor The Login screen is displayed 2 Type the supervisor PIN code and press OK The supervisor Main menu is displayed 154 Page 154 Jan 13 2...

Page 160: ...p Exiting the Supervisor Mode Follow the step below to exit the supervisor mode You must exit the supervisor Mode before you can begin to print postage How to Exit the Supervisor Mode To exit the supervisor mode 1 As supervisor Press The system will go into Sleep mode and supervisor is logged out 8 Configuring your Mailing System 155 Page 155 Jan 13 2017 10 45 ...

Page 161: ...As a user Press and select the path User Preferences Language 2 Select the language you want to use 3 Press OK to validate This is a User Setting that will only be active as long as you are logged in as a User Once you log out the Default Language Setting will be re activated Setting the Default Language You can set the Default Language of your Mailing System by completing the instructions outline...

Page 162: ... see How to Log in as Supervisor on page 154 Press and select the path Default User Settings Default User Pref erences Language 2 Select the default language 3 Press OK to validate This setting will not be affected by the standby mode 8 Configuring your Mailing System 157 Page 157 Jan 13 2017 10 45 ...

Page 163: ...l only be active as long as you are logged in as a User Once you log out the Default Sound Settings will be re activated Setting Default Sounds You can set the default sound state for user sessions How to Change the Default Sound Settings To change your Default Sound Settings 1 As supervisor see How to Log in as Supervisor on page 154 Press and select the path Default user settings Default user pr...

Page 164: ...e logged in As a User once you log out the Default Display Setting will be reactivated Setting Default Display Contrast To change the Default Contrast Setting of your screen follow the instructions outlined below How to Change the Default Contrast Setting To set the default contrast 1 As supervisor see How to Log in as Supervisor on page 154 Press and select the path Default user settings Default ...

Page 165: ...Do not press OK if the screen contrast is completely light or dark Readjust the contrast so the screen is visible then press OK 160 Page 160 Jan 13 2017 10 45 8 Configuring your Mailing System ...

Page 166: ...feed rollers will stop Start The period of time the system waits for the next envelope to the mail path after printing Once this time out is reached the system will stop Stop The period of time the system waits for an interaction with a User before automatically switching to Sleep Mode see Power Management on page 20 Sleep You can set a long Stop time out to have time to allow for reloading before...

Page 167: ... screen is displayed 2 Select each field and specify the length of each the time out Use C to clear digits 3 Press OK to exit This is a User Setting that will only be active as long as you are logged in as a User Once you log out the Default Time Out Settings will be re activated 162 Page 162 Jan 13 2017 10 45 8 Configuring your Mailing System ...

Page 168: ...sor on page 154 Press and select the path Default user settings Time out settings The Timeout setting screen is displayed 2 Select each field and specify the length of each the time out Use the C key to clear old settings then enter a new value 3 Press OK to validate 8 Configuring your Mailing System 163 Page 163 Jan 13 2017 10 45 ...

Page 169: ...can also warn you that the available funds remaining in your Postage Meter is getting low Low Funds Threshold This warning prevents you from running out of postage before or during a Job Run How to Set the High Value Warning Amount To set a high value warning amount 1 As supervisor see How to Log in as Supervisor on page 154 Press and select the path Default user settings System settings High Valu...

Page 170: ...ystem to ask for a security PIN Code for your Accounts in order to start a job run This allows you to restrict the usage of your funds See Postage Funds Management on page 85 How to Set Cancel a Postage Account PIN Code To set a Postage Account PIN code 1 As supervisor see How to Log in as Supervisor on page 154 Press and select the path Default user settings Funds settings 2 Press the arrow to th...

Page 171: ... This setting defines both the Weighing Device and the Weighing Mode that are automatically activated by your system each time a User begins to set up a Job Run see Choosing a Weighing Mode on page 72 How to Change the Default Weighing Mode To change the default weighing mode 1 As supervisor see How to Log in as Supervisor on page 154 Press and select the path Default User Settings System Settings...

Page 172: ...g in as the Supervisor see How to Log in as Supervisor on page 154 then Press and select the path Default User Settings System Settings Auto Weight Detection ON 2 Select Auto Weight Detection ON to activate the function 3 Press OK to validate How to De activate the Automatic Weight Detection on the WP To de activate the automatic weight detection on the WP 1 Log in as the Supervisor see How to Log...

Page 173: ...e Weighing Platform as a user 1 As a user Press and select the path System Settings Zero Weigh Platform 2 Remove all items from the Weighing Platform 3 Press OK to set to zero the Weighing Platform 4 Press OK when Weigh Platform zeroing complete How to Tare the Weighing Platform as a User To tare the Weighing Platform as a user 1 As a user Press and select the path System Settings Tare Weigh Platf...

Page 174: ...ervisor see How to Log in as Supervisor on page 154 Press and select the path System Settings Weighing Modes Tare Weigh Platform 2 Press OK to tare the Weighing Platform Shipping Application Shipping Application is a PC Application that communicates to the Mailing System to transfer the weight value When the Shipping application mode is activated the weight value is communicated by the Mailing Sys...

Page 175: ...ping application mode or Deactivated to deactivate this mode 3 Click OK to validate your selection How to set the Shipping Application connection To set the shipping application connection 1 As supervisor see How to Log in as Supervisor on page 154 Press and select the path Maintenance Advanced network setting Shipping application advanced setting The Shipping Application advanced setting screen i...

Page 176: ...teps below Changing the GEO code modifies the weight values the Mailing System calculates Make sure you enter the correct GEO Code to ensure your weights are accurate How to Change the GEO Code To change the GEO code 1 As supervisor see How to Log in as Supervisor on page 154 Press and select the path System Settings Accessories Settings Geocode 2 See the map and table on the next pages to get the...

Page 177: ...Geodesic 172 Page 172 Jan 13 2017 10 45 8 Configuring your Mailing System ...

Page 178: ...Geodesic codes 8 Configuring your Mailing System 173 Page 173 Jan 13 2017 10 45 ...

Page 179: ... You can set default parameters for the impression elements that follow The Default Postage Rate The Default Permit Impression The Default Slogan On list screens a mark indicates the default parameter Changing the Default Postage Rate This setting defines the Postage Rate that is automatically activated by your system each time a User begins to set up a Job Run How to Change the Default Postage Ra...

Page 180: ...on in the list 3 Press OK to validate the change See also To manage the Permit Impression see Managing Permit Impressions on page 197 To change the current Permit Impression see How to Select a Permit Impression on page 71 Changing the Default Slogans How to Change the Default Slogans To change the default Slogans 1 As supervisor see How to Log in as Supervisor on page 154 Press and select the pat...

Page 181: ...urs to Sunday 23 59 the system will print Monday s date on the envelopes after a confirmation message to the user How to Set the Automatic Date Advance Time To set the auto date advance time and days 1 As supervisor see How to Log in as Supervisor on page 154 Press and select the path Default user settings Default Impression Settings Automatic Date Advance The Automatic date advance configuration ...

Page 182: ...unded edges You can increase the distance by about 5 mm 13 64 or 10 mm 25 64 How to Set the Default Printing Offset To change the default printing offset 1 As supervisor see How to Log in as Supervisor on page 154 Press and select the path Default User Settings System Settings Print Offset 2 Set the default print offset from a position list 3 Press OK to validate 8 Configuring your Mailing System ...

Page 183: ...ified by a name and a number The system displays on the home screen the name of the current Impression Memory Standard Impression Memory The table below gives the content of a Standard impression memory Slogan Left Slogan Right Postage Rate Impression settings Account number if activated Account setting Permit Impression Memory The table below gives the content of a Permit Mail impression memory S...

Page 184: ...t of parameters if any 7 Repeat the previous step until the system displays the name of the new impression memory in the list 8 You can modify any option by using the Edit Del function see How to Edit Modify an Impression Memory on page 179 How to Edit Modify an Impression Memory To edit or modify an impression memory 1 As supervisor see How to Log in as Supervisor on page 154 Press and select the...

Page 185: ...n as Supervisor on page 154 Press and select the path Impression Memory 2 Select an impression memory from the list of saved impression memories 3 Press OK to validate 4 Select the menu path Delete 5 Press OK to confirm to delete the impression memory 180 Page 180 Jan 13 2017 10 45 8 Configuring your Mailing System ...

Page 186: ...l of connections on page 19 How to Set the Postage E Services Connection To set the Postage Online Services connection 1 As supervisor see How to Log in as Supervisor on page 154 Press and select the path Communication Settings Type of Connec tion The Server Access screen is displayed If you did not have the LAN cable plugged into the system you will get a warning message Please follow the message...

Page 187: ...the LAN preferences 1 As supervisor see How to Log in as Supervisor on page 154 Press and select the path Communication settings LAN settings The LAN configuration menu is displayed 2 Select DHCP ON DNS AUTO ON HALF DUPLEX and press OK four times for a standard LAN configuration 182 Page 182 Jan 13 2017 10 45 8 Configuring your Mailing System ...

Page 188: ... To check the time and date make sure the connection to the Postal Server is available See How to Set the Postal E Services Connection on page 181 How to Check Adjust the System Time and Date To check adjust the current time and date 1 As supervisor see How to Log in as Supervisor on page 154 Press and select the path System settings Date and time If you are processing postage at the time when the...

Page 189: ......

Page 190: ...ages as Supervisor 189 9 3 Managing Options 190 How to Display the Options 190 How to Load New Options 191 9 4 Managing Slogans 192 How to Display the List of Slogans 192 How to Modify or Delete a Slogan 193 How to Download New Slogans 194 9 5 Managing Postage Rates 195 How to Check your Rate File Updates 195 How to Download a New Rate File 196 9 6 Managing Permit Impressions 197 How to Display yo...

Page 191: ......

Page 192: ...custom Slogans To update your Mailing System s operating system see myEquipment E Services on page 141 The operations above are available through the supervisor menu Options and Updates How to Access the Options and Updates Menu 1 As supervisor see How to Log in as Supervisor on page 154 Press and select the path Options and Updates The Options and Updates menu is displayed 187 Page 187 Jan 13 201...

Page 193: ...ages How to Read Messages as a User 1 As a user Press and select the path Mailbox The Mailbox screen is displayed 2 Select the message to read and press OK 3 Select Delete message to erase the message after you have read it How to Read Messages as Supervisor 1 As supervisor see How to Log in as Supervisor on page 154 Press and select the path Mailbox The Mailbox screen is displayed 2 Select the me...

Page 194: ...nd press OK 3 Select Delete to erase the message How to Delete Messages as Supervisor 1 As supervisor see How to Log in as Supervisor on page 154 Press and select the path Mailbox The Mailbox screen is displayed 2 Select the message to be deleted and press OK 3 Select Delete to erase the message 9 Options and Updates 189 Page 189 Jan 13 2017 10 45 ...

Page 195: ...ns you can add to your Mailing System please contact our Customer Service Centre or your authorized Neopost Dealer How to Display the Options To display the option list 1 As supervisor see How to Log in as Supervisor on page 154 either Press and select the path Options and Updates Option List The Options list screen is displayed 2 To display the details of an option select the option and press OK ...

Page 196: ...ad New Options To activate an option that is ready for downloading on the E Services server 1 Check that your Mailing System is connected to a network see Connections on page 18 and that the connection is properly configured see Connection Settings on page 181 2 Select Check for updates It will trigger a call to the E Services server 3 After the call you can display installed options See How to Di...

Page 197: ...er See How to Load New Options on page 191 Displaying the List of Slogans The list of slogans displays all slogans that are installed in the Mailing System and indicates with a check mark the active slogan See also How to Change the Default Slogan on page 175 How to Display the List of Slogans To display the list of slogans 1 As supervisor see How to Log in as Supervisor on page 154 Press and sele...

Page 198: ... 2 Select the slogan and press OK The Slogan setting menu is displayed To change the name of the slogan 1 Select Edit 2 Change the slogan name using the keypad and press OK The system updates the slogan list To delete the slogan 1 Select Delete The system asks for a confirmation 2 Press OK to confirm deletion The system updates the slogan list Downloading New Slogans The procedure below allows you...

Page 199: ...ans 1 Display the list of slogans see How to Display the List of Slogans on page 192 2 Select Check for updates The Mailing System connects to the E Services server and downloads available slogans 194 Page 194 Jan 13 2017 10 45 9 Options and Updates ...

Page 200: ...playing Postage Rates Files The Rate File List displays all Postage Rate Files that are currently installed on your Mailing System Any Rate File appearing with a check mark is the active Rate File that contains the Postage Rates you are currently using to calculate your postage amounts Rate files will automatically become active on their effective date How to Check your Rate File Updates To displa...

Page 201: ...le How to Download a New Rate File To download new Rate File 1 Display the Rate File List see How to Check your Rate File Updates on page 195 above 2 Select Check for updates The Mailing System connects to the E Services server and downloads available Rate Files 196 Page 196 Jan 13 2017 10 45 9 Options and Updates ...

Page 202: ...st The Permit Impressions List displays all Permit Impressions that are currently installed on your Mailing System Any Permit Impression appearing with a check mark is your Default Permit Impression How to Display your Permit Impressions List To display the Permit Impressions List 1 As supervisor see How to Log in as Supervisor on page 154 Press and select the path Options and updates Update Permi...

Page 203: ... the memory device to an USB port of the base on your left hand side at the rear of the base see Connectors on page 18 3 Press OK The USB memory key content is displayed 4 Select a Permit Impression to load into the system and press OK The Permit Impression list is updated with the new Permit Impression To delete a Permit Impression 1 Select the Permit Impression to delete and press OK 2 Confirm d...

Page 204: ...n the Print Heads Automatically as Supervisor 206 How to Remove the Ink Cartridge 206 How to Clean the Print Heads Manually 207 How to Change the Ink Cartridge 208 10 2 Filling and Adjusting the Feeder Sealer 211 How to Fill the Sealer Bottle 211 How to Adjust the Sealing Fluid Flow 212 10 3 Cleaning the Mail Path 213 How to Clean the Brushes and Sponge Sealer 213 How to Clean the Feeder Belts and...

Page 205: ......

Page 206: ...ads manually if the automatic cleaning is not sufficient The ink cartridge contains two print heads that must be aligned if lines appear offset in the impression If you observe poor print quality streaked too light blurred etc see Cleaning the Print Heads on page 205 Ink Cartridge Maintenance This section explains how to Check the ink level in the cartridge Align the print heads Do an automatic cl...

Page 207: ...k the Best before date on the cartridge box The warranty on the Cartridge has expired once the best before date is reached How to Display Ink Level and Cartridge Data as a User To display the ink cartridge data 1 As a user Press and select the path Ink Cartridge Ink Cartridge information The Ink Cartridge Information screen is displayed 202 Page 202 Jan 13 2017 10 45 10 Maintaining your Mailing Sy...

Page 208: ...vel and the Cartridge Data 1 As supervisor see How to Log in as Supervisor on page 154 Press and select the path Maintenance Ink Cartridge Ink Cartridge Information The Ink Cartridge Information screen is displayed 10 Maintaining your Mailing System 203 Page 203 Jan 13 2017 10 45 ...

Page 209: ...cartridge change How to Align the Print Heads To align the print heads 1 As supervisor see How to Log in as Supervisor on page 154 Press and select the path Maintenance Ink Cartridge Cartridge Alignment The Cartridge Alignment screen is displayed 2 Press OK and put a piece of paper in the mail transport The system prints a test pattern 204 Page 204 Jan 13 2017 10 45 10 Maintaining your Mailing Sys...

Page 210: ...Cleaning the Print Heads If your Meter Impressions do not look sharp and clear clean the Print head to restore your print quality How to Clean the Print Heads Automatically as a User To clean the print heads automatically 1 As a user Press and select the path Ink Cartridge Cleaning Process The cleaning starts automatically 10 Maintaining your Mailing System 205 Page 205 Jan 13 2017 10 45 ...

Page 211: ...follow the procedure below How to Remove the Ink Cartridge 1 As supervisor see How to Log in as Supervisor on page 154 Press and select the path Maintenance Ink Cartridge Remove Cartridge 2 Open the top cover and remove the ink cartridge see How to Change the Ink Cartridge on page 208 3 Press OK twice to start the carriage motor 4 Check the cartridge and clean if neccesary then press OK 5 Re insta...

Page 212: ... 1 Open the top cover 2 Remove the ink cartridge see How to Change the Ink Cartridge on page 208 3 Clean the heads with a soft damp cloth 4 Put the cartridge back in place Close the base cover Changing the Ink Cartridge The Power cord must be plugged in to move the cartridge into the replacement position 10 Maintaining your Mailing System 207 Page 207 Jan 13 2017 10 45 ...

Page 213: ...e replacement position Keep fingers away from the ink cartridge while it is moving to the replacement position 2 Press down on the indent on top of the ink cartridge to disengage it 3 Lift out the old ink cartridge 208 Page 208 Jan 13 2017 10 45 10 Maintaining your Mailing System ...

Page 214: ...4 Remove the two plastic caps on the new ink cartridge The caps are removed 5 Remove the protective strips from the new ink cartridge 10 Maintaining your Mailing System 209 Page 209 Jan 13 2017 10 45 ...

Page 215: ...ew ink cartridge and then push it forward until you hear the click 7 Close the cover The alignment process of the printing heads starts automatically 210 Page 210 Jan 13 2017 10 45 10 Maintaining your Mailing System ...

Page 216: ...t of sealing fluid during a job run the system will continue to process your items but your envelopes will not be sealed properly How to Fill the Sealer Bottle To add water or sealing solution to the bottle 1 Remove the bottle from its base and turn it over 2 Unscrew the cap and fill the bottle with fluid 3 Screw the cap back and put the bottle back into place 211 Page 211 Jan 13 2017 10 45 10 Mai...

Page 217: ...aler on page 213 How to Adjust the Sealing Fluid Flow To adjust the sealing fluid flow 1 To adjust the sealing fluid flow When standing in front of the feeder Push the lever towards the left hand side to increase the fuild level Push the lever towards the right hand side to decrease the fluid level 212 Page 212 Jan 13 2017 10 45 10 Maintaining your Mailing System ...

Page 218: ...rushes and Sponge of the Sealer MAKE SUREYOUR SYSTEM IS DISCONNECTED FROM POWER SOURCE BEFORE CLEANING How to Clean the Brushes and Sponge Sealer To clean the brushes and sponge of the feeder 1 Open the feeder and push the left of the upper blue release lever to raise the upper drive assembly 2 Pull up the brush release lever 213 Page 213 Jan 13 2017 10 45 10 Maintaining your Mailing System ...

Page 219: ...ember its direction 5 Clean the sponge and the brush 6 Re install the sponge and retainer 7 Put the brush back and push the release lever back down until it snaps into place 8 Push down on the upper drive assembly until it locks back into position 214 Page 214 Jan 13 2017 10 45 10 Maintaining your Mailing System ...

Page 220: ...y 2 Clean the belts and or rollers with a damp cloth or 70 alcohol on a cotton applicator 3 Push down the upper drive assembly until it locks back into position and close the feeder cover Cleaning Mail Path Sensors The sensors are light sensitive devices successively covered by the envelopes during their travel along the mail path Clean the mail path sensors as indicated below on system base and f...

Page 221: ...ath Sensors To clean the mail path sensors 1 Use a damp cloth or 70 alcohol on a cotton applicator 2 Allow the parts to dry and close all covers and assemblies 216 Page 216 Jan 13 2017 10 45 10 Maintaining your Mailing System ...

Page 222: ... the base from service Prepares the base for removal by saving data on USB key 3 Withdraw a Meter Remove Postage Meter from service 4 Update Registration This procedure is used if you have changed your postal code Contact your Customer Service to change your information then you will be instructed to perform the update registration procedure Running the Installation Wizard This type of call should...

Page 223: ... the installation process and return to the supervisor main menu Additional information After installing your Mailing System you will want to add funds to the Postage Meter so you can begin to process mail See Adding Funds on page 90 Performing the Update Registration Procedure to Change your Postal Code This procedure is to be used if you have changed your postal code First contact Customer Servi...

Page 224: ...tion message is displayed 2 Press OK 3 Select Update registration 4 Press Continue twice to start the Update Registration Process A message Transaction completed is displayed 5 Press OK twice 6 Enter the Geocode Please refer to the User guide for the code values 7 Press OK The registration update process is finished 8 Press Finish to return to the supervisor main menu 9 Check printed postal code t...

Page 225: ......

Page 226: ...Mail Jammed in the Auto Feeder 225 11 2 Label Jamming 227 How to Clear a Label Jammed in the Base 227 11 3 Weighing Problems 228 11 4 Diagnostics and System Data 230 How to Access Diagnostic Data 231 How to Display Software Data 231 How to Display Hardware Data 232 How to Display the Event Lists 232 How to Display the System Counters 233 221 Page 221 Troubleshooting Jan 13 2017 10 45 ...

Page 227: ......

Page 228: ...der on page 35 Mailpiece is too thick Mail size is incorrect Envelopes are not properly stacked on the feeder platform How to Clear Mail Jammed in the Base To clear mail jammed in the Base 1 Pull the release handle located underneath the base to lower the transport belts and wheels Hold the handle 2 Using your other hand remove the jammed envelopes 3 Release the jam release handle to put the trans...

Page 229: ...em is too thick Mail size is incorrect Too many envelopes are on the feed deck Envelopes are not properly inserted onto the feed deck Actions Possible causes 1 Feed sealed envelopes with sealing OFF 2 Check that sealed envelopes are prop erly sealed at the leading edge Partially sealed envelopes will jam Sealing is ON while feeding sealed envelopes The mail transport path should be regularly clean...

Page 230: ...he mail path guides and rollers On a feeder with sealer push down on the blue handle then lift up the drive assembly 3 If necessary pull up the brush release lever and remove the brush assembly 4 Remove jammed envelopes 5 If applicable reinstall the brush assembly and push the release lever until it snaps into place 11 Troubleshooting 225 Page 225 Jan 13 2017 10 45 ...

Page 231: ...6 On model with sealer push down the upper drive assembly to lock it 7 Close the cover 226 Page 226 Jan 13 2017 10 45 11 Troubleshooting ...

Page 232: ... Base To clear a label jammed in the Base 1 Remove all labels from the dispenser Check that there is not label stuck in the bottom of the dispenser 2 Pull the release handle located underneath the base to lower the transport belts and wheels Hold the handle 3 Using your other hand remove the jammed label 4 Release the jam release handle to put the transport belt and wheels back into position 227 P...

Page 233: ...he scale Clear the weighing zone and re zero the Weighing Platform see Weighing Settings on page 166 Something is touching or laying on the Weighing Platform See the weighing platform zeroing procedures in Weighing Settings on page 166 The Weighing Platform zero is not correct 1 Press OK to clear the error message 2 Press the Rate key and select a rate class that can accommodate the weight of the ...

Page 234: ...To avoid weighing errors make sure the weighing platform is clear when starting the system 11 Troubleshooting 229 Page 229 Jan 13 2017 10 45 ...

Page 235: ... gain access to all the diagnostic data listed below Comments Diagnostic No Sends a message to a server if connected to check the line Ping Server 1 Reports the status 0 or 1 of the sensors below Top doc Start print Cover Carriage Top Seal Sensors Status 2 Tests the feed motor and clutch Mixed Mail Feeder 3 The screen displays a test pattern Display 5 Displays Key ok if the test is correct Keypad ...

Page 236: ...to The Software Data Postage Meter Loader OS PACK XNDF DATA DELTA language variant The Hardware system Data P N of the base and the Postage Meter The list of the events occurred in the system Base events Postage Meter events and Server connection history The data of the system counters How to Display Software Data To display Software Data 1 As supervisor see How to Log in as Supervisor on page 154...

Page 237: ... see How to Log in as Supervisor on page 154 Press and select the path Maintenance System info Event list 2 Select the Base events list or the Postage Meter events list or Server connection history 3 Press OK to validate 4 The system displays the selected list in a table which includes The Code of the event The Date and time of the event The Cycles when the event occurred 5 Note the Code and refer...

Page 238: ... To display the counter data 1 As supervisor see How to Log in as Supervisor on page 154 Press and select the path Maintenance System info Counters 2 The system displays the counter data 11 Troubleshooting 233 Page 233 Jan 13 2017 10 45 ...

Page 239: ......

Page 240: ...tains the main specifications of your Mailing System 12 1 Mail Specifications 237 12 2 Recommended Operating Conditions 241 12 3 Technical Specifications 242 12 4 Operating Specifications 243 235 Page 235 Specifications Jan 13 2017 10 45 ...

Page 241: ......

Page 242: ...ications 12 1 Envelope Dimensions Your Mailing System can handle the envelope flap sizes as illustrated below note the illustration is not to scale Dimensions in mm 237 Page 237 Jan 13 2017 10 45 12 Specifications ...

Page 243: ...s also the minimum width for portrait mode This figure rises up to 160mm 6 19 64 for envelopes that have the maximum height 228mm 8 31 32 Envelope Weight 3 g 0 1 oz Min 907 g 2 lbs Max 238 Page 238 Jan 13 2017 10 45 12 Specifications ...

Page 244: ...er Envelope Stack 2 83 g 0 1 oz Min weight 907 g 2 lbs Max weight 10 cm 4 Max height The feeder cannot process nested envelopes EnvelopeThickness 12 7 mm 1 2 Max with the Sealer OFF 9 5 mm 3 8 Max with the Sealer ON 12 Specifications 239 Page 239 Jan 13 2017 10 45 ...

Page 245: ...Additional information See also How to Use the Feeder on page 35 240 Page 240 Jan 13 2017 10 45 12 Specifications ...

Page 246: ...perated in the following conditions Ambient temperature 10 C 40 C 50 F 104 F Temperature range 80 max without condensation Relative humidity Weighing accuracy To obtain the best weighing results use a solid and steady table Away from any doors Away from any fan 241 Page 241 Jan 13 2017 10 45 12 Specifications ...

Page 247: ...o Feeder with sealer 260 mm x 350 mm x 545 mm 10 15 64 x 13 25 32 x 21 29 64 Weight Base 10 kg 22 lb 0 7 oz Auto Feeder 6 5 kg 14 lb 5 oz Auto Feeder with sealer 8 3 kg 18 lb 4 7 oz Catch tray 1 2 kg 2 lb 10 3 oz Power Frequency 60 Hz Current full configuration 2 5 A Power supply 110 V 6 10 3 wire grounded circuit up to standard NFC15 100 242 Page 242 Jan 13 2017 10 45 12 Specifications ...

Page 248: ...N 9 52 mm 3 8 Max Thickness Manual Feed 10 mm 25 64 Stack of Envelopes Auto Feeder max 102 mm 4 high Min Weight 2 85 g 0 1 oz Max Weight 1 2 kg 2 lb 10 3 oz Label dimensions pre cut and self adhesive Max width 40 mm 1 37 64 Min length 150 mm 5 29 32 Labels must be longer to print slogans Label storage recommended room temperature 25 C 77 F and relative humidity 50 243 Page 243 Jan 13 2017 10 45 12...

Page 249: ...Accounts The number of accounts you can create is set to 35 by default and can be raised optionally to 500 Operators Number of Operators 50 244 Page 244 Jan 13 2017 10 45 12 Specifications ...

Page 250: ... 112 113 116 119 121 128 143 144 145 147 149 151 153 154 156 158 159 161 164 165 168 169 174 175 176 177 181 183 185 187 190 191 192 198 202 207 218 228 237 cartridge 204 Cartridge 202 Catch tray 242 Catch Tray 11 12 Changing Accounts 3 Control Panel 11 12 15 25 88 counter 15 26 34 62 82 126 127 Counter 26 34 121 126 Cover 13 230 credit 90 D date 15 26 62 76 126 127 128 129 130 131 132 134 135 148...

Page 251: ...3 Menu 16 25 messages 15 188 Messages 143 meter 16 48 76 92 139 143 Meter 15 16 23 25 26 29 37 46 51 55 59 62 65 76 87 90 121 126 128 129 131 132 134 135 137 177 205 217 218 231 monitor 103 N normal 7 131 O off 26 OFF 21 80 224 239 Online Services 143 181 operator 114 115 117 136 Operator 96 102 103 113 114 121 136 option list 190 P permit mail 121 130 Permit mail 26 130 Permit Mail 46 71 121 178 ...

Page 252: ...113 121 128 129 131 132 133 134 135 137 153 154 155 171 178 183 187 192 197 217 Supervisor 121 139 153 230 231 SUPERVISOR 4 System Base 11 12 T Tare 168 task 3 29 Task 29 33 text 111 Thickness 243 time 4 7 20 25 29 92 102 136 143 153 161 174 175 183 217 Time 20 183 type of impression 62 71 Type of impression 55 62 76 Type of Impression 65 W weighing mode 16 74 166 167 228 Weighing mode 72 Weighing...

Page 253: ... Index Page 248 Jan 13 2017 10 45 A0079314 C 13 01 2020 ...

Page 254: ...A0079314 C 13 01 2020 ...

Reviews: