Chapter 4
Creative Cutter Tutorials
74
Creative Cutter MINI
Step 4: Continue Tracing and Refine
1
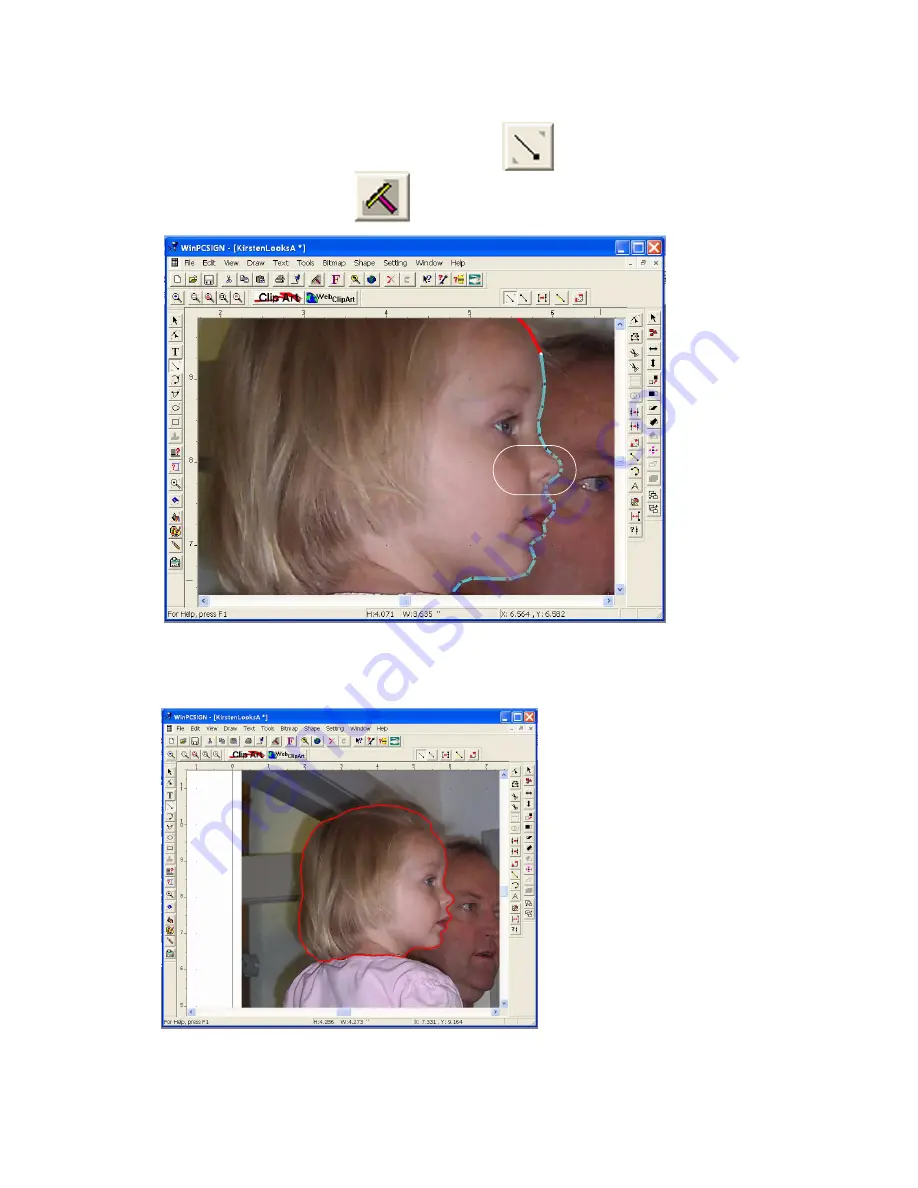
Create smaller segments around tight areas,
as shown in figure 117.
2
Click the
Redraw
tool
to turn the line color to red (or whatever color you have
chosen).
Figure 117
3
Continue tracing around the picture until you reach the starting point. The ending and
beginning points should connect automatically. See figure 118.
Figure 118
Summary of Contents for Mini Creative Cutter
Page 1: ...Pazzles Creative Cutter Mini User Guide www pazzles com...
Page 24: ...Chapter 2 Installation and Setup 16 Creative Cutter MINI Blade Positioning Guide Figure 15...
Page 38: ...Chapter 3 Basic Procedures for Using the Mini Creative Cutter 30 Creative Cutter MINI...
Page 88: ...Chapter 4 Creative Cutter Tutorials 80 Creative Cutter MINI...
Page 111: ...Chapter 5 Manipulating Letters and Shapes Creative Cutter MINI 103 Figure 149...
Page 112: ...Chapter 5 Manipulating Letters and Shapes 104 Creative Cutter MINI...
Page 124: ...Chapter 6 Working With Graphics 116 Creative Cutter MINI...
Page 133: ...Chapter 7 Specialized Cutting and Finishing Techniques Creative Cutter MINI 125...
Page 134: ...Chapter 7 Specialized Cutting and Finishing Techniques 126 Creative Cutter MINI...
Page 140: ...Chapter 8 Troubleshooting Guide 132 Creative Cutter MINI...


