


Chapter 4
Creative Cutter Tutorials
Creative Cutter MINI
73
Step 3: Begin Tracing the Picture
1
Click the
Magnify
tool and use it to enlarge a section of the picture.
2
Click the
Segment from Path
tool.
3
Click on a starting point and hold the mouse button down as you drag the starting line. See
figure 115.
Figure 115
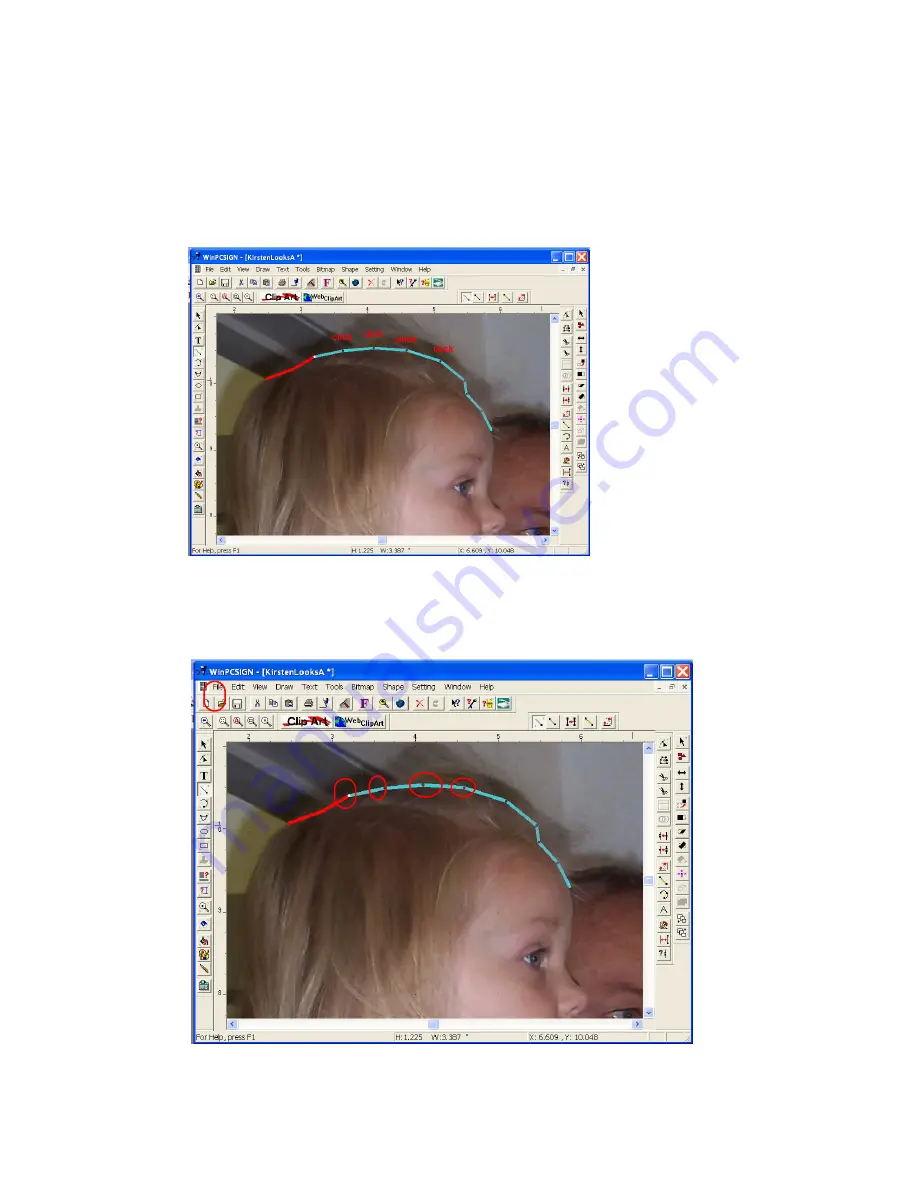
4
Continue tracing around the picture by clicking on a spot some distance away from your
first line. As you click along the outline of the picture, a line fills in between the points. See
figure 116.
Figure 116
Summary of Contents for Mini Creative Cutter
Page 1: ...Pazzles Creative Cutter Mini User Guide www pazzles com...
Page 24: ...Chapter 2 Installation and Setup 16 Creative Cutter MINI Blade Positioning Guide Figure 15...
Page 38: ...Chapter 3 Basic Procedures for Using the Mini Creative Cutter 30 Creative Cutter MINI...
Page 88: ...Chapter 4 Creative Cutter Tutorials 80 Creative Cutter MINI...
Page 111: ...Chapter 5 Manipulating Letters and Shapes Creative Cutter MINI 103 Figure 149...
Page 112: ...Chapter 5 Manipulating Letters and Shapes 104 Creative Cutter MINI...
Page 124: ...Chapter 6 Working With Graphics 116 Creative Cutter MINI...
Page 133: ...Chapter 7 Specialized Cutting and Finishing Techniques Creative Cutter MINI 125...
Page 134: ...Chapter 7 Specialized Cutting and Finishing Techniques 126 Creative Cutter MINI...
Page 140: ...Chapter 8 Troubleshooting Guide 132 Creative Cutter MINI...