Chapter 4
Creative Cutter Tutorials
46
Creative Cutter MINI
4
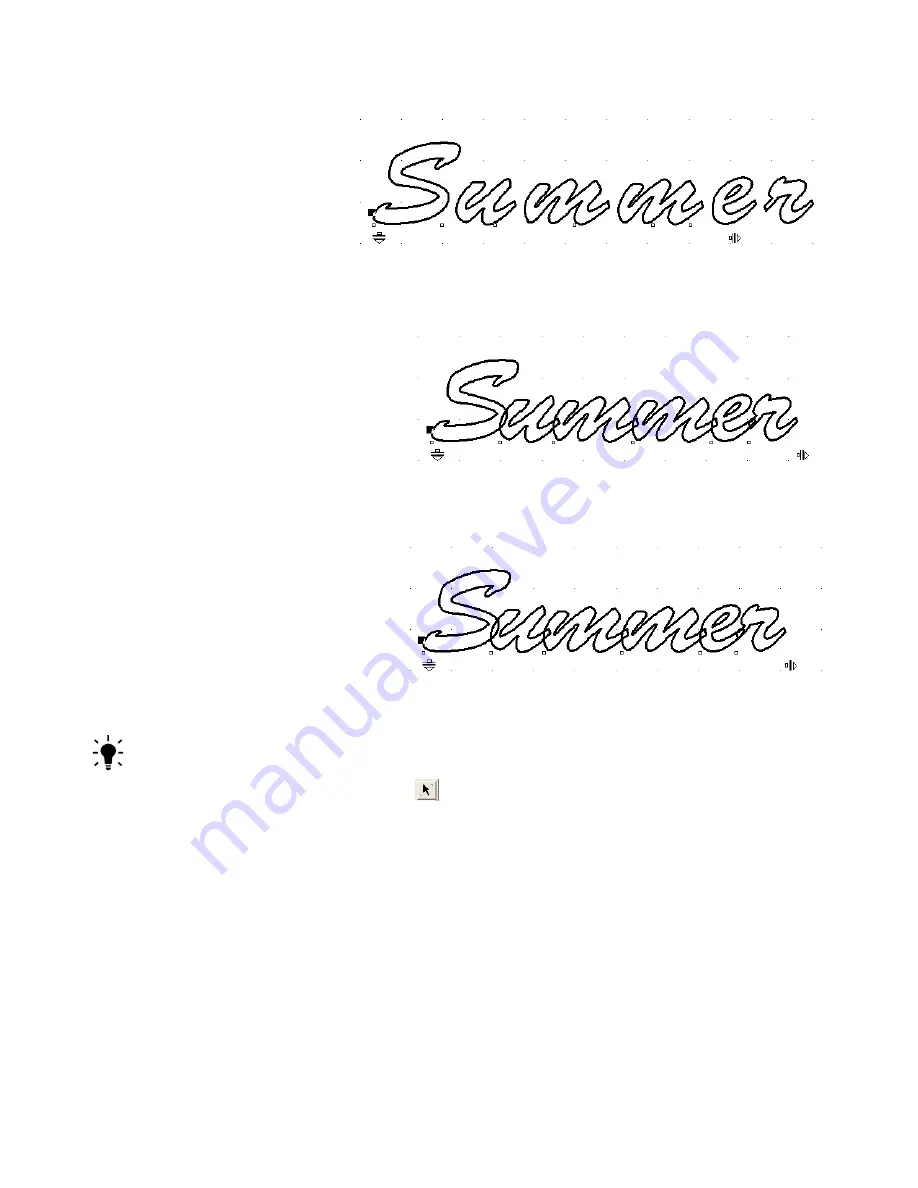
Click the arrow
pointing to the right.
Then, hold down the
mouse button and
drag the arrow to the
left. Watch how the
little boxes move as
you drag the arrow.
Figure 63
5
Release the mouse
button and watch as the
letters move to the location
represented by the little
boxes. See figure 64.
Figure 64
6
To weld the letters into
one complete word, the
letters must overlap as
shown in figure 65.
Continue to adjust your
word by moving the arrow
left or right until your word
looks like the one shown.
Figure 65
TIP:
You can adjust individual letters by selecting the box below a letter and moving it with
your mouse.
7
Click the
Select Elements
tool
and then click the word to select it.
Summary of Contents for Mini Creative Cutter
Page 1: ...Pazzles Creative Cutter Mini User Guide www pazzles com...
Page 24: ...Chapter 2 Installation and Setup 16 Creative Cutter MINI Blade Positioning Guide Figure 15...
Page 38: ...Chapter 3 Basic Procedures for Using the Mini Creative Cutter 30 Creative Cutter MINI...
Page 88: ...Chapter 4 Creative Cutter Tutorials 80 Creative Cutter MINI...
Page 111: ...Chapter 5 Manipulating Letters and Shapes Creative Cutter MINI 103 Figure 149...
Page 112: ...Chapter 5 Manipulating Letters and Shapes 104 Creative Cutter MINI...
Page 124: ...Chapter 6 Working With Graphics 116 Creative Cutter MINI...
Page 133: ...Chapter 7 Specialized Cutting and Finishing Techniques Creative Cutter MINI 125...
Page 134: ...Chapter 7 Specialized Cutting and Finishing Techniques 126 Creative Cutter MINI...
Page 140: ...Chapter 8 Troubleshooting Guide 132 Creative Cutter MINI...


