Chapter 2
Installation and Setup
12
Creative Cutter MINI
2
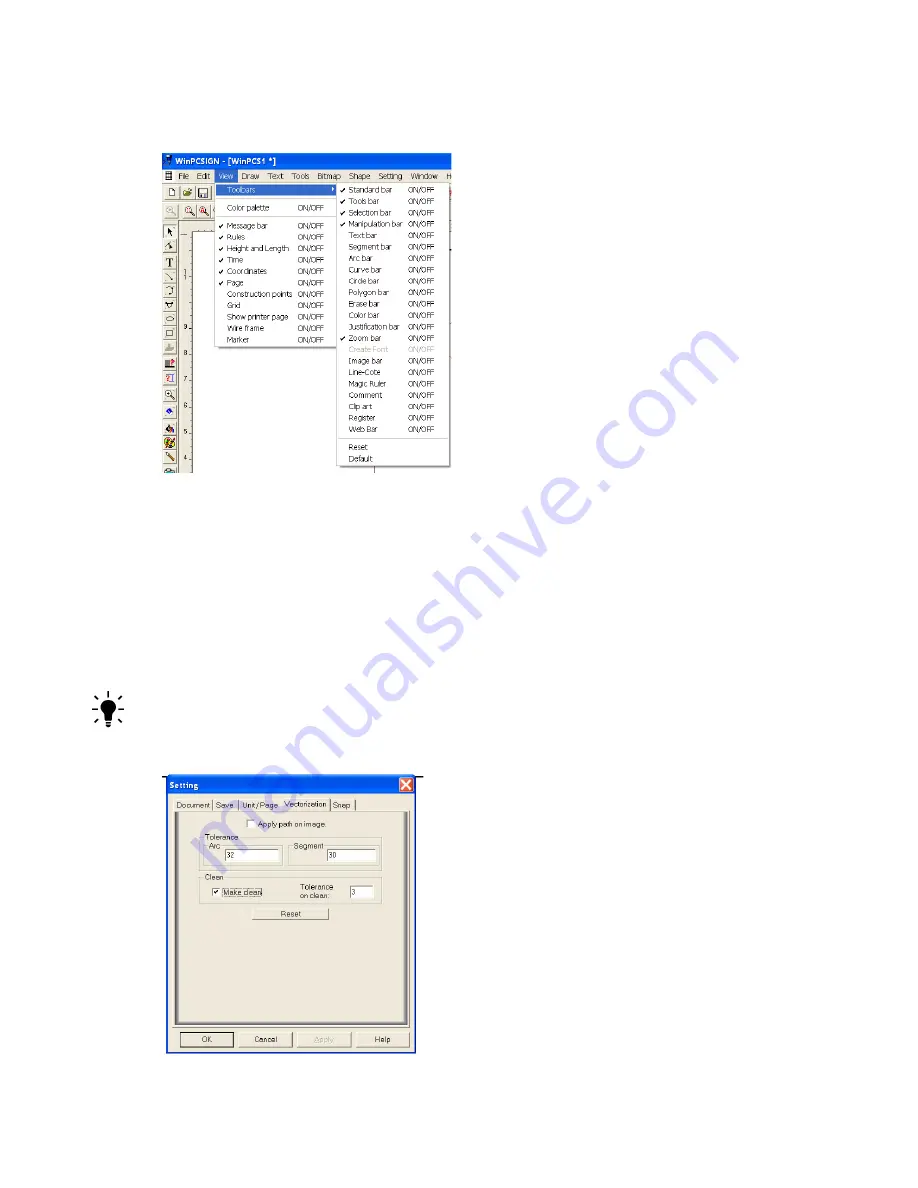
Click each of the following options to select them:
Standard bar, Tools bar, Selection
bar, Manipulation bar, Zoom bar.
The toolbars you select are marked with a checkmark.
Figure 11
3
From the
View
menu, click
Grid
to select it. Turning on
Grid
is helpful in placing images
by displaying small dots at 1-inch intervals on the Page screen.
4
Click the
Settings
menu, and then click
Grid
to open the
Setting
box.
5
In the
Setting
box, click the
Unit/Page
tab.
6
Under
Unit of measurement
, click
inches.
TIP:
You can change the
Toolbar
and
Grid
settings at any time.
7
Click the
Vectorization
tab, and then click the
Make Clean
box to check it.
Summary of Contents for Mini Creative Cutter
Page 1: ...Pazzles Creative Cutter Mini User Guide www pazzles com...
Page 24: ...Chapter 2 Installation and Setup 16 Creative Cutter MINI Blade Positioning Guide Figure 15...
Page 38: ...Chapter 3 Basic Procedures for Using the Mini Creative Cutter 30 Creative Cutter MINI...
Page 88: ...Chapter 4 Creative Cutter Tutorials 80 Creative Cutter MINI...
Page 111: ...Chapter 5 Manipulating Letters and Shapes Creative Cutter MINI 103 Figure 149...
Page 112: ...Chapter 5 Manipulating Letters and Shapes 104 Creative Cutter MINI...
Page 124: ...Chapter 6 Working With Graphics 116 Creative Cutter MINI...
Page 133: ...Chapter 7 Specialized Cutting and Finishing Techniques Creative Cutter MINI 125...
Page 134: ...Chapter 7 Specialized Cutting and Finishing Techniques 126 Creative Cutter MINI...
Page 140: ...Chapter 8 Troubleshooting Guide 132 Creative Cutter MINI...


