5.5 Programming a One-look Network
The Add Site Wizard, which is run from the Home Screen of the Master unit, will add other KX-NS series PBXs
connected to the private IP network to your One-look network as Slave units.
Notice
When using a One-look network, do not disable the PBX’s FTP server settings. For details, refer to
"28.2.2 Network Service—[2-2] Server Feature—FTP" in the PC Programming Manual.
Note
The PBX to be added must have been configured as a Slave unit using the Easy Setup Wizard.
For details about Easy Setup Wizard, see "5.4.1 Easy Setup Wizard".
1.
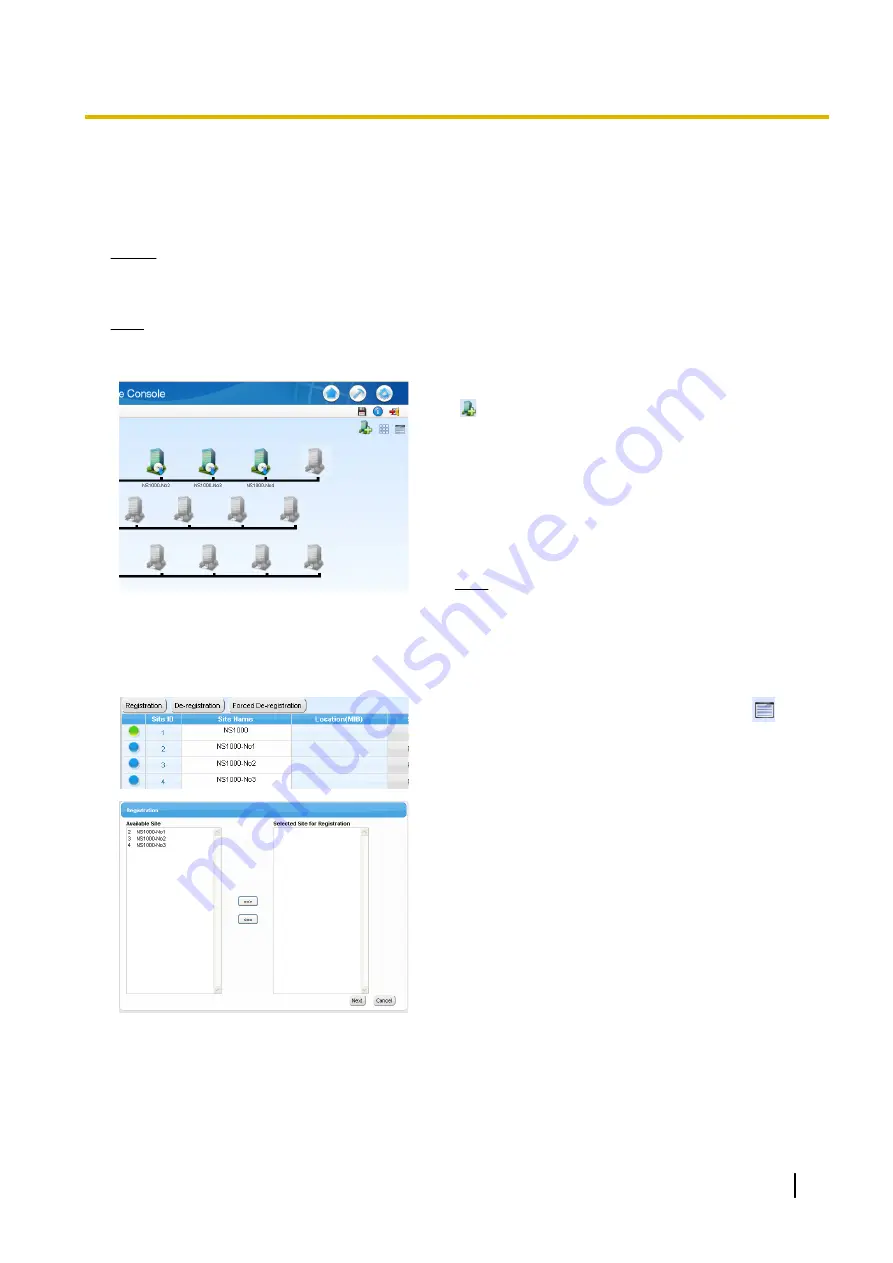
To start the Add Site Wizard, click the Add Slave button
( ) on the Home screen.
2
.
Follow the prompts of the Add Site Wizard to complete
following settings:
•
PBX Setting
•
WAN Setting
•
Registration Setting
•
SNTP / Daylight Saving
•
Maintenance Setting
Note
•
The parameters which appear in the settings
above are described in "5.4.1 Easy Setup
Wizard".
•
If 2 or more sites will be added to the One-look
network, repeat steps
1
to
2
for each site.
3
.
After the Add Site Wizard is completed, click
on the
Home screen, and then click
Registration
on the List
View.
4.
A list of KX-NS series PBXs set up as Slave units will be
displayed under
Available Site
.
Select PBXs by their assigned site names and click the
right arrow to move them to
Selected Site for
Registration
.
Click
Next
to start the registration process.
5.
On the
Registration
screen, the status of PBXs being
registered is displayed.
6.
On the
Registration
screen, the result of the registration
process is shown. Click
Close
to continue.
Registered Slave PBXs can now be viewed and selected on the Home Screen for programming.
MASTER LED Transition
When adding Slave units, the MASTER LED of each KX-NS1000 PBX changes as shown in the following table:
Installation Manual
229
5.5 Programming a One-look Network
Summary of Contents for KX-NS1000
Page 40: ...40 Installation Manual 1 4 Data Security ...
Page 76: ...76 Installation Manual 2 3 3 System Capacity ...
Page 108: ...108 Installation Manual 3 1 3 Using CTI Applications ...
Page 267: ...the priority Installation Manual 267 5 8 3 Setting LLDP Parameters ...
Page 312: ...312 Installation Manual 5 12 Automatic Configuration of Mailboxes ...
Page 318: ...318 Installation Manual 6 2 Methods of Stacking PBXs ...
Page 332: ...332 Installation Manual 7 1 6 Troubleshooting by Error Log ...
Page 400: ...400 Installation Manual 8 6 26 WAN Port Mirroring ...
Page 414: ...414 Installation Manual 9 3 7 PCMPR Software File Version 004 1xxxx ...


