background image

82

4. Select the desired transaction by pressing  

∧∧∧∧∧


or


∨∨∨∨∨

, or by typing the reference number on the

numeric keypad. You can now change the date/time of transmission (a) and/or the
correspondent's facsimile number (b):

a) Display the "DATE/TIME" field by pressing the 

<<<<<


or 


>>>>>

 key.

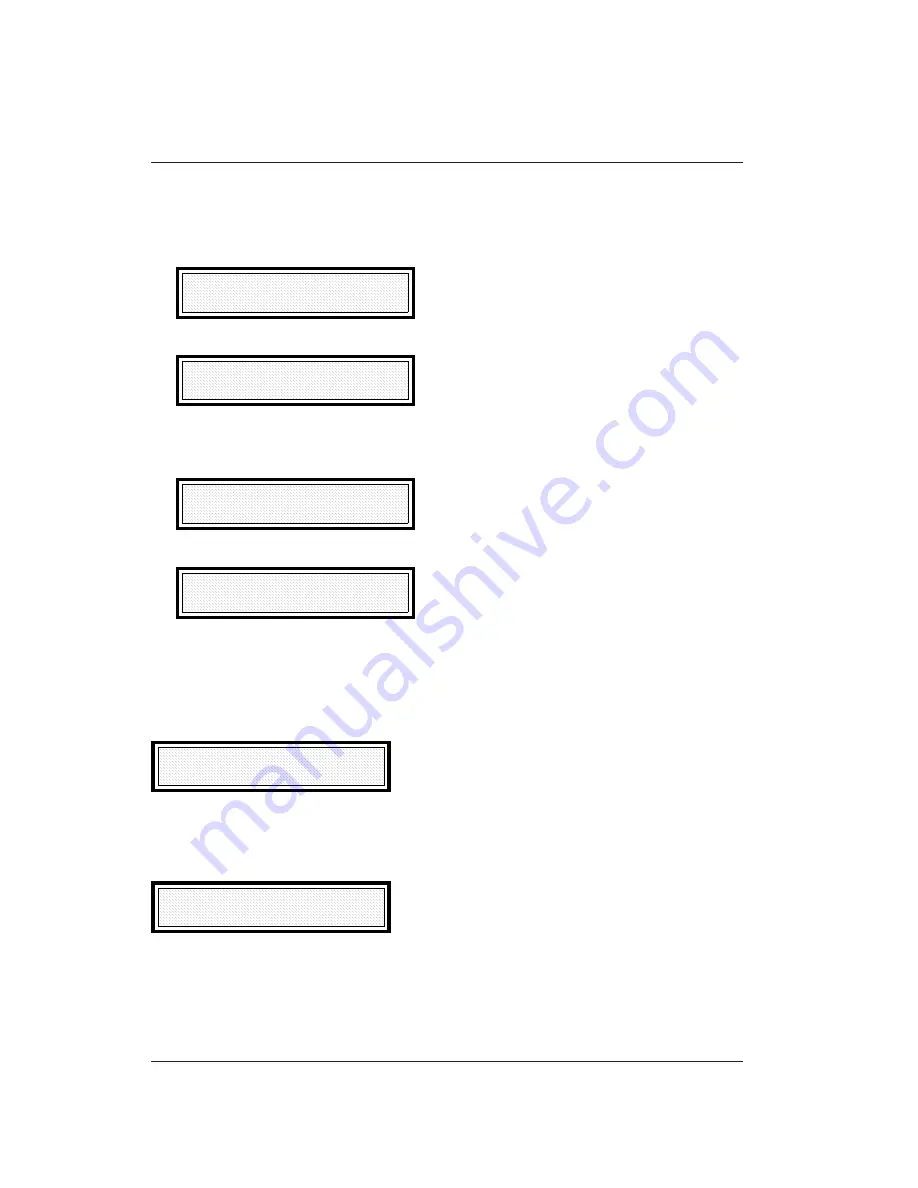
  BROADCAST DOC.R nnnn
  DATE/TIME:DD/MM  'YY  hh:mm

Press START.

  DELAYED TX
  ENTER TIME:         hh:mm

The display shows the current time. Change the transmission time, or accept the current time,
and confirm by pressing START.

b) Display the "NUMBER" field by pressing the  

<<<<<


or 


>>>>>

 key.

  BROADCAST DOC.R nnnn
  NUMBER:

Press START.

  BROADCAST TRANSMISSIONS
  NUMBER:

Change the correspondent's facsimile number and press START.

5. To exit from the menu, press STOP twice.

Display Messages (with LINE STATUS pressed - memory transmission)

  STORING COMPLETED
  PAGES :nn                 DOC.R:xxxx

The document has been stored for transmission. The display shows the number of pages in the
document and its reference number, which can be used for changing the transaction associated
with it.

  TRANSMITTING         P.nn 14.4 E

The facsimile machine is sending a document. The display shows the number of the page being
sent (P.nn), the transmission speed (expressed in thousands of bauds, 14.4, 9.6 or 4.8) and
whether or not Error Correction Mode (E) is enabled.

Summary of Contents for OFX 3200

Page 1: ...AcSIMILE 8 3 NSTRUCTIONS...

Page 2: ...ipment Conformity with the above basic requirements is certified by means of the Mark shown on the product The Mark was introduced in 1995 Your attention is drawn to the following actions that could c...

Page 3: ...erference in a residential installation This equipment generates uses and can radiate radio frequency energy and if not installed and used in accordance with the instructions may cause harmful interfe...

Page 4: ...t is necessary The telephone company may make changes in its facilities equipment operations or procedures that could affect the operation of the equipment If this happens the telephone company will p...

Page 5: ...safety requirements Industry Canada does not guarantee the equipment will operate to the user s satisfaction Before installing this equipment users should ensure that it is permissible to be connecte...

Page 6: ...self with the machine and gain confidence in learning the concepts terminology and procedures that will enable you to take full advantage of your machine s many features References to procedures are i...

Page 7: ...llation Parameters 12 Printing the Installation Parameters 12 Changing the Installation Parameters 12 Getting Started 17 Sending a Fax 17 Redialling Manually 17 Receiving a Fax 17 GETTING THE BEST FRO...

Page 8: ...ialling Keys 58 Programming Speed Dialling Codes 61 Printing Programmed Data 63 Clearing Programmed Data 64 Programming the program keys 65 Printing Programmed Data 68 Clearing Programmed Data 68 Mess...

Page 9: ...report 96 Displaying the report 98 Memory Management 99 Documents in the memory 99 Printing the List of Documents 99 Selecting a document 100 Clearing a document 100 Printing a document 100 Broadcast...

Page 10: ...ting Procedure 115 Routine Maintenance 116 Cleaning the Optical Reader 116 Manual Nozzle Testing Procedure 116 Cleaning the Electrical Contacts on the Print Head 118 Cleaning the Print Head Pad 119 Pu...

Page 11: ...INSTALLING YOUR FACSIMILE MACHINE AND GETTING STARTED QUICKLY...

Page 12: ...R The printing unit is based on bubble ink jet technology enhanced by resolution regulation text image separation and grey scale functions which make it an extremely reliable copying machine You can o...

Page 13: ...e machine and the other parts supplied with it on a table or desk Then check you have all the items listed below 1 Facsimile machine with power cable 4 Document support 2 Print head 5 This manual 3 Te...

Page 14: ...er positioning lever 7 Operator console 2 Document feed slide 8 Print head 3 Paper cassette 9 Printer compartment cover 4 Original guides 10 Optical reader scanner 5 Sent copied document tray 11 ON OF...

Page 15: ...ng the likelihood of jams The tray also enables the facsimile machine to be placed beside a table thus saving a considerable amount of space The machine must not be exposed to sunlight installed in a...

Page 16: ...socket see case 1 or case 2 figure Note if the network to which the facsimile machine is connected has more than one socket connected in series the facsimile machine must be connected to the primary s...

Page 17: ...the facsimile machine and the telephone to the telephone line case 2 Having connected the facsimile machine to the telephone line make sure that the ON OFF switch is in its OFF position O and then pl...

Page 18: ...he figure below and connect the power cable ADJUSTING THE PAPER CASSETTE IMPORTANT The size set on the paper cassette must correspond to the one selected by means of the configuration parameter PRINT...

Page 19: ...ock by pushing it towards the paper cassette and then pulling it upwards Lower the cover and the console Switch on the machine wait for the message CHECK PRINT HEAD to appear on the display see note a...

Page 20: ...e Automatic Nozzle Cleaning and Testing Procedure 4 The procedures page 115 NO NO 5 Push the print head in the direction indicated by the arrow until it clicks into position 6 Close the print head com...

Page 21: ...repeating the procedure described below You can also change the date and time format by means of the set up parameter DATE FORMAT Getting the Best from Your Facsimile Machine page 34 1 Press DATA STOR...

Page 22: ...in the Character Set Table by pressing the or key When the character required appears press the CONFIRM key to insert it in the sender s name A space can be entered by pressing the key If you make a m...

Page 23: ...the relevant installation parameters the machine can be used with the basic configuration set by the manufacturers You can tailor the configuration to your specific needs later on when you have become...

Page 24: ...play will show the symbol 7 Having typed all the digits that form the fax number confirm by pressing START The display shows the next parameter INSTALLATION PARAMETERS DIAL TYPE 8 Press START DIAL TYP...

Page 25: ...private exchange parameter in some countries this parameter cannot be accessed PRIVATE BRANCH EXCHANGE DIAL TYPE Press START again DIAL TYPE PULSE One of two types of dialling may be used pulse or to...

Page 26: ...14 Press START This parameter determines the delay from 10 to 999 seconds between one redial and the next Set the desired delay and confirm by pressing START The display shows the next parameter FAX P...

Page 27: ...ile machine is connected to a private branch exchange you must also select the method used for connecting to the public line and the type of dialling used by the exchange The connection methods availa...

Page 28: ...Y HH MM nnn DOCUMENT INSERTED 2 Dial the correspondent s fax number on the numeric keypad and press START The facsimile machine starts to store the document the percentage of free memory decreases It...

Page 29: ...GETTING THE BEST FROM YOUR FACSIMILE MACHINE...

Page 30: ...ces The various integrated circuits it contains convert binary signals sequences of 1 s and0 s intoanalogsignals i e variableelectricalvoltages andviceversa Thecommunication process is regulated on an...

Page 31: ...ve to do is press SPEED DIAL and the or key to display the names associated with the speed dialling codes in alphabetical order and press START to dial the relevant number Group dialling This method i...

Page 32: ...phone exchanges When it is activated the symbol appears on the display METHODS OF TRANSMISSION The facsimile machine enables you to send a document in several ways according to the urgency the number...

Page 33: ...stored automatically by the facsimile machine Repeating transmission Stored documents or broadcast transmissions that were unsuccessful can be repeated providing the set up parameter RESEND FAILED TX...

Page 34: ...paper or ink running out or a paper jam in the paper feed mechanism The facsimile machine s memory contains about 70 pages POLLING 1 Pollingcouldbedefinedasa self servicedatacommunications method Ite...

Page 35: ...rized to receive one of your documents max 20 digits the CSI corresponds to the numeric part of the sender s ID They can be printed to facilitate consultation 4 The procedures page 89 Reception by Pol...

Page 36: ...disabled After printing the report the transactions concluded successfully are automatically cleared from the memory while those not sent successfully are kept in the memory until they are retransmitt...

Page 37: ...enabled 4 The procedures page 95 Activity report It contains the information about the transmission and reception transactions carried out It may be printed automatically if the set up parameter ACTIV...

Page 38: ...the documents sent by polling indicating the number of transactions carried out and if in secure mode the IDs of the receivers Example of the report Polling for reception report It contains informati...

Page 39: ...is made to activate certain functions or to change the machine s configuration access is denied until the password is entered There are four passwords Confidential Mailbox Password Enables you to send...

Page 40: ...eceiving undesired documents advertising material propaganda etc The numbers of the remote correspondents enabled for communication with your facsimile machine are managed by checking the last 4 or 6...

Page 41: ...n the document and its reference number which you may need to know if you subsequently need to change the setting SENDER ID LINE This parameter enables you to define where the machine will print the s...

Page 42: ...eter enabled due to the automatic storage feature incoming documents can be received even when there is no paper or ink left a paper jam has occurred the cover is open or the facsimile machine is busy...

Page 43: ...one touch or speed dialling numbers for whom the CLOSED NETWORK parameter is enabled When this function is enabled you cannot send a document to a correspondent not included in the list This feature i...

Page 44: ...TION AFTER TX COPY Enables you to select the type of resolution adopted during the transmitting copying of documents The available settings are STANDARD and FINE The setting of this parameter has no e...

Page 45: ...CONNECTING TO A PERSONAL COMPUTER The facsimile machine has a bidirectional parallel interface which once fitted with the optional kit can be connected to a personal computer In this configuration th...

Page 46: ...ters the last activity report printed and transaction statistics status of connections type of errors detected number of pages sent and received etc By analysing this data the remote operator can chan...

Page 47: ...ransaction if the document is sent from the memory or at the end of the current page if it is sent from the ADF When the facsimile machine indicates that the TALK function has been activated the machi...

Page 48: ...an make one or more copies of the document Having inserted the document in the ADF and made the relevant settings proceed as follows for a single copy Press COPY The facsimile machine makes a copy of...

Page 49: ...THE PROCEDURES...

Page 50: ...ransmission reception GENERAL ASPECTS THE CONSOLE The console consists of a liquid crystal alphanumeric display a series of keys and LED indicators that will enable you to recognize the machine s oper...

Page 51: ...on If pressed a second time it exits from the menu IfpressedtogetherwiththeLINESTATUSkey itbreakstheconnection Dual function key Starts a manual transmission or reception transaction Activates the sel...

Page 52: ...the other resolutions Activates recognition of the colours and grey tones of the original document to be sent or copied which will be received or copied in grey tones AUTO LED on for documents contain...

Page 53: ...acsimile Dual function key EXTERNAL Itmustbepressedbeforediallingorrecordingan external number when the facsimile machine is connected via an exchange PBX SECOND TONE When required it enables a second...

Page 54: ...or vice versa the available options of each function on the menus Used for scrolling cyclically from the first to the last or vice versa through the various menu functions or the elements on a list Us...

Page 55: ...n from the memory sets the facsimile machine to automatically check page numbering the facsimile machine systematically numbers the document While making a copy sets the number of copies to be made Us...

Page 56: ...ed repeatedly it gradually decreases the speaker volume until the minimum level is reached Menu Access Keys DIAL DIRECTORY Gives access to the Telephone Directory menu and includes the following funct...

Page 57: ...olling transmission document Reception on PC and FAX Monitor line Remote diagnostics Date format Language selection The Installation Parameters submenu comprises the following functions Sender s name...

Page 58: ...0 09 94 10 35 65 DOC RECEIVED IN MEMORY If there are reports waiting to be printed automatically 20 09 94 10 35 95 ACTIVITY REPORT These messages will alternate with those that identify the causes of...

Page 59: ...machine The Telephone Directory menu comprises the functions that enable you to programme the various methods of fast dialling The Data Entry menu comprises the functions that enable you to set the d...

Page 60: ...REDUCTION PRINT OVERFLOW QUALITY PRINTING INHIBIT TRANSMISSION INHIBIT COPY CLOSED NETWORK IN RX CLOSED NETWORK IN TX SENDER ID LINE QUALITY COPIES RESOLUTION AFTER TX COPY SUBSTITUTE RECEPTION ECM U...

Page 61: ...DATE FORMAT LANGUAGE SELECTION SENDER S NUMBER DIAL TYPE DIAL TYPE FOR PUB NET NO RING FOR AUTOMATIC RX REDIAL NO TIME BETWEEN REDIALS FAX PHONE ALARM DURATION A B 21 22 23 24 25 26 27 28 29 0 0 1 2 3...

Page 62: ...REPORT MEMORY STATUS DOCUMENTS IN MEMORY REPORTS LAST TX REPORT KEY CHOICE OF FUNCTION DISPLAY The indications in the DISPLAY column are given in abbreviated form exactly as they appear onthedisplay...

Page 63: ...EPTION MULTICOPY DISPLAYING OTHER FUNCTIONS CONFID MESSAGES POLLING CONFID TX A PASSWORD MESSAGES ENTER NO POLLING POLLING FOR TRANSMISSION 1 2 1 2 PAGE N PAGINATING MULTICOPY PAGINATING KEYS CHOICE O...

Page 64: ...1 2 SPEAKER VOLUME LEVEL X BROADCAST TRANSMISSION ENTER TIME hh mm PRINT HEAD ADJUSTMENT PURGE PRINT HEAD DELAYED TRANSMISSION ENTER TIME hh mm KEYS CHOICE OF FUNCTION DISPLAY PRINT BROADCAST DELAYED...

Page 65: ...ars on the display Press EXT 2nd D TONE before entering the number The display shows the letter E before the sequence of numbers Press whilesettingthenumber Thesymbol will appear on the display To con...

Page 66: ...DIAL Enable the LAST TX REPORT parameter in the operating configuration see the Setting the Set up Parameters section Press LINE STATUS and STOP at the same time Enable the LAST RX REPORT parameter in...

Page 67: ...N TX YES Check on 4 6 digits N O SENDER ID LINE INSIDE DOCUMENT OUTSIDE DOCUMENT QUALITY COPIES YES N O RESOLUTION AFTER TX COPY STANDARD FINE SUBSTITUTE RECEPTION YES N O ECM YES N O DOCUMENT RETRANS...

Page 68: ...he set up parameters are those set by the manufacturers To change the settings follow the procedure described below I Beforechangingtheparametersettings werecommendyouprintthemasdescribedabove so that...

Page 69: ...Subscriber s name Transmission speed 14400 9600 or 4800 bps the latter is useful on lines with a lot of interference The transmission speed set here takes priority over the speed set in the operating...

Page 70: ...06 _ 5 Type the desired facsimile number on the numeric keypad max 32 digits e g 0125 45812 If the display shows a previously set number you can leave it unchanged or overwrite it with a new number by...

Page 71: ...n to the International parameter YES NO This parameter is used for eliminating an echo on the telephone line It is only to be enabled if you are to make an international or intercontinental call To co...

Page 72: ...terference The transmission speed set here takes priority over the speed set in the operating configuration Elimination of echo during international and intercontinental calls Closed network This para...

Page 73: ...s an optional parameter CD SPEED DL NAME L 06 SIPEL_ 9 Press START to confirm the name entered Thefacsimilemachineautomaticallymovesontothetransmissionspeed 14400 9600 4800 parameter To confirm the va...

Page 74: ...and100speeddiallingcodes This enables you to check that the numbers facsimile and telephone and data set for each key or code user name transmission speed and closed network settings are correct and w...

Page 75: ...for the speed dialling codes CLEARING PROGRAMMED DATA This section describes the procedure for clearing the data programmed for the one touch dialling keys and speed dialling codes 1 Perform steps 1 a...

Page 76: ...can group on one key up to 100 fax numbers recorded for one touch or speed dialling which will be dialled automatically by the facsimile machine by pressing the corresponding key grouped dialling The...

Page 77: ...Press SPEED DIAL and enter the speed dialling code or one touch dialling key on the numeric keypad to be associated with the selected program key alternatively lower the maskl and press the correspond...

Page 78: ...which the fax is to be sent by entering two digits for the hour and two more digits for the minutes Example 12 00 DELAYED TX ENTER TIME 12 00 13 Press START to confirm the time set The facsimile machi...

Page 79: ...INT 3 Press STOP to exit from the menu Example of a program key data printout Clearing Programmed Data This section describes the procedure for clearing the data programmed on the program keys as desc...

Page 80: ...it from the menu CLEARING KEYS OR CODES ONE BY ONE 1 Perform steps 1 to 3 of the Programming the program keys section PROGRAM KEYS PROG KEY 1 010 2 Press or to select the desired program key e g progr...

Page 81: ...es sent each page may be marked with a short message which may for example indicate the type of document CONFIDENTIAL URGENT etc the sender of the document Dr John Smith or contain a promotional messa...

Page 82: ...6 Press START to confirm the message set MESSAGE 3 A Having recorded the message the facsimile machine is automatically set for recording of the next message 7 Repeat the procedure from step 5 if you...

Page 83: ...introduce the characters refer to the Operation Summary 1 Press DATA STORING DATA DATE TIME 2 Press until the desired function appears on the display for example System Password STORING DATA SYSTEM PA...

Page 84: ...sk you to enter it before allowing you to change or delete the passwords 1 Press DATA STORING DATA DATE TIME 2 Press until the desired function appears for example Password for transmission STORING DA...

Page 85: ...mm Capacity of the ADF With the automatic document feeder ADF inserted the facsimile machine can handle A3 A4 A5 A6 B4 LETTER and LEGAL documents between 0 07 mm and 014 mm thick The ADF can handle up...

Page 86: ...N First of all check that the document is not crumpled does not have clips or a glossy surface etc In these cases take the precautions indicated in the previous section Insert the document face down i...

Page 87: ...ng very small characters and detailed drawings SUPER LED On STANDARD For easily legible pages No LED indicator on CONTRAST LIGHT For very dark pages LIGHT LED On DARK For very light pages DARK LED On...

Page 88: ...ne beeps and the document is automatically cleared from the memory when sending a document from the ADF after the document has been sent if the number of pages set does not correspond to the number of...

Page 89: ...play Messages section lists the messages shown on the display during transmission operations Immediate I Remember that if the set up parameter AUTOMATIC STORING is disabled the document must be left i...

Page 90: ...AYED TX hh mm ENTER FAX NO 4 Dial the correspondent s number using any of the methods available The facsimile machine starts to store the document automatically and having done so returns to standby C...

Page 91: ...ing or or enter the number directly on the numeric keypad You can now change the date time of transmission a and or the correspondent s facsimile number b a Display the DATE TIME field by pressing the...

Page 92: ...set of correspondents The facsimile machine starts sending the document if immediate or returns to standby if delayed Repeating a Single Transaction of the Broadcast Transmission To repeat a transact...

Page 93: ...BROADCAST DOC R nnnn NUMBER Press START BROADCAST TRANSMISSIONS NUMBER Change the correspondent s facsimile number and press START 5 To exit from the menu press STOP twice Display Messages with LINE S...

Page 94: ...ment is sent from the ADF press STOP to remove the message and retry transmission TRANSMISSION INTERRUPTED number Transmission was aborted by the operator TRANSMISSION FAILED number A communication er...

Page 95: ...LED goes off MANUAL RECEPTION This reception method requires the machine to be attended When the telephone rings lift the handset and check whether the call is a voice or telephone call If the handse...

Page 96: ...he sender s machine RECEIVING P nn 14 4 E sender s number 2 At the end of reception the facsimile machine returns to standby the machine beeps and the TX RX LED goes off When the caller wants to have...

Page 97: ...86 RECEPTION COMPLETED The document was received successfully RECEPTION FAILED An error occurred during reception Check the result of the operation on the Activity Report...

Page 98: ...OLLING ID ID 03 If the selected polling ID has already been associated with a facsimile number the latter is shown on the display In this case choose another ID keys and or take the following steps to...

Page 99: ...he secure polling IDs have been stored 1 Press DATA STORING DATA DATE TIME 2 Press or until the Secure Polling ID function appears on the display STORING DATA SECURE POLLING ID 3 Press PRINT The machi...

Page 100: ...d it Secure I You must have already stored the secure polling IDs Follow steps 1 to 3 of the procedure described above and then continue as follows 1 By pressing or select the SECURE POLLING option an...

Page 101: ...ect the parameter POLLING FOR RECEPTION and press START POLLING FOR RECEPTION SET 3 Press START again The facsimile machine asks the time at which the transmission request is to be made The display sh...

Page 102: ...lect the function POLLING FOR RECEPTION and press START POLLING FOR RECEPTION SET 3 By pressing or select the CHANGE option POLLING FOR RECEPTION CHANGE 4 Press START POLLING FOR RECEPTION POLLING NO...

Page 103: ...r the new number and confirm by pressing START Date time indicates the date and time of reception To change the date time of reception press START enter the new date time and confirm by pressing START...

Page 104: ...T TRANSMISSION REPORT Printing the report To print the report proceed as follows 1 Press REPORT REPORTS LAST TX REPORT 2 Press PRINT LAST TX REPORT PRINTING 3 To exit from the menu press STOP Example...

Page 105: ...DATE T Date and time of transmission DURATION Duration of transmission If the values appear in brackets this means that the document was sent in DOCUMENT RETRANSMISSION mode PAGES Number of pages tha...

Page 106: ...t proceed as follows 1 Press REPORT REPORTS LAST TX REPORT 2 By pressing or display the LAST RX REPORT function REPORTS LAST RX REPORT 3 Press PRINT The fax machine prints the report LAST RX REPORT PR...

Page 107: ...reception DURATION Duration of reception PAGES Number of pages that form the document received RESULT Result of reception Displaying the report To display the individual items on the report proceed a...

Page 108: ...e of transaction associated with the document DOC R Specifies the document s characteristics ADF Document sent from the ADF POLL Document sent received by polling 0001 9999 Document reference number P...

Page 109: ...lay the single information items proceed as follows 1 Follow steps 1 and 2 of the procedure described above and then press START The facsimile machine displays the progressive transaction number ACTIV...

Page 110: ...cuments in the memory 4 To exit from the menu press STOP Example of the list How to interpret the example DOC R Reference number of the document and type of activity associated with it BROADCAST TRANS...

Page 111: ...STOP twice Clearing a document Select the document as described and then press the CLEAR key Remember that if a document is cleared any transactions associated with it are also cancelled Before procee...

Page 112: ...t a list of all the documents associated with broadcast transmissions by following the procedure described below 1 Press MEM STAT MEMORY STATUS DOCUMENTS IN MEMORY 2 Press the or key to display the BR...

Page 113: ...st document associated with a broadcast transmission BROADCAST TRANSMISSIONS BROADCAST DOC R nnnn If necessary select the desired broadcast transmission by pressing or or type the reference number dir...

Page 114: ...display and print the information about the documents in the memory associated with memory transmissions Printing a list of memory transmissions You can print a list of all the documents associated wi...

Page 115: ...the memory 1 Press MEM STAT MEMORY STATUS DOCUMENTS IN MEMORY 2 Press or to display the MEMORY TRANSMISSIONS function and press START MEMORY TRANSMISSIONS TRANS NO nnnn Select the desired transaction...

Page 116: ...y because there was an error preventing them from being printed immediately Check the type of error out of paper or ink etc and correct it OUT OF INK There is no ink in the cartridge Replace the cartr...

Page 117: ...simile machine has caused its internal components to overheat Stop using the facsimile machine for about 30 minutes DIAGNOSTIC ERROR nn An error was detected by the diagnostic test carried out automat...

Page 118: ...k that the document is inserted in the ADF and that it is positioned correctly 02 IMPOSSIBLE CONNECTION The machine does not detect any dialling tone or it receives irregular signals Check that the ma...

Page 119: ...OTE ID NOT QUALIFIED The correspondent s number is not included in the list of those belonging to the network Contact the correspondent and check the facsimile numbers 16 Not used 17 INCORRECT PAGE CO...

Page 120: ...rectly fed out the display shows the message CHECK THE DOCUMENT XX Proceed as follows 1 Lift the operator console and remove the remaining documents from the feed slot 3 Lower the operator console 2 R...

Page 121: ...e jam is in the received copied document output area when the jam is in the paper feed area 1 Lift the paper positioning lever and remove the paper 2 Remove the front cover of the paper cassette by re...

Page 122: ...icks into position 6 Reinsert the paper and lower the paper positioning lever NOTE If you cannot reach the jammed sheet wait for the end of transmission reception and then switch the machine off and t...

Page 123: ...ith an interchangeable cartridge The ink cartridge can be replaced several times After a certain number of times however the printing quality inevitably deteriorates At this point you should replace t...

Page 124: ...correctly inserted At this point the facsimile machine performs the Automatic Nozzle Cleaning and Testing Procedure described later and prints the result on the sheet of paper automatically inserted...

Page 125: ...nt head Do not touch the electrical contactsortheprintingnib area protected by the transparent film NO NO CAUTION 1 Lift the operator console and open the printer compartment cover 2 Releasetheprinthe...

Page 126: ...The print test contains a numbered scaleand a set of graphics and text to enable the operator to assess the print quality immediately At the end of the procedure the display shows the message CHECK PR...

Page 127: ...y wipe dry do not pour the product directly onto the glass 2 Lift the operator console 5 Having completed the operation lower the operator console again 6 Clean the outer surface of the facsimile mach...

Page 128: ...his means that there is a mechanical problem If this is the case consult the table below CAUSE ACTION The paper used has a very porous surface Try printing on the other side of the sheet or else use a...

Page 129: ...cloth CAUSE ACTION The print head has been replaced or reinserted incorrectly Remove and reinsert the print head and then carry out the Automatic Nozzle Cleaning and Testing Procedure There is one or...

Page 130: ...e consists of aspirating the ink to unblock the nozzles 1 Press PRINT PRINT HEAD ADJUSTMENT PURGE PRINT HEAD 2 Press START 3 At the end of the procedure press STOP to exit from the menu Cleaning the P...

Page 131: ...full a sheet of paper is jammed inside the machine and the memory is full with a telephone connected to the telephone socket of the facsimile machine the dial tone can be heard when you press the HOO...

Page 132: ...isplay National characters can only be displayed after the language has been selected by means of the set up parameter LANGUAGE SELECTION The characters with a shaded background can only be printed no...

Page 133: ...tter Legal 15 sheets of A3 B4 Printing method Bubble ink jet on plain paper Maximum printing width 208 mm Printing paper A4 210 mm x 297 mm Paper feed Plain paper cassette 200 A4 sheets 80 gr m Dimens...

Page 134: ...mming one touch dialling keys 50 programming speed dialling codes 53 speed 20 DOCUMENTS 60 associated with broadcast 89 clearing 98 in memory 87 retransmission 30 E ERROR CORRECTION MODE 33 EXCHANGE 1...

Page 135: ...26 31 S SCANNER 3 19 cleaning optical reader 105 SECURITY 28 closed network 29 32 password 32 passwords 28 SENDER S NAME 11 SIGNALS 94 SOLVING PROBLEMS BY YOURSELF 109 STAND BY 43 T TELEPHONE CONVERSA...

Reviews: