


Chapter 4 Setting Up the Microscope
4.2 Setup Procedure
1-82
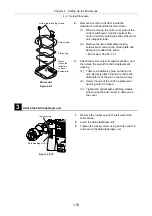
10
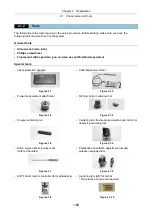
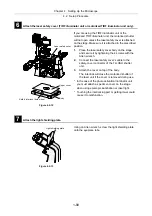
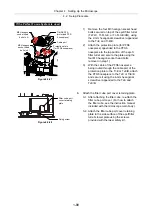
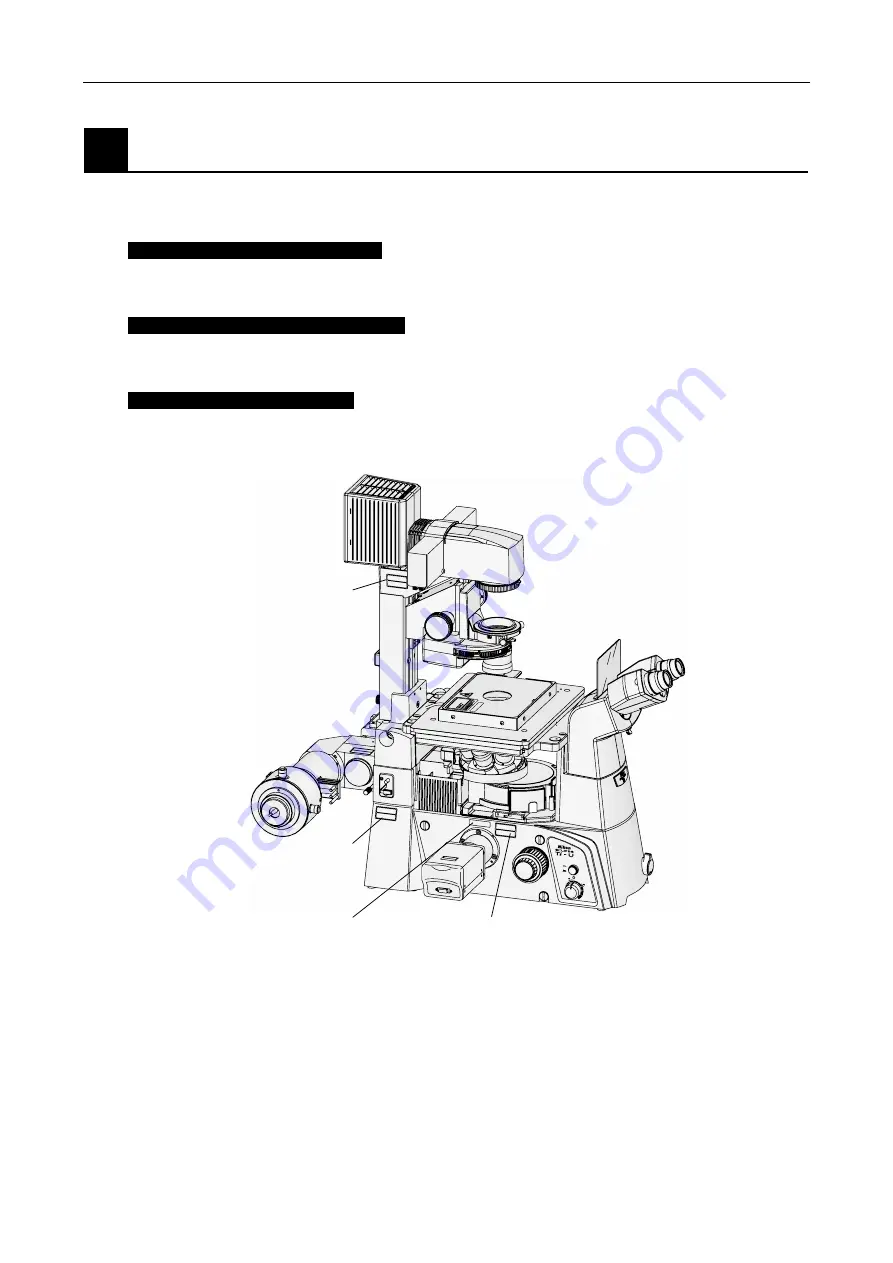
Affix the labels.
After confirming the safety of the laser (p.1-228 to 1-230), affix the specified warning labels to the
locations shown below.
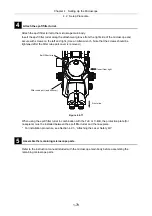
Left side of microscope main unit
Affix “(7) IEC caution label - Class 3B area” on the left side of the microscope main unit, under the field
diaphragm.
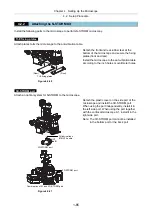
Both sides of microscope main body
Affix “(7) IEC caution label - Class 3B area” and “(9) IEC aperture label 2” above the right and left ports
of the microscope main unit.
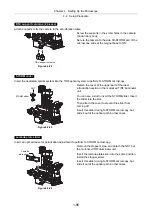
On 100W dia pillar illuminator
Affix
“(7) IEC caution label - Class 3B area” on the dia pillar illuminator 100W.
LAS
ER
RA
DIA
TIO
N
AVO
ID E
XPO
SU
RE
TO
BE
AM
CLA
SS 3
B L
ASE
R P
RO
DU
CT
AVO
ID E
XPO
SU
RE
LAS
ER
LIG
HT
IS
EM
ITT
ED
FRO
M O
BJE
CTIV
E A
PER
TUR
E
CAUTION – CL
ASS 3B
LASER RADIA
TION WHEN OPEN
AVOID EXPO
SURE TO THE BEAM
VORSICHT
– LASERSTRA
HLUNG
KLASSE 3
B,
WENN ABDEC
KUNG GEÖFF
NET
NICHT DEM ST
RAHL AUSSE
TZEN
AVOID EXPOSU
RE
LASER LIGHT
IS EMITTE
D
FROM THIS
APERTURE
CAUTION – CLA
SS 3B
LASER RADIAT
ION WHEN OP
EN
AVOID EXPOS
URE TO THE B
EAM
VORSICHT – L
ASERSTRAHLU
NG
KLASSE 3B,
WENN ABDEC
KUNG GEÖFF
NET
NICHT DEM ST
RAHL AUSSET
ZEN
CAUTION – CLA
SS 3B
LASER RADIA
TION WHEN O
PEN
AVOID EXPOS
URE TO THE B
EAM
VORSICHT – L
ASERSTRAHLU
NG
KLASSE 3B,
WENN ABDEC
KUNG GEÖFF
NET
NICHT DEM ST
RAHL AUSSET
ZEN
ON
OFF
6V30W
MAX.
12V100W
Figure 4.2-16
(9) (both sides)
(7)
(7)
(7) (both sides)
Summary of Contents for Eclipse Ti Series
Page 2: ......
Page 14: ......
Page 256: ......
Page 258: ......
Page 260: ...Contents 2 2 8 2 Environmental Conditions 2 70 8 3 Safety Standards Compliance 2 71 ...


