A-10
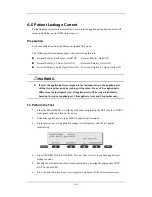
5. Press SOFT KEYS 1-4 to select leakage tests
6. Press APPLIED PART (SOFT KEY 4) at any time to select the desired applied part
leakage current:
7. Modify the configuration of the front panel outlet by pressing the appropriate SOFT
KEY on the 601PRO:
8. Press the print data key at any time to generate a printout of the latest measurement.
In Case of Failure
Check any broken of the enclosure. Replace any defective part.
Inspect wiring for bad crimps, poor connections, or damage.
Test the wall outlet; verify it is grounded and is free of other wiring abnormalities.
Notify the user or owner to correct any deviations. As a work around, check the other
outlets to see if they could be used instead.
Change another probe to confirm if the fail is caused by console.
If the leakage current measurement tests fail on a new unit and if situation can not be
corrected, submit a Safety Failure Report to document the system problem. Remove unit
from operation.
If all else fails, stop using and inform the Customer Service Engineer for analysis and
disposal.
LIMITS
For CF
applied parts,
10
μ
A in Normal Condition
50
μ
A in Single Fault Condition
For BF
applied parts,
100
μ
A in Normal Condition
500
μ
A in Single Fault Condition
Summary of Contents for BeneView T5
Page 1: ...DPM 6 Patient Monitor Service Manual ...
Page 2: ......
Page 4: ...II FOR YOUR NOTES ...
Page 12: ...6 FOR YOUR NOTES ...
Page 16: ...1 4 FOR YOUR NOTES ...
Page 32: ...2 16 FOR YOUR NOTES ...
Page 68: ...3 36 FOR YOUR NOTES ...
Page 80: ...4 12 FOR YOUR NOTES ...
Page 126: ...5 46 FOR YOUR NOTES ...
Page 133: ...6 7 6 3 3 12 1 Screen Assembly with anti glare screen Exploded View ...
Page 163: ...6 37 6 6 7 BIS Module Exploded View ...
Page 180: ...6 54 FOR YOUR NOTES ...
Page 204: ...A 14 FOR YOUR NOTES ...
Page 205: ......

