A-8
Preparation
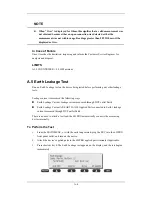
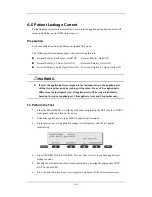
To perform a calibration from the Mains on Applied Part test, press CAL (SOFT KEY 2).
1. Disconnect ALL patient leads, test leads, and DUT outlet connections.
2. Press CAL to begin calibration, as shown:
If the calibration fails, the previously stored readings will be used until a passing
calibration has occurred. Also, the esc/stop key has no effect during calibration.
3. When the calibration is finished, the Mains on Applied Part test will reappear.
WARNING
z
A 2-beep-per-second signal indicates high voltage present at the applied part
terminals while a calibration is being performed.
z
High voltage is present at applied part terminals while measurements are being
taken.
To Perform the Test
1. From the MAIN MENU, or with the outlet unpowered, plug the DUT into the 601
2. Attach the applied parts to the 601PRO applied part terminals.
3. Attach the red terminal lead to a conductive part on the DUT enclosure.
4. Press shortcut key 7. The Mains on Applied Part test is displayed.
5. Select the desired outlet configuration and applied part to test using the appropriate
SOFT KEYS:
6. Press START TEST (SOFT KEY 1) to begin the test.
7. Press the print data key to generate a printout of the latest measurement.
Summary of Contents for BeneView T5
Page 1: ...DPM 6 Patient Monitor Service Manual ...
Page 2: ......
Page 4: ...II FOR YOUR NOTES ...
Page 12: ...6 FOR YOUR NOTES ...
Page 16: ...1 4 FOR YOUR NOTES ...
Page 32: ...2 16 FOR YOUR NOTES ...
Page 68: ...3 36 FOR YOUR NOTES ...
Page 80: ...4 12 FOR YOUR NOTES ...
Page 126: ...5 46 FOR YOUR NOTES ...
Page 133: ...6 7 6 3 3 12 1 Screen Assembly with anti glare screen Exploded View ...
Page 163: ...6 37 6 6 7 BIS Module Exploded View ...
Page 180: ...6 54 FOR YOUR NOTES ...
Page 204: ...A 14 FOR YOUR NOTES ...
Page 205: ......


