Reviewing Sample Results
7-18
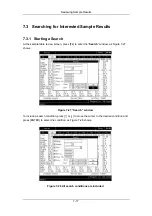
To specify the name of the patient
ENTER
the patient name into the “
Name
” box.
Selecting the patient gender
SELECT
the desired item
from the
“
Gender
”
drop-down list
. Note that you can select blank
in case you are not aware of the patient gender.
Selecting
the
department
You can either directly
ENTER
the name of the department, from which the sample came,
into the “
Dept
” box or
SELECT
the desired department
from the
“
Dept
”
pull-down list
(if
there are previously saved departments in the list,
Entering
sample
ID
ENTER
the ID number into the “
ID
” box.
Entering the bed number
ENTER
the number of the patient’s bed into the ”
Bed No.
“ box
.
Entering the chart number
ENTER
the number of the patient’s medical chart into the
“
Chart No.
” box.
Entering the start and end date
ENTER
the start date into the
“
Start
” box
;
ENTER
the end date into the
“
End
”
box.
CLICK
“
Yes
” to start the search. The analyzer will search the saved sample results for
matches and report the conclusion at “
Search Result
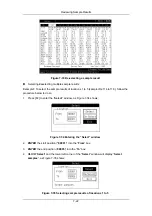
” window, as Figure 7-29 shows.
CLICK
“
Yes
” of the “
Search Result
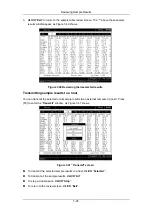
” window to return to the searched sample review screen,. The
matches found are saved in a database called “
Searched
” and you can review them in either
the “
Table
” mode or the “
Histogram
” mode.
Summary of Contents for BC-2800
Page 1: ...BC 2800 Auto Hematology Analyzer Operator s Manual ...
Page 2: ......
Page 12: ......
Page 24: ...Using This Manual 1 12 Figure 1 4 High voltage warning label 7 High Voltage 7 ...
Page 62: ......
Page 91: ...Customizing the Analyzer Software 5 29 Figure 5 46 Saving changes ...
Page 92: ......
Page 170: ...Using the QC Programs 8 14 Figure 8 18 Transmission dialog box ...
Page 196: ......
Page 248: ......
Page 252: ......
Page 266: ......
Page 284: ...Appendices E 10 Hemoglobin Concentration ...
Page 286: ...P N 2800 20 28795 2 0 ...


