Appendix K
AccuPyc II 1340
K-2
Apr 07
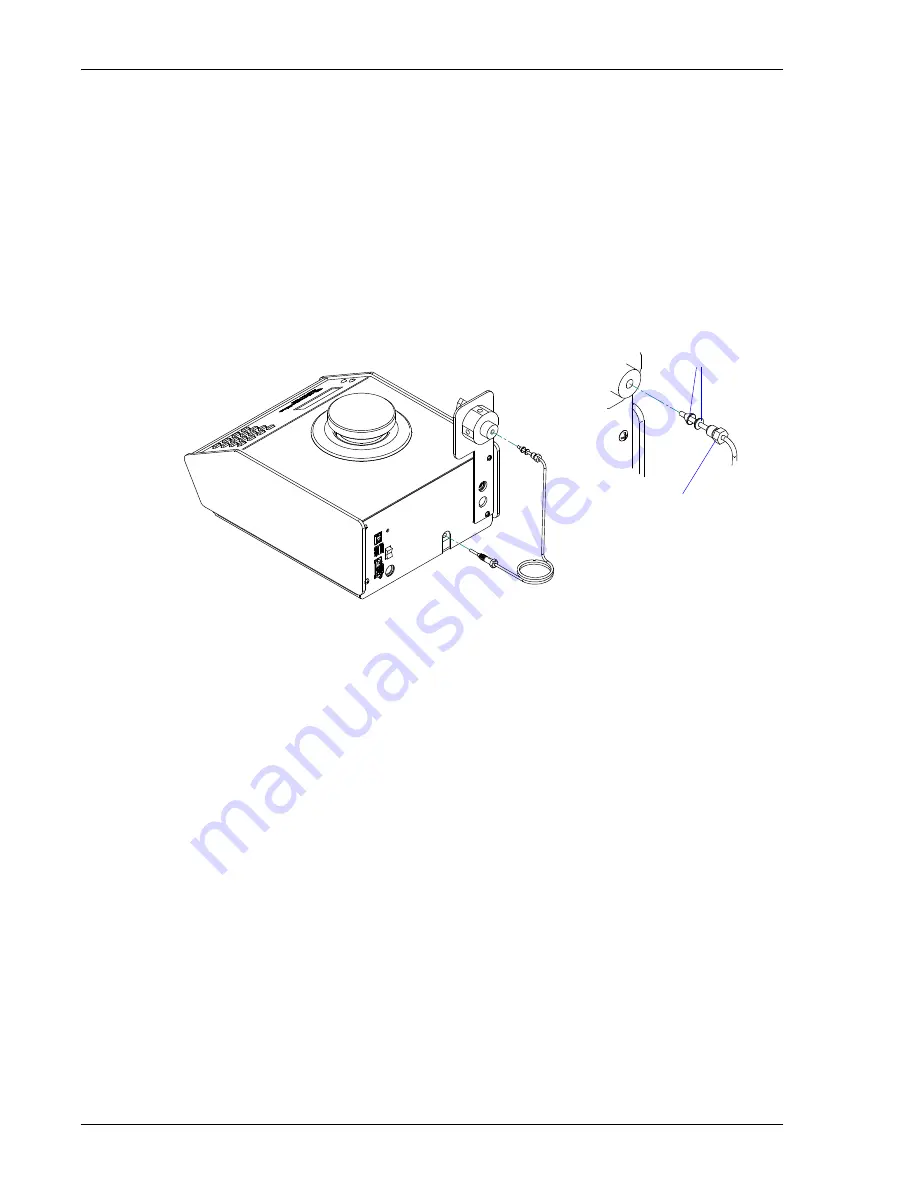
5. Remove the protective caps from the ends of the gas entrance tubing, then remove the
ferrules from the upper end of the tubing.
6. Remove the nut from the center port and slide it onto the end of the gas entrance tubing,
then replace the front and rear ferrules. Be sure the ferrules are oriented as shown below.
7. Insert the tubing into the center port of the Multigas assembly; use the nut to secure the
tubing to the assembly.
8. Insert the other end of the tubing into the gas inlet on the rear panel of the analyzer; use the
self-contained swage nut to secure the tubing to the inlet.
Ferrules
Swage nut
Ferrules
Swage nut
Summary of Contents for AccuPyc 2 1340
Page 1: ...AccuPyc II 1340 Operator s Manual V1 09 134 42801 01 Oct 2013...
Page 2: ...Micromeritics Instrument Corporation 2006 2013 All rights reserved Printed in the U S A...
Page 4: ......
Page 8: ...Table of Contents AccuPyc II 1340 iv Aug 2013...
Page 18: ...Specifications AccuPyc II 1340 1 10 Aug 2013...
Page 72: ...System Commands AccuPyc II 1340 3 38 Aug 2013...
Page 84: ...Reviewing Data AccuPyc II 1340 4 12 June 2013...
Page 100: ...Ordering Information AccuPyc II 1340 6 6 Sep 2013...
Page 116: ...Appendix B AccuPyc II 1340 B 4 Aug 2013...
Page 120: ...Appendix C AccuPyc II 1340 C 4 June 2013...
Page 128: ...Appendix D AccuPyc II 1340 D 8 Nov 06...
Page 136: ...Appendix G AccuPyc II 1340 G 2 Oct 08...
Page 138: ...Appendix H AccuPyc II 1340 H 2 Nov 06...
Page 152: ...Appendix K AccuPyc II 1340 K 4 Apr 07...
Page 157: ...AccuPyc II 1340 Index June 2013 Index 5 Zero pressure offset 1 5 Zero pressure transducer 3 37...


