82
Maxxyz
T
H E
C
L E A R
O
P T I O N S
W
I N D O W
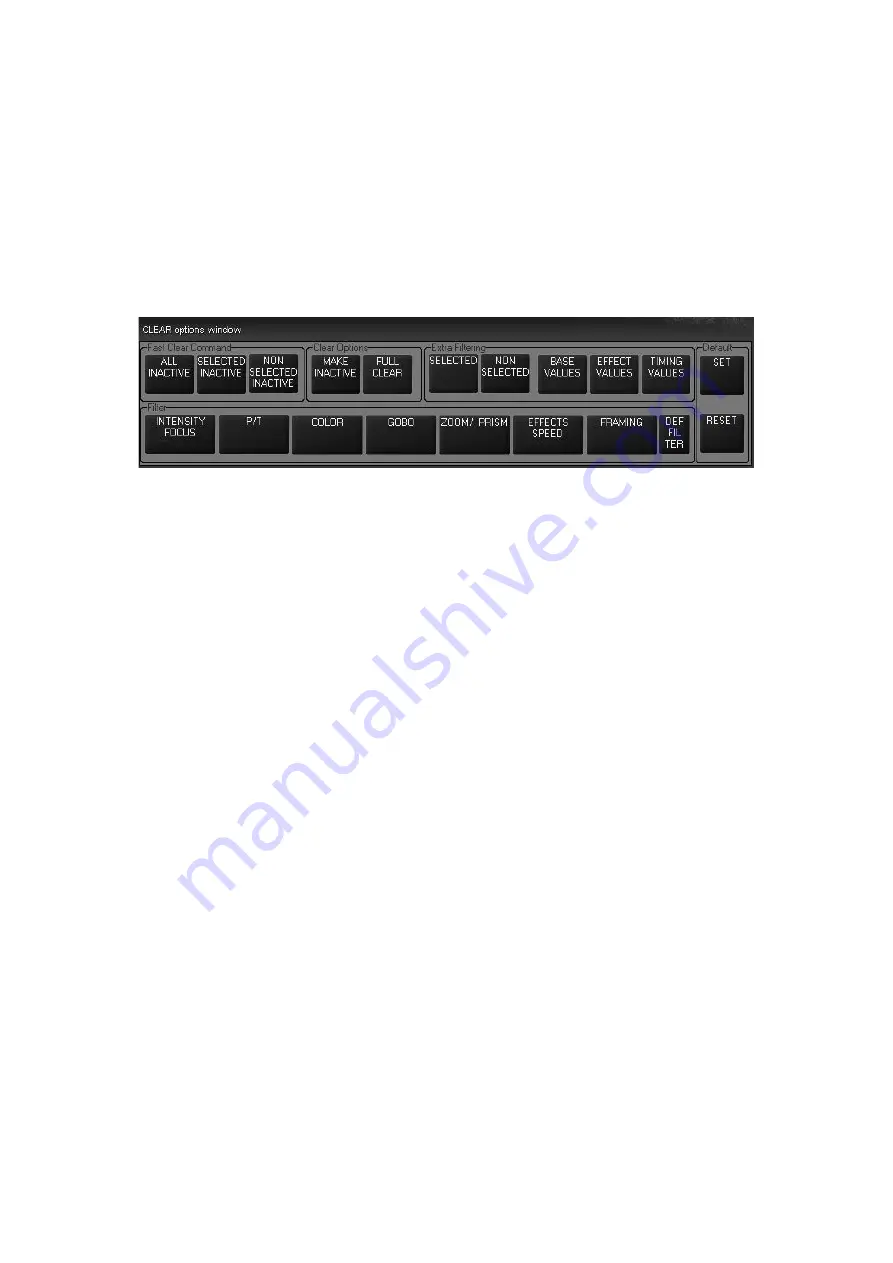
When you first press the Clear key, you will see the Clear Options window pop-up in the left hand
touch screen.
To use the Clear Options window and filters, employ the following steps:
1 Press
Clear
2 Set your filters as desired
3 Press
Enter
The Clear Options window is used not merely to clear fixtures, but also to make attributes
inactive. Quite similar to the Load options window, it contains several buttons that are broken
down into five categories:
F
AST
C
LEAR
C
OMMAND
C
ATEGORY
These keys are not technically used for clearing fixture attributes, but are used in making
attributes inactive. It is worth noting that none of these keys require an “Enter” command to
execute. And, as mentioned above, none of the other filtering used in the Clear Options window
will be applied when using the Fast Clear Commands.
Null Channel
A null channel is one that is not in the programmer. It may still have a
value, but, as it is not in the programmer, it is not considered either
active or inactive and is therefore “null.”
Fast Clear
Command
These keys are used to make attributes inactive and do not require
an “Enter” command to execute. These commands also will ignore
any other filtering that may be in place.
Clear Options
These keys determine whether a clear or an inactive function will be
performed
Extra Filtering
These filters determine which fixtures and what types of attributes will
be cleared or made inactive
Filter
This group of filters acts to filter specific attribute groups
Default
These two buttons allow you to change the “default” behavior of
Clear options window.
All Inactive
Every attribute of every fixture in the programmer will be made
inactive
Selected Inactive
Only the attributes of selected fixtures will be made inactive
Non-Selected
Inactive
Attributes of fixtures that are not currently selected in the
programmer will be made inactive
Selected Fixture
A selected fixture is one that is currently editable using the
programmer’s trackbelts, touch screen, etc.
Summary of Contents for Maxxyz
Page 1: ...Maxxyz user manual For Use with Software Version 1 3 78 ...
Page 8: ...8 Maxxyz ...
Page 154: ...154 Maxxyz ...
Page 155: ...Appendix 3 Wiring Charts 155 ...
Page 156: ...Appendix 3 Wiring Charts 156 ...
Page 160: ......


