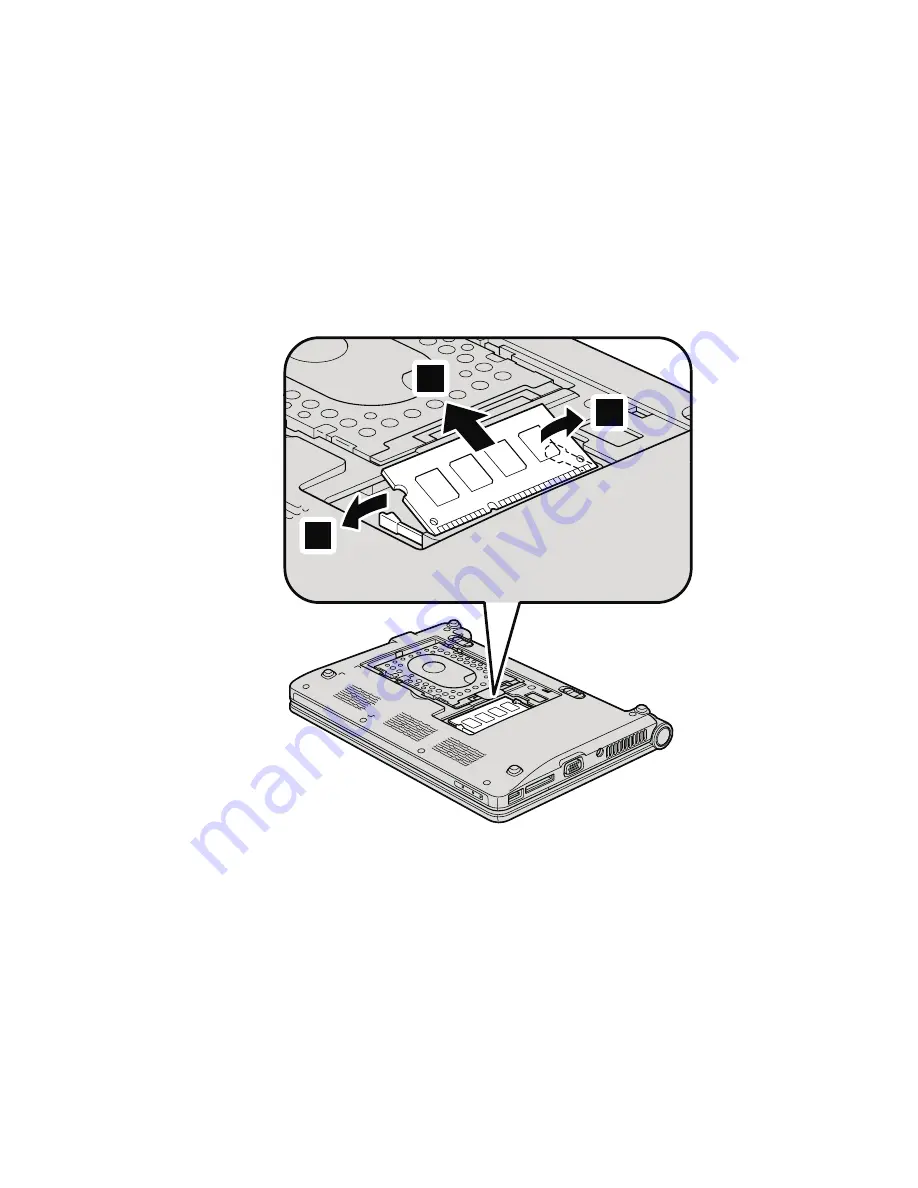
6.
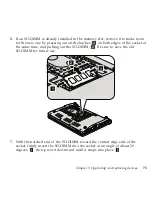
If
an
SO-DIMM
is
already
installed
in
the
memory
slot,
remove
it
to
make
room
for
the
new
one
by
pressing
out
on
the
latches
1
on
both
edges
of
the
socket
at
the
same
time,
and
pulling
out
the
SO-DIMM
2
.
Be
sure
to
save
the
old
SO-DIMM
for
future
use.
1
1
2
7.
With
the
notched
end
of
the
SO-DIMM
toward
the
contact
edge
side
of
the
socket,
firmly
insert
the
SO-DIMM
into
the
socket
at
an
angle
of
about
20
degrees
1
;
then
pivot
it
downward
until
it
snaps
into
place
2
.
Chapter
5.
Upgrading
and
replacing
devices
73
Summary of Contents for S10e - IdeaPad 4187 - Atom 1.6 GHz
Page 1: ...Lenovo IdeaPad S9e and S10e User Guide ...
Page 8: ...viii Lenovo IdeaPad S9e and S10e User Guide ...
Page 44: ...36 Lenovo IdeaPad S9e and S10e User Guide ...
Page 66: ...58 Lenovo IdeaPad S9e and S10e User Guide ...
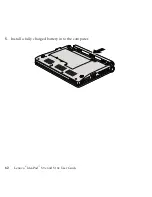
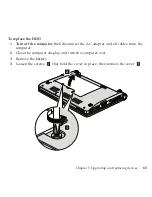
Page 70: ...5 Install a fully charged battery into the computer 62 Lenovo IdeaPad S9e and S10e User Guide ...
Page 74: ...5 Slide the HDD in the direction of the arrow 66 Lenovo IdeaPad S9e and S10e User Guide ...
Page 75: ...6 Remove the HDD by pulling out the tab Chapter 5 Upgrading and replacing devices 67 ...
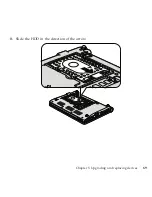
Page 77: ...8 Slide the HDD in the direction of the arrow Chapter 5 Upgrading and replacing devices 69 ...
Page 82: ...1 2 1 2 74 Lenovo IdeaPad S9e and S10e User Guide ...
Page 126: ...118 Lenovo IdeaPad S9e and S10e User Guide ...
Page 144: ...136 Lenovo IdeaPad S9e and S10e User Guide ...
Page 146: ...138 Lenovo IdeaPad S9e and S10e User Guide ...
Page 166: ...158 Lenovo IdeaPad S9e and S10e User Guide ...
Page 174: ...166 Lenovo IdeaPad S9e and S10e User Guide ...
Page 175: ......
Page 176: ......

