


Before you begin
• You have a #1 Phillips screwdriver.
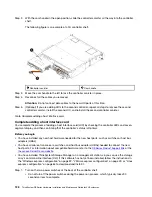
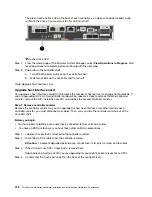
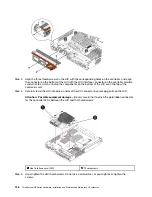
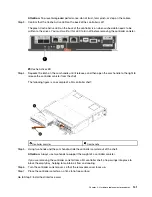
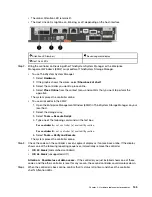
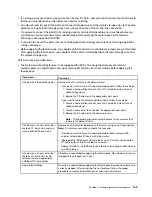
Step 1. Remove the controller canister's cover by pressing down on the button and sliding the cover off.
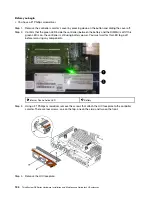
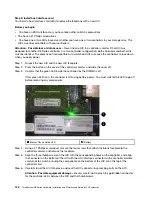
Step 2. Confirm that the green LED inside the controller (between the battery and the DIMMs) is off.If this
green LED is on, the controller is still using battery power. You must wait for this LED to go off
before removing any components.
Internal Cache Active LED
Battery
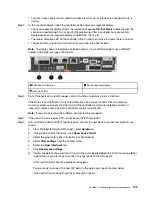
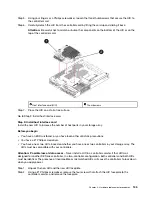
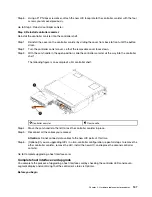
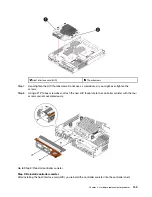
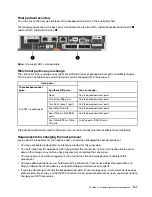
Step 3. Using a #1 Phillips screwdriver, remove the screws that attach the HIC faceplate to the controller
canister.There are four screws: one on the top, one on the side, and two on the front.
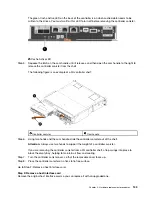
Step 4. Remove the HIC faceplate.
134
ThinkSystem DE Series Hardware Installation and Maintenance Guide for 2U Enclosures
Summary of Contents for DE120S
Page 96: ...90 ThinkSystem DE Series Hardware Installation and Maintenance Guide for 2U Enclosures ...
Page 282: ...276 ThinkSystem DE Series Hardware Installation and Maintenance Guide for 2U Enclosures ...
Page 284: ...278 ThinkSystem DE Series Hardware Installation and Maintenance Guide for 2U Enclosures ...
Page 291: ......
Page 292: ......


