8-13
Troubleshooting > Troubleshooting
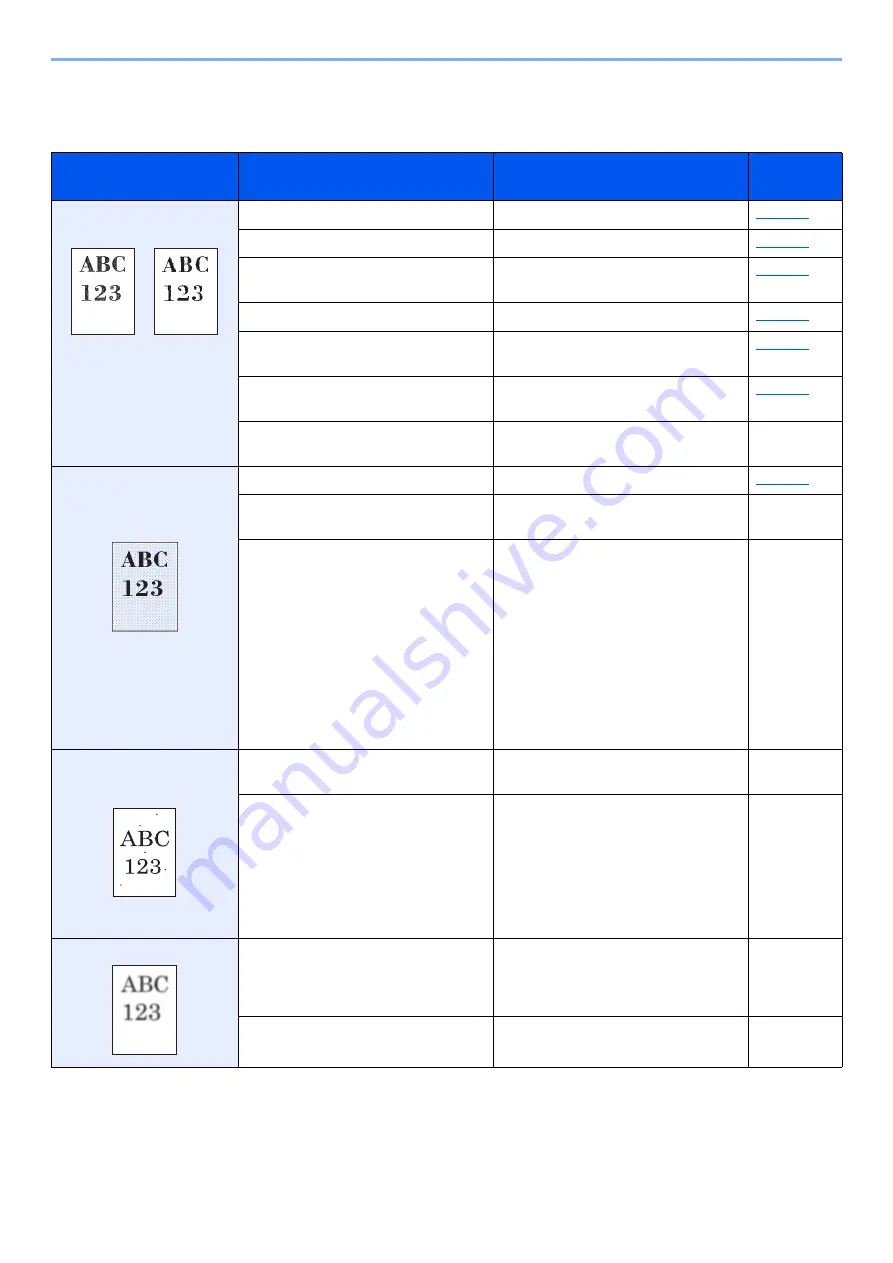
Printed Image Trouble
When the following printed image trouble occurs, implement appropriate procedures.
Symptom
Checkpoints
Corrective Actions
Reference
Page
Printed images are totally
too light.
Is the paper damp?
Replace the paper with new paper.
Have you changed the density?
Select appropriate density level.
Is the toner distributed evenly within the
toner container?
Shake the toner container from side to
side several times.
Is EcoPrint mode enabled?
Disable [
EcoPrint
] mode.
Are the developer unit and drum unit
installed correctly?
Correctly install the developer unit and
drum unit.
—
Make sure the paper type setting is
correct for the paper being used.
—
Select the [
Menu
] key >
[Adjust/Maintenance
]
> [
Service
] > [
Drum
] > [
OK
] > [
OK
].
—
Printed images are too dark
even though the background
of the scanned original is
white.
Have you changed the density?
Select appropriate density level.
—
Select the [
Menu
] key > [
Adjust/Maintenance
]
> [
Service
] > [
Drum
] > [
OK
] > [
OK
].
—
―
Select the [
Menu
] key > [
Adjust/Maintenance
]
> [
Service
] > [
MC
] > [
OK
] > [
OK
] and increase
the adjustment value. Increase the adjustment
value 1 level at a time from the current value. If
there is no improvement after the value is
increased by 1 level, increase by 1 level again.
If there is no improvement, lower in increments
of 1 level from the original setting. If there is no
improvement after the value is decreased by 1
level, decrease by 1 level again. If there is still
no improvement, return the setting to the
original value.
―
Black dots appear on the
white background when
white original is scanned.
—
Select the [
Menu
] key > [
Adjust/Maintenance
]
> [
Service
] > [
Drum
] > [
OK
] > [
OK
].
—
―
Select the [
Menu
] key > [
Adjust/Maintenance
]
> [
Service
] > [
MC
] > [
OK
] > [
OK
] and increase
the adjustment value. Increase the adjustment
value 1 level at a time from the current value. If
there is no improvement after the value is
increased by 1 level, increase by 1 level again.
If there is still no improvement, return the
setting to the original value.
―
Printed images are fuzzy.
Is the device used in an environment
with high humidity or where the
temperature or humidity changes
suddenly?
Use in an environment that has suitable
humidity.
―
―
Select the [
Menu
] key > [
Adjust/Maintenance
]
> [
Service
] > [
Drum
] > [
OK
] > [
OK
].
―
Summary of Contents for 1102RX3NL0
Page 1: ...OPERATION GUIDE ECOSYS P2040dn ECOSYS P2040dw PRINT...
Page 195: ...8 26 Troubleshooting Clearing Paper Jams 4 Open the front cover 5 Close the front cover...
Page 197: ...8 28 Troubleshooting Clearing Paper Jams 4 Open the front cover 5 Close the front cover...
Page 199: ...8 30 Troubleshooting Clearing Paper Jams 4 Open the front cover 5 Close the front cover...
Page 205: ...8 36 Troubleshooting Clearing Paper Jams 14Close the front cover...
Page 215: ...9 4 Appendix Optional Equipment 4 Replace the covers...
Page 239: ......
Page 242: ...First edition 2016 6 2RYKDEN000...


