


751/601
11-54
Utility mode
11
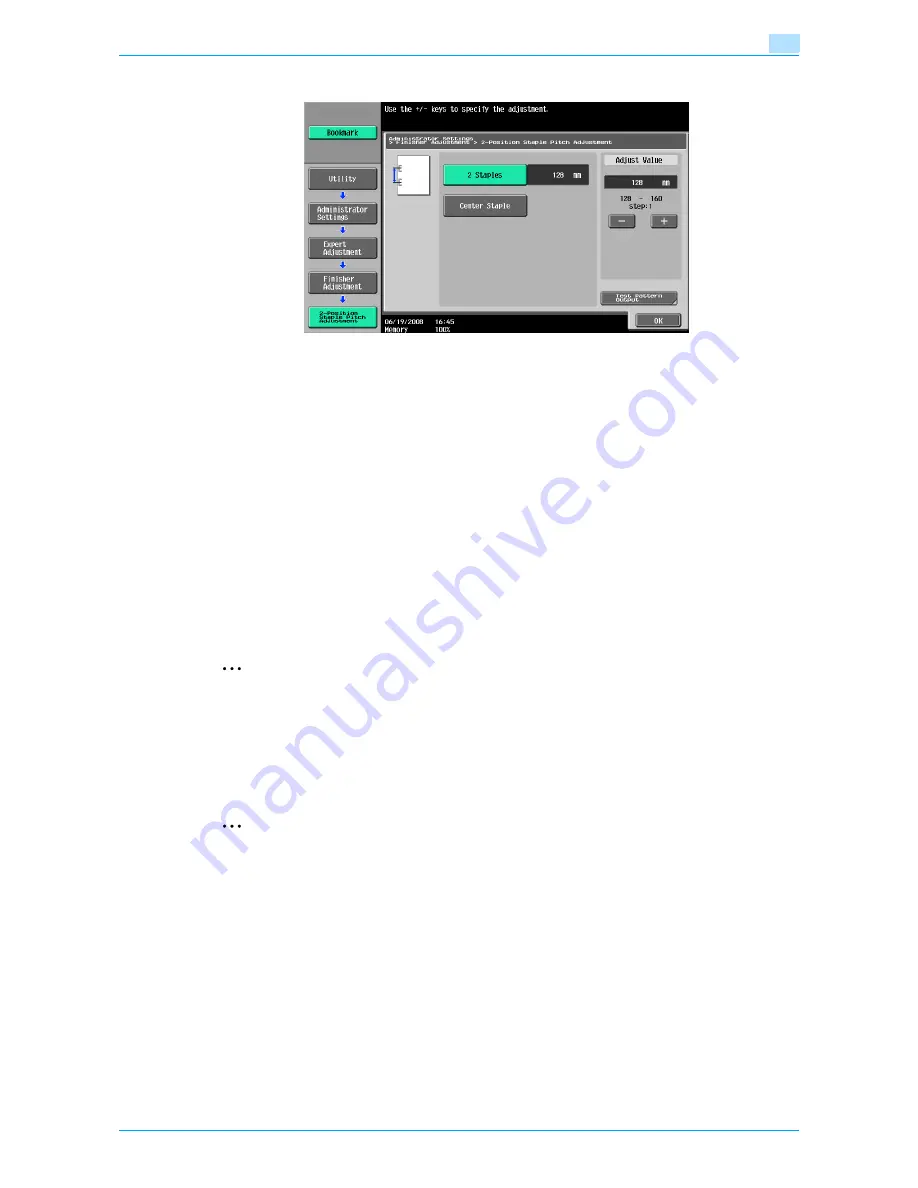
The Adjust Spacing of 2 Staples screen appears.
6
Touch the button for the setting to be adjusted.
7
Check the stapling positions in the sample copy.
–
Touch [+] or [-] under "Adjust Value" to adjust the distance (between 128 mm and 160 mm) between
the staples.
–
Each time [+] or [-] is touched, the value is increased or decreased by one increment.
8
Touch [OK].
The distance between the staples is adjusted.
If no adjustment of the distance between the staples was necessary in step 7, this completes the
procedure.
9
Use the "2 Position" Staple setting to print another sample copy.
10
Check the print result.
–
Check that the distance between the staples was adjusted.
–
If more adjustment is necessary, repeat steps 6 through 10.
2
Note
Set the value by mm. Refer to the conversion rate below.
1 inch = 25.4 mm
11.6.11
Post Inserter Tray Size Adjustment
The sensors for detecting the size of paper loaded in the paper trays of the optional post inserter can be
adjusted.
2
Note
[Post Inserter Tray Size Adjustment] appears only if optional post inserter is installed.
1
Display the Administrator Setting screen.
–
For details on displaying the Administrator Settings screen, refer to
"Displaying the Administrator
Settings screen" on page 11-36
.
2
Touch [1 System Settings].
The System Settings screen appears.
3
Touch [7 Expert Adjustment].
The Expert Adjustment screen appears.
4
Touch [5 Finisher Adjustment].
The Finisher Adjustment screen appears.
Summary of Contents for bizhub 601
Page 1: ...User s Guide Copy Operations...
Page 16: ...751 601 x 15 Explanation of manual conventions...
Page 17: ...751 601 x 16...
Page 20: ...1 Before Making Copies...
Page 78: ...2 Basic copy operations...
Page 105: ...751 601 2 28 Basic copy operations 2 Binding Position screen Zoom screen Frame Erase screen...
Page 149: ...751 601 2 72 Basic copy operations 2 4 Touch OK and then touch OK again...
Page 157: ...3 Additional copy operations...
Page 187: ...4 Troubleshooting...
Page 235: ...5 Specifications...
Page 246: ...6 Copy paper originals...
Page 276: ...7 Application functions...
Page 298: ...751 601 7 23 Application functions 7 6 Press the Start key...
Page 316: ...751 601 7 41 Application functions 7 7 Press the Start key...
Page 355: ...8 Replacing toner cartridges and staple cartridges and emptying hole punch scrap box...
Page 376: ...9 Care of the machine...
Page 383: ...10 Managing jobs...
Page 397: ...11 Utility mode...
Page 476: ...12 Authentication Unit Biometric Type AU 101...
Page 501: ...13 Authentication Unit IC Card Type AU 201...
Page 527: ...14 Appendix...
Page 534: ...15 Index...
Page 538: ...http konicaminolta com Copyright 2008 2008 8 A0PN9551 CO 00...


