5.12
Section 5
Fuel System and Governor
15. The
correct
fl
oat height se
tt
ing is
17 mm
(0.669 in.) ± 1.5 mm (0.059 in.)
, measured from
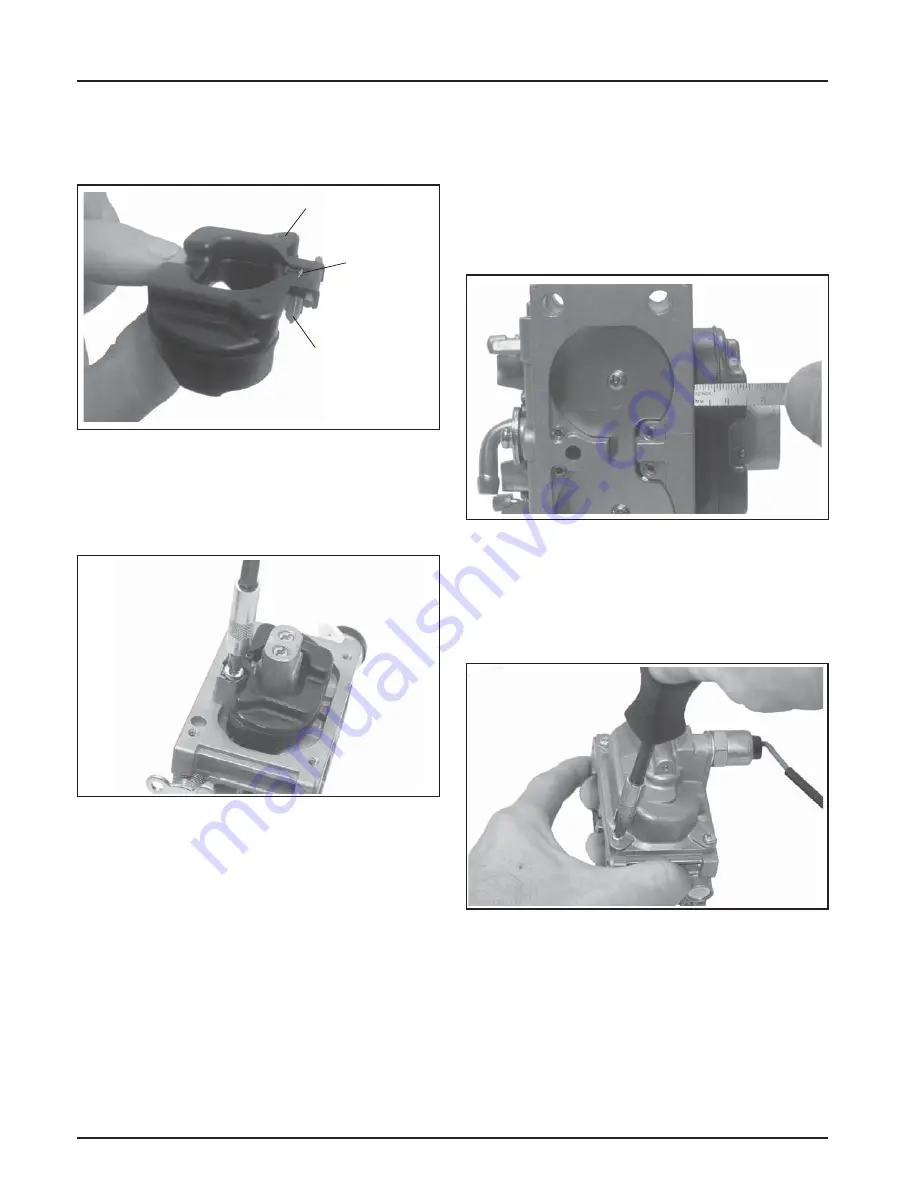
the
fl
oat bo
tt
om to the body of the carburetor.
See Figure 5-27. Replace the
fl
oat if the height is
di
ff
erent than speci
fi
ed. Do not a
tt
empt to adjust
by bending the
fl
oat tab.
NOTE: Be sure to measure from the casting surface,
not the rubber gasket, if still a
tt
ached.
Figure 5-27. Checking Float Height.
16. When the proper
fl
oat height is obtained,
carefully reinstall the fuel bowl, using new
O-rings onto the carburetor. Secure with the
four original screws. Torque the screws to
2.5 ± 0.3 N·m (22 ± 3 in. lb.)
. See Figure 5-28.
Figure 5-28. Installing Fuel Bowl.
Choke Repair
1. Remove the carburetor from the engine. Discard
the old mounting gaskets for the air cleaner and
carburetor.
2. Clean the areas around the choke sha
ft
and the
self-relieving choke mechanism thoroughly.
12. A
tt
ach the inlet needle to the plastic tang of
the
fl
oat with the wire clip. The formed 90° lip
should point up, with the needle valve hanging
down. See Figure 5-25.
Inlet Needle
Float
Clip
Figure 5-25. Float and Inlet Needle Details.
13. Install the
fl
oat and inlet needle down into the
seat and carburetor body. Install the new pivot
pin through the
fl
oat hinge and secure with the
new retaining screw. See Figure 5-26.
Figure 5-26. Installing Float Assembly.
14. Hold the carburetor body so the
fl
oat assembly
hangs vertically and rests lightly against the
fuel inlet needle. The inlet needle should be
fully seated but the center pin of the needle (on
retainer clip end) should not be depressed. Check
the
fl
oat height adjustment.
NOTE: The inlet needle center pin is spring loaded.
Make sure the
fl
oat rests against the fuel inlet
needle without depressing the center pin.
Summary of Contents for Comand Pro CH1000
Page 1: ...SERVICE MANUAL HORIZONTAL CRANKSHAFT CH940 CH1000...
Page 2: ......
Page 4: ......
Page 30: ...4 4 Section 4 Air Cleaner and Air Intake System...
Page 52: ...6 6 Section 6 Lubrication System...
Page 96: ...8 16 Section 8 Disassembly...
Page 110: ...Section 9 Inspection and Reconditioning 9 14...
Page 140: ...10 30 Section 10 Reassembly...
Page 141: ......


