


Basic Skills - Exporting Data from the Database File Manager
KLA-Tencor P-16+ / P-6 User’s Guide
2-16
KLA-Tencor Confidential
0142530-000 AB
Friday, March 13, 2009
Pr
eliminary
6.
Set the required variables in the
Save As
dialog box. See
for an
explanation of the variables to be set.
7.
Complete the information in the dialog box.
8.
After all the information has been entered, click
Save
to complete the export.
Exporting the Graph from within Analysis Program (Scan and Sequence
Data)
2
1.
When the operator needs to see the scan graph before exporting it, after entering
the Scan Data or Sequence Data folder containing the scan file, double-click the
file. This opens the Analysis screen with the graph displayed.
2.
If the correct graph is displayed, resize or reorient it as required before export.
3.
Choose
Export Graph…
from the
File
menu to open the Save As (export) dialog
box.
4.
Fill in the required information.
5.
After all the information has been entered, click
Save
to complete the export.
E
XPORTING
D
ATA
FROM
THE
D
ATABASE
F
ILE
M
ANAGER
2
Export of data files from the Database File Manager is performed the same way for
both Scan Data and Sequence Data sets.
1.
From the Database File Manager choose either 2D or 3D files.
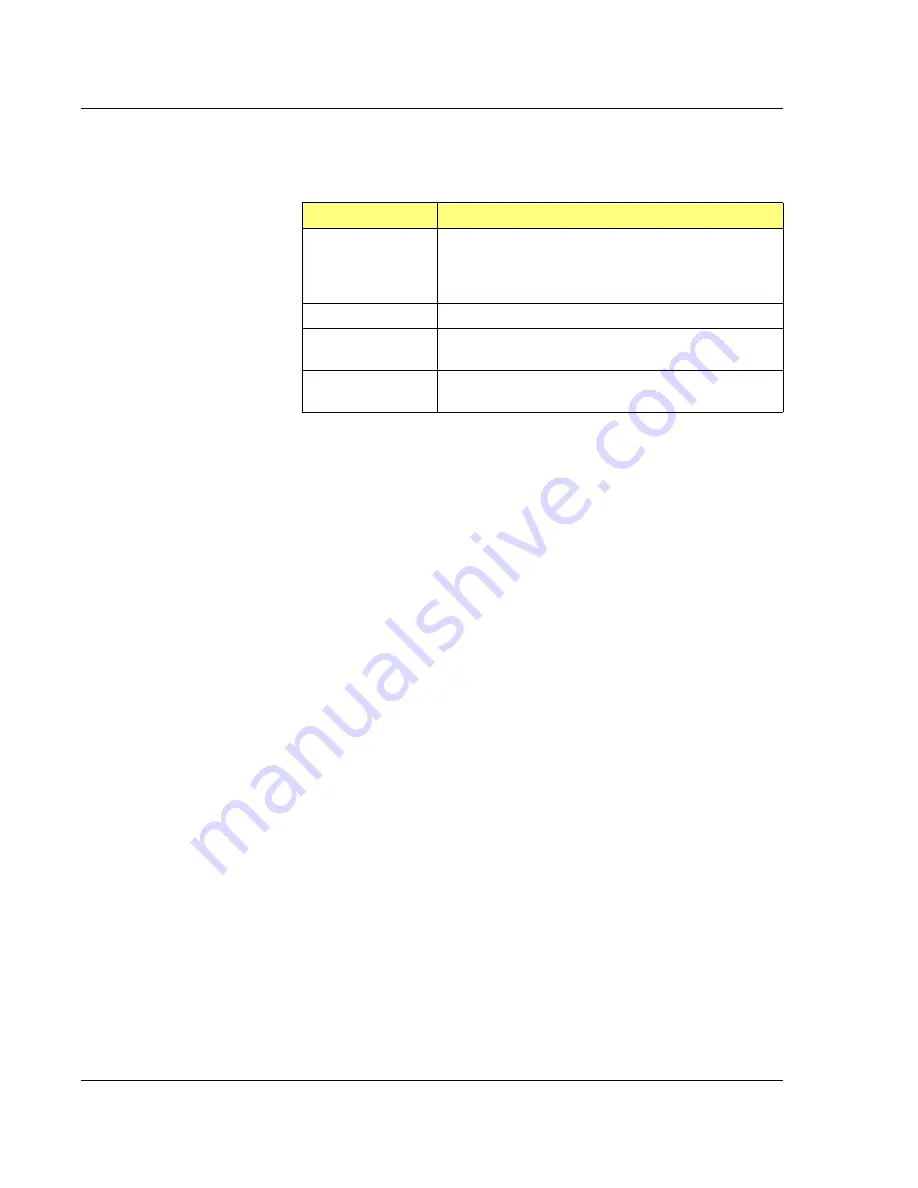
Table 2.4
Graphics Export Dialog Features
Variable
Description
Save In
This drop-down menu provides a
browse
feature from
which to search for the folder that the graphic is to be
exported to or the application that is to analyze it. The
location must be and displayed in the
Save In:
field.
File Name
Type the
File Name
, up to 68 -characters in length.
Save as Type
From the drop-down menu, select the
graphic
format:
(
BMP
,
TIFF
,
WMF, EPS,
or
JPEG)
.
Export Size
Allows the user to keep the original size or resample to
a smaller size, or change to a larger format.


