8 Special procedures
144
2.
Connect an Ethernet cable between the host PC and
the 100 Mb/s Ethernet port (J3211) on the cephalostat
CPU board.
3.
Run the openS2.bat file to have an s2terminal session
started. Refer to chapter Preparing for update for more
detailed instructions. Use the default IP address
(10.208.6.101). A connection should be established
and a boot prompt shown in the s2terminal, for exam-
ple:
CEPH R3200c boot-2.18R2798>
otherwise redo the volatile installation.
4.
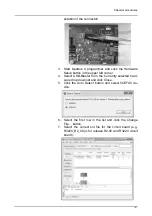
Update the FGPA core using the command:
xcpr 3210 OP3DPRO_CEPHR3210_R<ver_major>_<ver_minor>.srec
Example:
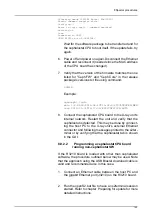
CEPH R3200c boot-2.18R2798>xcp r3210
OP3DPRO_CEPHR3210_R2_00.srec
Transferring OP3DPRO_CEPHR3210_R2_00.srec to Main CPU
Updating core...
transfer 864965 bytes from S-records...
update 0 864965 = 0x0..+864965
FRAMES:1205
Flashing image (864965 bytes) @0x0
Status command transfer error.
Login fail (no connection).
Login fail (no connection).
Login fail (no connection).
Verifying...
verified ok
Done.
Wait until the update is completed, power off and power
on again. You should again have a boot prompt coming
up in the s2terminal, otherwise start over from step 1.
5.
Update the cephalostat CPU FW using the command:
xfp OP3DPRO_CEPHRFW_R<ver_major>_<ver_mi-
nor>.srec
Example:
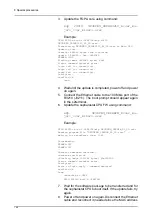
CEPH R3200c boot-2.18R2798>xfp
OP3DPRO_CEPHFW_R2_00.srec
Reading program file "OP3DPRO_CEPHFW_R2_00.srec" ...
Waiting for eraseErase time: 1342
Programming...
FRAMES:367
FRAMES:367
…
Checking embedded checksum...
checksum verified ok
Summary of Contents for ORTHOPANTOMOGRAPH OP 3D Pro
Page 2: ......
Page 4: ......
Page 8: ...iv rev...
Page 18: ...1 Introduction 10...
Page 27: ...2 Unit description 19 2 6 Unit movements Panoramic unit movements R C J D...
Page 29: ...2 Unit description 21...
Page 30: ...2 Unit description 22...
Page 38: ...4 PC requirements 30...
Page 54: ...5 Installing the unit 46 4 Fasten the covers...
Page 67: ...5 Installing the unit 59 C C D D Top cover of the column E E...
Page 104: ...7 Cephalometric calibration and alignment 96...
Page 111: ...7 Cephalometric calibration and alignment 103 3 Tighten the locking nut...
Page 117: ...7 Cephalometric calibration and alignment 109...
Page 128: ...8 Special procedures 120 6 Remove the arm from the column 4 nuts 7 Disassemble the arm...
Page 132: ...8 Special procedures 124 right handed assembly Prism assembly for the left handed cephalostat...
Page 158: ...8 Special procedures 150...
Page 165: ...9 OP 3D Pro Pre sales check list 157 9 11 Notes comments...
Page 166: ...9 OP 3D Pro Pre sales check list 158 9 12 Dimensions 463...
Page 167: ...9 OP 3D Pro Pre sales check list 159 9 13 Dimensions with cephalostat...


