8. Aligning the unit
ORTHOPANTOMOGAPH OP 2D
115
8.7 Checking and adjusting the focal trough
1.
PC:
Enable image capture for still mode im-
age.
Still mode can be selected using the s2termi-
nal or through the GUI of the unit.
2. Make sure that the chin support is in the 0
position and then attach the
alignment cone
assembly
to the chin support.
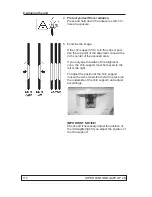
3. Manually rotate the Rotating Unit to the Patient
In/Out (
PIO
) position. Rotating Unit parallel to
the
front
of the upper shelf and the tubehead
(t/h) is on the
right
.
Insert a 4 mm hexagon socket wrench into the
locking hole in the guide pin assembly to hold
the Rotating Unit in position.
Summary of Contents for ORTHOPANTOMOGAPH OP 2D
Page 2: ......
Page 4: ...IV ORTHOPANTOMOGAPH OP 2D Contents...
Page 24: ...14 ORTHOPANTOMOGAPH OP 2D 2 Unit Description 2 3 Unit dimensions...
Page 32: ...22 ORTHOPANTOMOGAPH OP 2D 2 Unit Description...
Page 33: ...2 Unit Description ORTHOPANTOMOGAPH OP 2D 23 2 6 Block diagram...
Page 34: ...24 ORTHOPANTOMOGAPH OP 2D 2 Unit Description 2 7 Fuse diagram...
Page 38: ...28 ORTHOPANTOMOGAPH OP 2D 2 Unit Description...
Page 43: ...3 Circuit Boards L1200 ORTHOPANTOMOGAPH OP 2D 33 L1200 Block Diagram...
Page 46: ...36 ORTHOPANTOMOGAPH OP 2D 3 Circuit Boards L1500 L1500 Block diagram...
Page 50: ...40 ORTHOPANTOMOGAPH OP 2D 3 Circuit Board L1600 L1600 Block diagram...
Page 54: ...44 ORTHOPANTOMOGAPH OP 2D 3 Circuit Boards L1700 L1700 Block Diagram...
Page 57: ...3 Circuit Boards L1800 ORTHOPANTOMOGAPH OP 2D 47 L1800 Block diagram...
Page 61: ...3 Circuit Boards P1910 ORTHOPANTOMOGAPH OP 2D 51 P1910 Block diagram...


