


neoVI FIRE 2 User’s Guide
63
© 2016 Intrepid Control Systems, Inc.
Version 2.1 - October 10, 2016
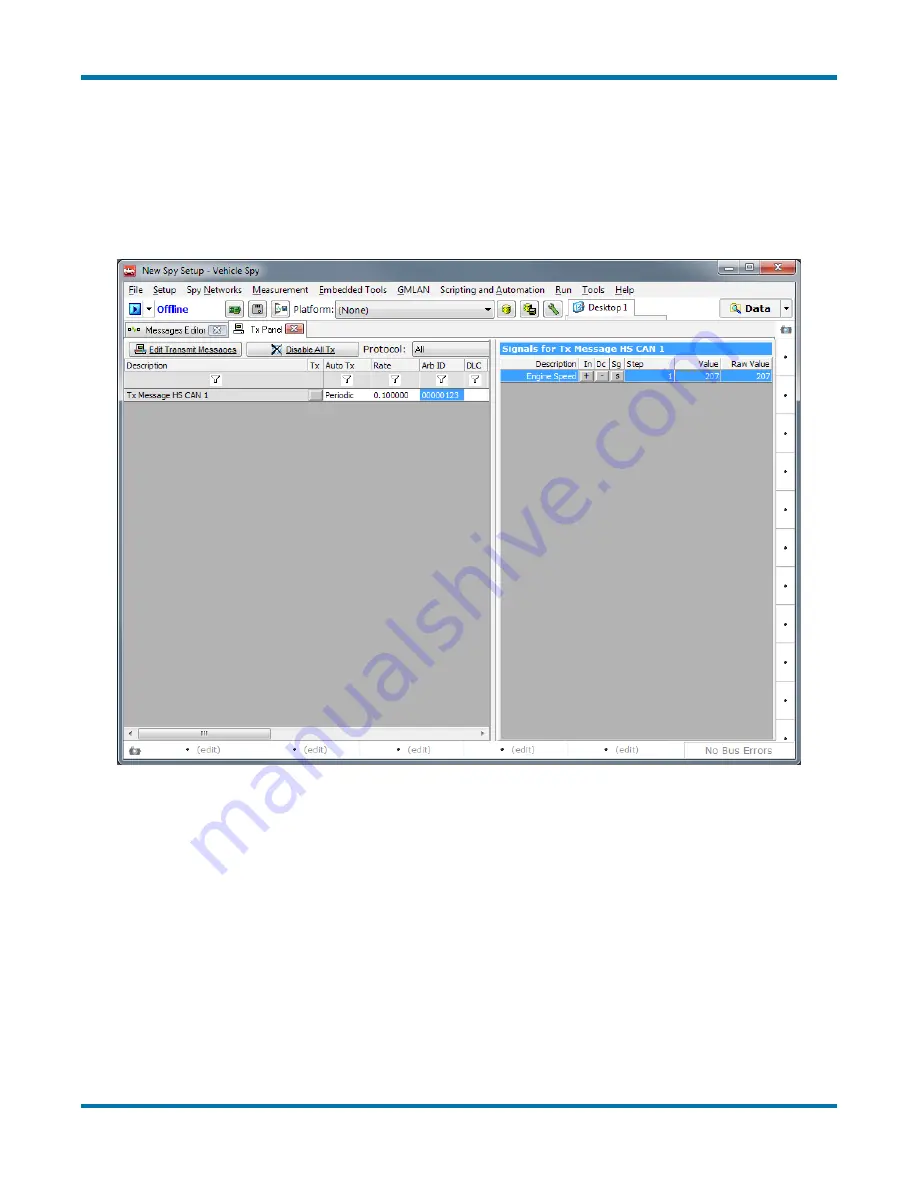
12. Set Signal Data Value:
On the right side of the screen, double-click under
Value
for the
Engine Speed
signal, and enter “207”. (You may need to first move the vertical divider
bar that separates the two halves of the Tx Panel, by clicking on it and dragging it to the
left.)
The
Tx Panel
in Vehicle Spy should now appear similar to Figure 83. Our custom message is
ready to transmit.
Figure 83: Vehicle Spy Tx Panel with 100 Millisecond Periodic Rate Set and Signal Value Assigned.
Let’s now switch to
Messages View
and go online to see our message being transmitted on the
CAN network.
13. Switch to Messages View:
Select
Messages
from the
Spy Networks
menu.
14. Go Online:
Press the blue arrow button in the top left corner of Vehicle Spy.
You should now see a new “Message HS CAN 1” message show up about every 100 ms
(Figure 84). Notice the green dot under the
Tx
column, which labels this as a transmitted
message.
15. Expand Message:
Press the + sign to the left of “Message HS CAN 1”.


