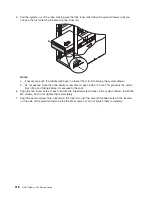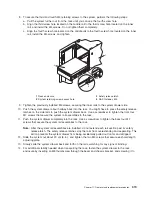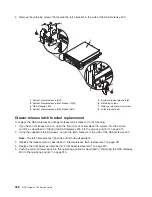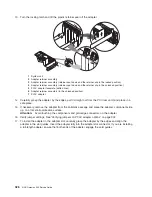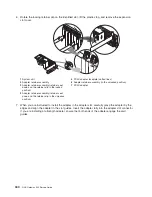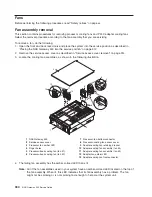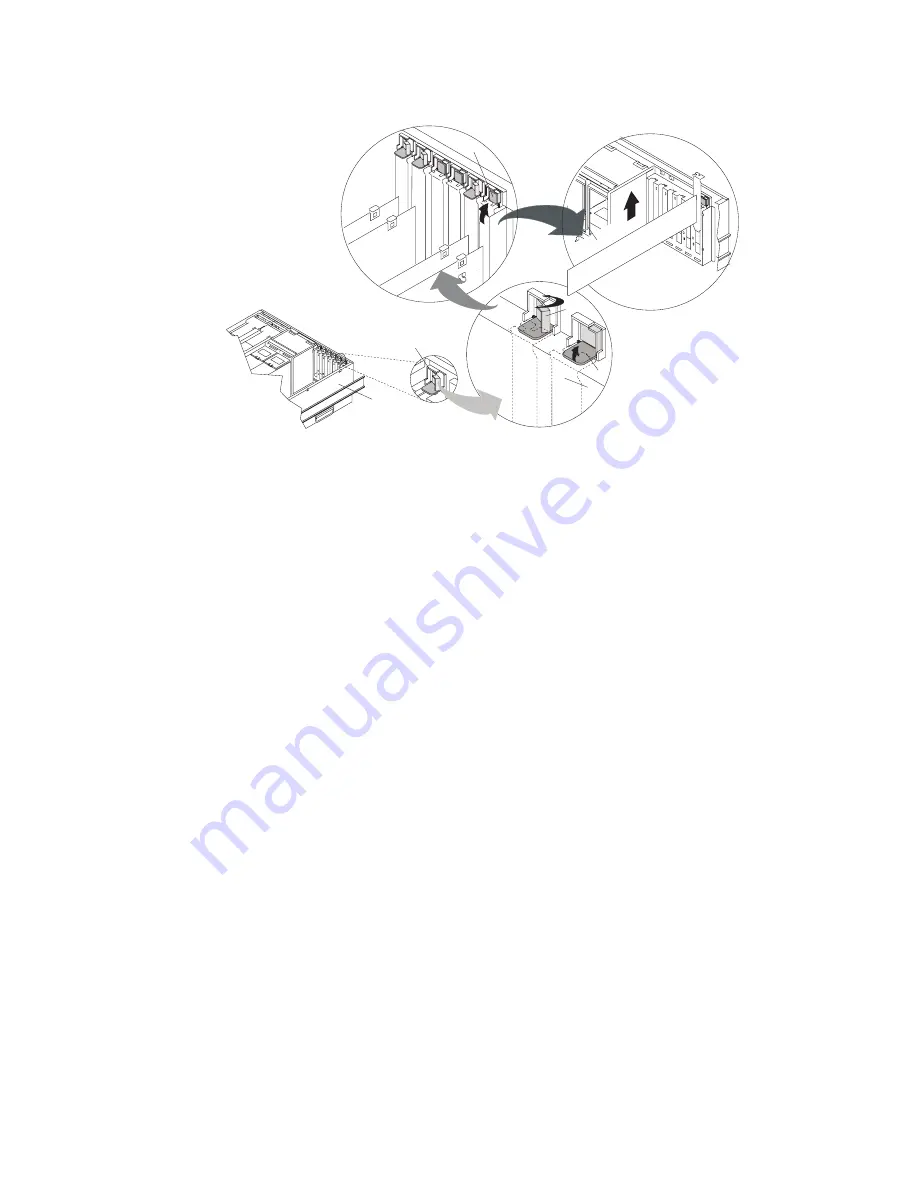
12. Turn the locking latch and lift the plastic retainer seat off the adapter.
1
2
3
6
4
5
7
1
System unit
5
PCI-X adapter faceplate (dotted lines)
2
Adapter retainer assembly
6
Adapter retainer assembly (in the unlocked position)
3
Adapter retainer assembly (retainer seat
down and the retainer clip in the locked
position)
7
PCI-X adapter
4
Adapter retainer assembly (retainer seat
down and the retainer clip in the unlocked
position)
13. Carefully grasp the adapter by the edges and pull it straight out from the PCI riser card.
14. If you are not installing another adapter in this slot, place an expansion slot cover in the adapter slot
opening.
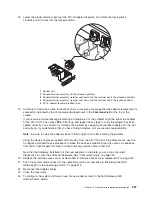
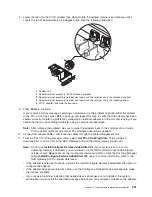
15. Lower the plastic retainer seat over the PCI-X adapter faceplate, and rotate the locking latch
clockwise until it clicks into the locked position.
16. Continue to follow the screen instructions until you receive a message that the adapter removal is
successful. Successful removal is indicated by the
OK
message displayed next to the
Command
field
at the top of the screen.
PCI-X adapter installation
To add an adapter, there must be an empty slot available. This procedure is used sometimes to help
isolate a problem. To add an adapter option as an upgrade, refer to the
NAS Gateway 500 Hardware
Installation Guide
.
1. If necessary, remove the adapter from the antistatic package.
Attention:
Avoid touching the components and gold-edge connectors on the adapter.
2. Place the adapter, component-side up, on a flat, static-protective surface.
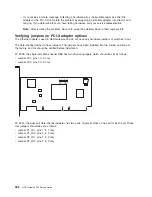
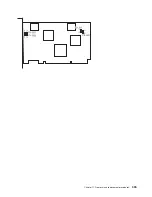
3. Verify the jumper settings. See “Verifying jumpers on PCI-X adapter options” on page 332.
4. From the PCI-X Hot-Plug Manager menu, select
Add a PCI-X Hot-Plug Adapter
and press
Enter
to
display the Add a Hot-Plug Adapter window.
5. Select the appropriate empty PCI-X slot from the ones listed on the screen, and press
Enter
. The
selected PCI-X slot will go into the Identify state. Press
Enter
again. The selected PCI-X slot will go
into the Action state. See “Component LEDs” on page 384.
Chapter 11. Removal and replacement procedures
329
Summary of Contents for TotalStorage NAS Gateway 500
Page 1: ...IBM TotalStorage NAS Gateway 500 Service Guide GY27 0418 00 ...
Page 2: ......
Page 3: ...IBM TotalStorage NAS Gateway 500 Service Guide GY27 0418 00 ...
Page 16: ...xiv NAS Gateway 500 Service Guide ...
Page 20: ...xviii NAS Gateway 500 Service Guide ...
Page 36: ...System logic flow Note Not all components are supported 16 NAS Gateway 500 Service Guide ...
Page 52: ...32 NAS Gateway 500 Service Guide ...
Page 58: ...38 NAS Gateway 500 Service Guide ...
Page 112: ...92 NAS Gateway 500 Service Guide ...
Page 266: ...246 NAS Gateway 500 Service Guide ...
Page 326: ...306 NAS Gateway 500 Service Guide ...
Page 353: ...Chapter 11 Removal and replacement procedures 333 ...
Page 392: ...372 NAS Gateway 500 Service Guide ...
Page 402: ...382 NAS Gateway 500 Service Guide ...
Page 412: ...392 NAS Gateway 500 Service Guide ...
Page 440: ...420 NAS Gateway 500 Service Guide ...
Page 446: ...426 NAS Gateway 500 Service Guide ...
Page 448: ...428 NAS Gateway 500 Service Guide ...
Page 466: ...446 NAS Gateway 500 Service Guide ...
Page 469: ......
Page 470: ... Printed in U S A GY27 0418 00 ...
Page 471: ...Spine information IBM TotalStorage NAS Gateway 500 NAS Gateway 500 Service Guide GY27 0418 00 ...


