


moisture.IQ User’s Manual
67
Chapter 5. Using the Configuration Menu
5.2.2 Entering Calibration Data Manually (cont.)
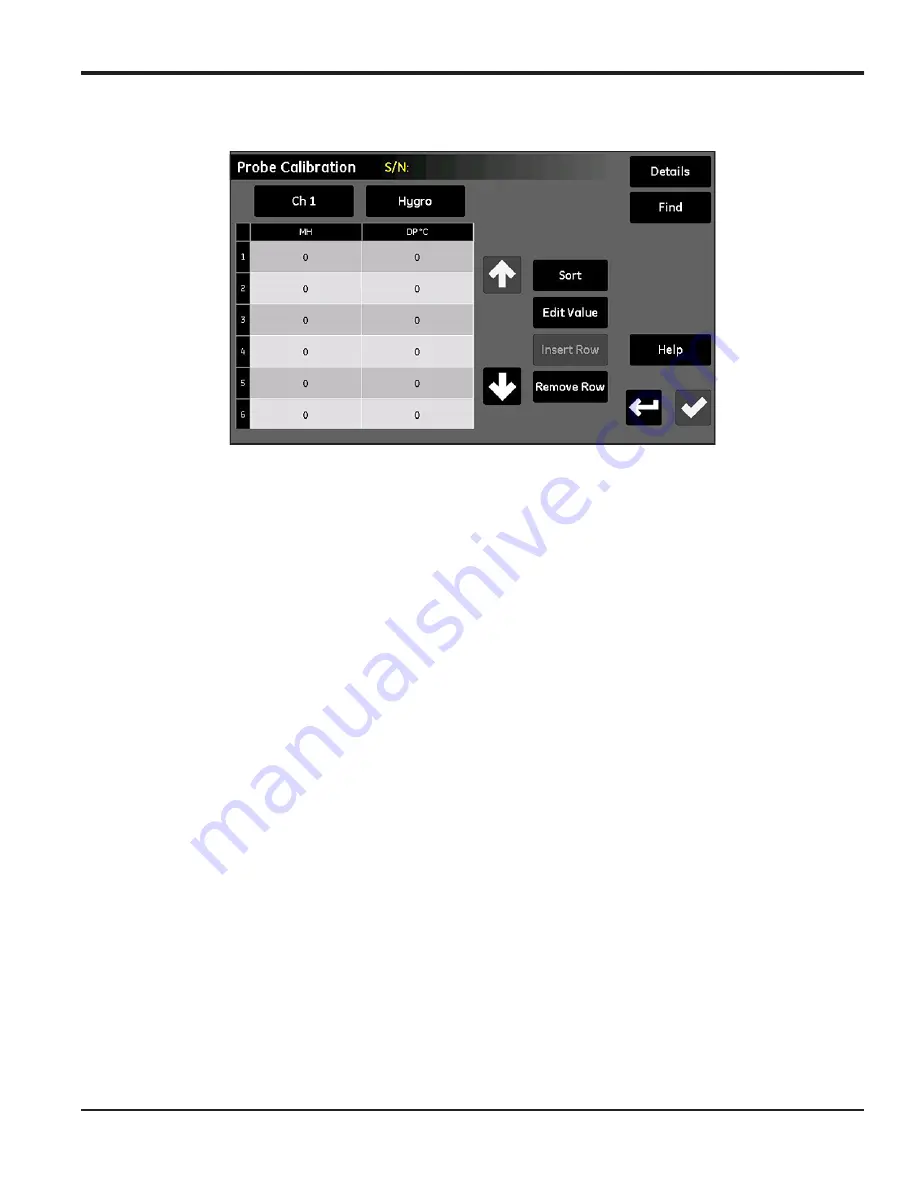
Figure 58: Probe Calibration Screen
2.
Just below the probe serial number, tap the
Channel
button to select the channel to which the probe is
connected.
3.
To the right of the
Channel
button, tap the
Type
button to select the type of input connected to that
channel (
Hygro, Pressure, Oxygen, Aux 1
or
Aux 2
).
4.
For each input selected, the table below the two buttons includes data entry boxes for 2 to 16 data
points. The four buttons to the right of the table are used to edit and arrange the calibration data as
required:
•
Sort
- Tap this button to sort the data rows in ascending order by the left column.
•
Edit Value
- Tap this button and then tap a text box and enter the values from the relevant
Calibration Data
Sheet
for each point specified, using the calculator keys on the pop-up keypad. Continue entering or checking
values for each input until you have completed each channel.
•
Insert Row
- Use this button along with the
Remove Row
button to organize the rows in the table as desired.
•
Remove Row
- Use this button along with the
Insert Row
button to organize the rows in the table as desired.
5.
After you have finished entering your probe calibration data, tap the
Return
button to return to the
Configuration Menu
.
Summary of Contents for moisture.IQ
Page 1: ...Moisture and Oxygen 910 298 Rev E September 2017 bhge com moisture IQ User s Manual ...
Page 2: ......
Page 4: ... no content intended for this page ...
Page 12: ...Preface x moisture IQ User s Manual no content intended for this page ...
Page 45: ...moisture IQ User s Manual 33 Chapter 2 Operation ...
Page 49: ...moisture IQ User s Manual 37 Chapter 2 Operation ...
Page 50: ...Chapter 2 Operation 38 moisture IQ User s Manual ...
Page 110: ...Chapter 8 Troubleshooting 98 moisture IQ User s Manual no content intended for this page ...
Page 180: ... no content intended for this page ...
Page 181: ......


