GE H
EALTHCARE
D
IRECTION
5245279, R
EVISION
3
LOGIQ™ P6/P6 P
RO
S
ERVICE
M
ANUAL
Section 4-3 - General Procedure
4 - 19
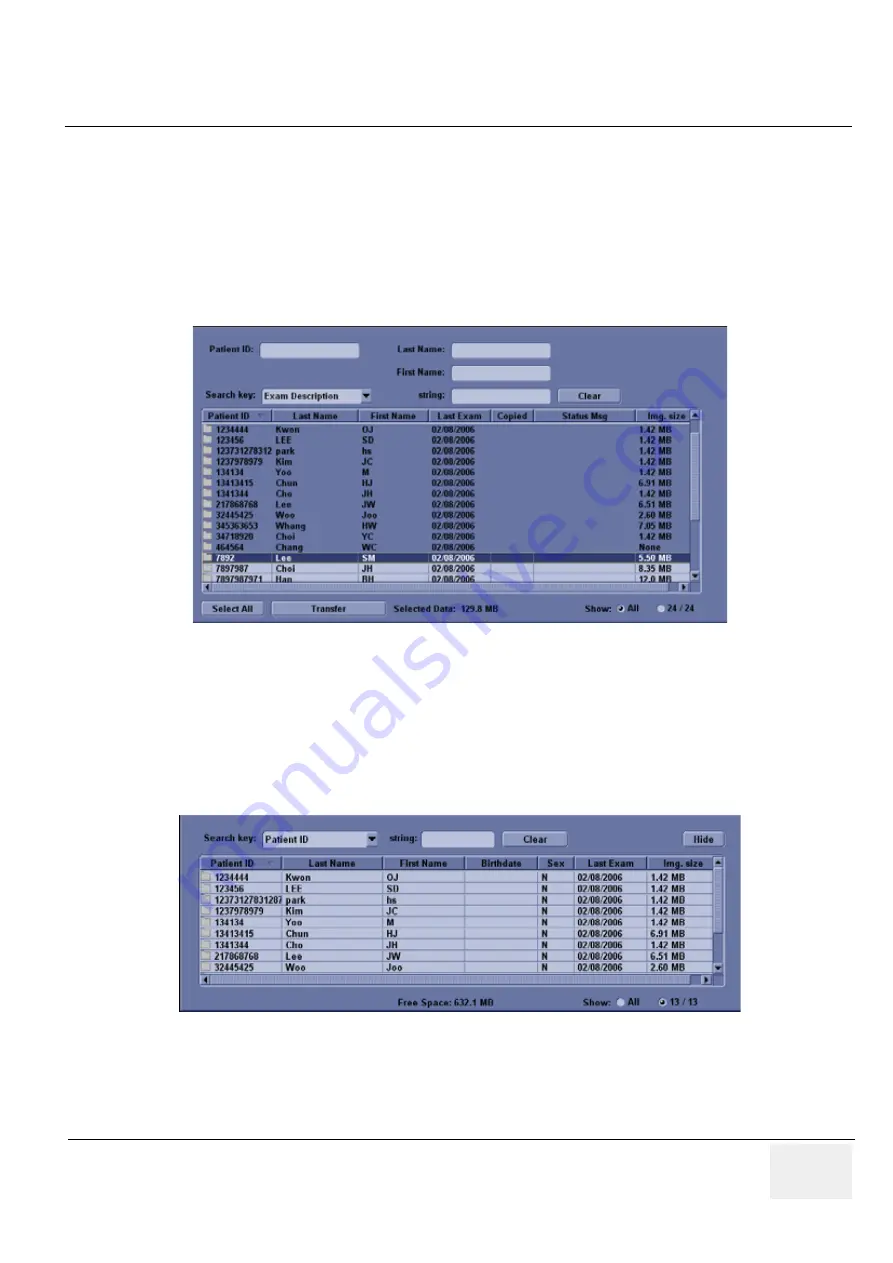
4.) In the patient list at the top of the Patient menu, select the patient(s) you want to export. You
can use Windows commands to select more than one patient. To select a consecutive list of
patients, click the cursor on the first name, move the cursor to the last name, then press and
hold down the Shift+right Set key to select all the names. To select a non-consecutive list of
patients, click the cursor at the first name, move the cursor to the next name, then press and
hold down the Ctrl+right Set key, move the cursor to the next name, then press and hold down
the Ctrl+right Set key again, etc. You can also search for patients via the Search key and string.
Or, Select All Button from the Patient Menu:
NOTE:
You need to use your best judgment when moving patients' images. If there are lots of images
or loops, then only move a few patients at a time.
5.) Once you have selected all of the patients to export, press Transfer Button as shown in Figure
4-17 from the Patient Menu.
6.) The progress bar appears as the copy is taking place. Once transfer completed, the exported
patient list will be shown as Figure 4-21.
7.) Press F3 to eject the media. Specify that you want to finalize the CD-ROM.
Figure 4-20 Source Section
Figure 4-21 Destination Section of Patient Screen
Summary of Contents for LOGIQ P6
Page 2: ...GE HEALTHCARE DIRECTION 5245279 REVISION 3 LOGIQ P6 P6 PRO SERVICE MANUAL Page 1 2 ...
Page 9: ...GE HEALTHCARE DIRECTION 5245279 REVISION 3 LOGIQ P6 P6 PRO SEVICE MANUAL vii JA ZH CN KO ...
Page 22: ...GE HEALTHCARE DIRECTION 5245279 REVISION 3 LOGIQ P6 P6 PRO SERVICE MANUAL Page 1 10 ...
Page 477: ......


