


PG9602™ OPERATION AND MAINTENANCE MANUAL
© 2011 Fluke Calibration
Page
24
Caution
•
Do not plug the AMH VENT connection. Use only a “SESO”
type quick-connector stem. Plugging the AMH VENT
connection can cause serious damage to AMH internal
components.
•
Drive vacuum supply must be connected to AMH VENT
when using a PG9000 in “absolute by vacuum” mode.
Always check that AMH is supplied with drive vacuum
before establishing reference vacuum in the AMH vacuum
chamber. Failure to do so may result in damage to the
binary mass pins and/or binary masses.
2.3.1.5.3
Connecting AMH Communications
Connect the AMH communication cable (6 ft. cable with circular connectors at
each end) from the PG9000 Remote Electronics Module to the PG9000 Base.
The cable carries both power and communication data to the AMH-100-VAC
once it is connected to the PG9000 Base. See Section 3.7.2.1 for instructions to
load the AMH onto the PG Base.
Caution
Perform an AMH initialization before loading AMH onto the
PG9000 platform (see Section 2.4.10). The initialization ensures
that AMH binary mass pins are retracted and main mass
columns are rotated correctly for loading. Installing the AMH
over the masses before performing an AMH startup risks
damaging internal AMH components.
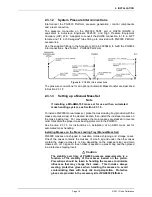
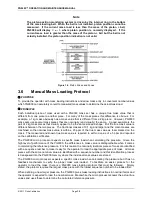
2.3.1.6
Setting Up Vacuum Reference Hardware (optional)
PG9000 may be operated in atmosphere reference or vacuum reference modes.
For vacuum reference, the bell jar and vacuum reference accessories should be
used (see Table 3).
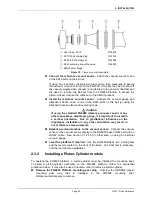
To install the Vacuum reference accessories proceed as follows:
Setup the base
: If not already complete, install and setup the PG9000
Base, piston-cylinder(s), and mass set per sections 2.3.1.1 through 2.3.1.4.
Ensure proper operation with atmospheric reference.
Connect AMH Drive Vacuum
: If not already performed, connect the AMH
drive vacuum connection (see Section 2.3.1.5.2).
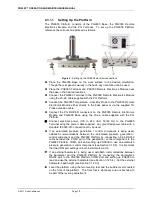
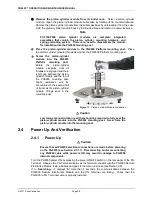
Install the PG9000 bell jar:
Ensure that the elastomeric seal is in place on
the lower lip of the bell jar. Place the bell jar over the masses and the AMH if
present. The bell jar locates on the lip of the vacuum plate. Position the bell
jar such that the three KF40 connections are located conveniently for
reference vacuum source, manual vent and reference vacuum measurement
devices.
Install the vacuum vent kit:
The vacuum vent kit includes a manually
operated valve, a reducer, clamps and centering rings. Note that a KF40
centering ring with an integral mesh screen is provided to help prevent
contaminants from entering the bell jar through the vent valve.
Summary of Contents for PG9000 Series
Page 10: ...PG9602 OPERATION AND MAINTENANCE MANUAL 2011 Fluke Calibration Page X Notes...
Page 128: ...PG9602 OPERATION AND MAINTENANCE MANUAL 2011 Fluke Calibration Page 118 Notes...
Page 164: ...PG9602 OPERATION AND MAINTENANCE MANUAL 2011 Fluke Calibration Page 154 Notes...
Page 188: ...PG9602 OPERATION AND MAINTENANCE MANUAL 2011 Fluke Calibration Page 178 Notes...
Page 192: ...PG9602 OPERATION AND MAINTENANCE MANUAL 2011 Fluke Calibration Page 182 Notes...


