R
Page R-1
Repair and Service Manual
Read all of Section B and this section before attempting any procedure. Pay particular attention to all Notes, Cautions and Warnings
WHEEL AND TIRE SERVICE
To prevent serious per-
sonal injury caused by a
broken socket, use only
sockets designed for impact wrench use. Never use a
conventional socket.
To prevent serious injury or death resulting from
a tire explosion, never exceed inflation pressure
rating on tire sidewall.
To prevent tire explosion, pressurize tire with
small amount of air applied intermittently to seat
beads. Never exceed the tire manufacturer’s rec-
ommendation when seating a bead. Protect face
and eyes from escaping air when removing valve
core.
Use caution when inflating tires. Due to the low
volume of these small tires, overinflation can
occur in a matter of seconds. Overinflation could
cause the tire to separate from the wheel or cause
the tire to explode, either of which could cause
personal injury or death.
Standard tires for this vehicle are uni-direc-
tional and should never be moved from one
side of vehicle to the other. Driver side tires should always
remain on the driver side of the vehicle. Passenger side tires
should always remain on the passenger side of the vehicle.
Uni-directional tires have an arrow on the sidewall indicating
direction of rotation when moving forward.
Tool List
Qty. Required
Torque wrench, 1/2" drive, ft. lbs. ................................ 1
Lug wrench, 3/4" ......................................................... 1
Impact wrench, 1/2" drive............................................ 1
Impact socket, 3/4", 1/2" drive..................................... 1
This vehicle comes standard with uni-directional tires.
Tire condition should be inspected and inflation pres-
sures checked per Periodic Service Schedule when the
tires are cool. Be sure to install the valve dust cap after
checking or inflating. When removing wheels with an
impact wrench, use only impact sockets. Regular sockets
are not designed for impact pressures exerted by power
tools.
Tire inflation will depend on the type of tires fitted but
under no condition should inflation pressure be higher
than recommended on the tire sidewall. Standard and
optional tires should be inflated to pressure designated in
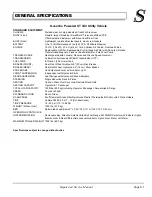
GENERAL SPECIFICATIONS section. If pressure is not
designated in GENERAL SPECIFICATIONS, inflate to
pressure designated on tire sidewall. All four tires
should have the same pressure for optimum handling
characteristics. Do not overinflate. Due to the low vol-
ume of these small tires, overinflation can occur in a mat-
ter of seconds. Be sure to install the valve dust cap after
checking or inflating.
Tire Replacement / Repair
To prevent injury, be
sure mounting/demount-
ing machine is anchored
to floor. Wear OSHA approved safety equipment when
mounting/demounting tires.
Tire plug tools and plugs are available at most
automotive parts outlets and have the advan-
tage of not requiring the tire be removed from the wheel.
Tires should be replaced when the center lugs of the tire
have worn to 1/16” (0.1cm).
The vehicle is fitted with low pressure tubeless tires
mounted on one piece rims.
Generally, the most cost effective way to repair a flat tire
resulting from a puncture in the tread portion of the tire is
to use a commercial tire plug.
If the tire is flat, raise vehicle and remove wheel. Refer to
‘Lifting the Vehicle’ in Section B for proper lifting proce-
dure and safety information. Inflate tire to maximum rec-
ommended pressure. Immerse tire in water to locate the
leak and mark with chalk. Insert tire plug in accordance
with manufacturer’s specifications.
If the tire is to be removed or mounted, the tire changing
machine manufacturer’s recommendations must be fol-
lowed in order to minimize the possibility of personal
injury. Be sure to position tire on wheel correctly. Arrow
on tire indicates rotation when moving forward.
Position the rim to suit the side that the tire will be
installed on the vehicle.
Follow all instructions and safety warnings provided by
the mounting/demounting machine manufacturer.
!
!
!
!
WHEELS AND TIRES
Summary of Contents for ST 4X4
Page 6: ...Page iv Repair and Service Manual TABLE OF CONTENTS Notes...
Page 10: ...Repair and Service Manual SAFETY INFORMATION Page viii Notes...
Page 12: ...GENERAL INFORMATION ROUTINE MAINTENANCE Page A ii Repair and Service Manual Notes...
Page 24: ...SAFETY Page B ii Repair and Service Manual Notes...
Page 34: ...BODY AND TRUCKBED Page C ii Repair and Service Manual Notes...
Page 50: ...BRAKES Page D ii Repair and Service Manual Notes...
Page 68: ...CONTINUOUSLY VARIABLE TRANSMISSION CVT Page E ii Repair and Service Manual Notes...
Page 74: ...DIRECTION AND DRIVE SELECTOR Page F ii Repair and Service Manual Notes...
Page 80: ...ELECTRICAL Page G ii Repair and Service Manual Notes...
Page 114: ...FRONT SUSPENSION AND STEERING Page J ii Repair and Service Manual Notes...
Page 128: ...FUEL SYSTEM Page K ii Repair and Service Manual Notes...
Page 136: ...PAINT Page L ii Repair and Service Manual Notes...
Page 142: ...REAR AXLE AND SUSPENSION Page M ii Repair and Service Manual Notes...
Page 152: ...SPEED CONTROL Page N ii Repair and Service Manual Notes...
Page 160: ...TROUBLESHOOTING Page P ii Repair and Service Manual Notes...
Page 168: ...WHEELS AND TIRES Page R ii Repair and Service Manual Notes...
Page 174: ...GENERAL SPECIFICATIONS Page S ii Repair and Service Manual Notes...
Page 180: ...LIMITED WARRANTY Page T ii Repair and Service Manual Notes...
Page 182: ...Page T 2 Repair and Service Manual LIMITED WARRANTY Notes...


