2.
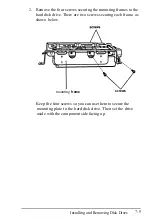
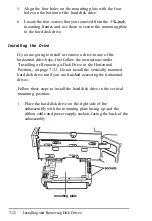
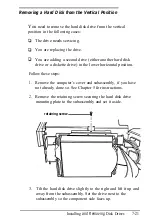
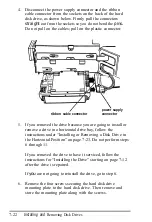
Remove the four screws securing the mounting frames to the
hard disk drive. There are two screws securing each frame, as
shown below.
mounting
frame
screws
Keep the four screws so you can use them to secure the
mounting plate to the hard disk drive. Then set the drive
aside with the component side facing up.
Installing and Removing Disk Dives
7-9
Summary of Contents for EQUITY 3865X/20 PLUS
Page 1: ...EPSON E Q U I T Y 3 8 6 5 X 2 0 P L U S U s e r s G u i d e ...
Page 2: ...EPSON E Q U I T Y 3 8 6 S X 2 0 P L U S USER S GUIDE X EQ386 20PLUS ...
Page 136: ......
Page 266: ...E Q U I T Y 3 8 6 S X 2 0 P L U S U s e r s G u i d e ...
Page 269: ...Epson America Inc 20770 Madrona Avenue Torrance CA 90503 ...

