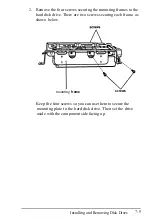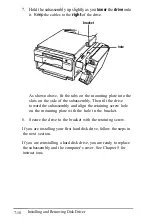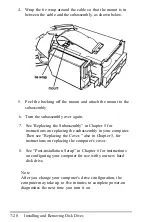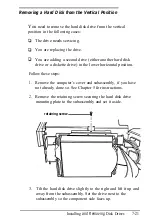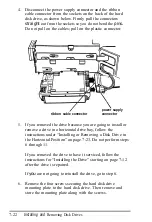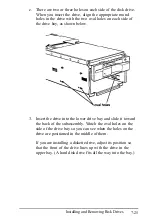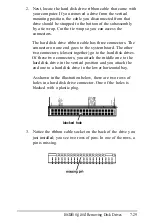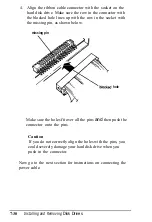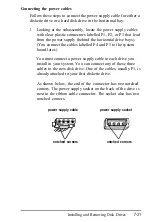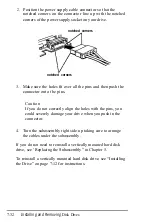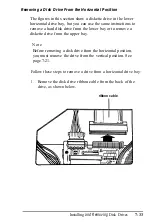
7. Hold the subassembly up slightly as you
lower
the
drive
onto
it.
Keep
the cables to the
right
of the drive.
bracket
hole
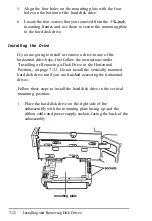
As shown above, fit the tabs on the mounting plate into the
slots on the side of the subassembly. Then tilt the drive
toward the subassembly and align the retaining screw hole
on the mounting plate with the hole in the bracket.
8.
Secure the drive to the bracket with the retaining screw.
If you are installing your first hard disk drive, follow the steps in
the next section.
If you are reinstalling a hard disk drive, you are ready to replace
the subassembly and the computer’s cover. See Chapter 5 for
instruct ions.
7-18
Installing and Removing Disk Driver
Summary of Contents for EQUITY 3865X/20 PLUS
Page 1: ...EPSON E Q U I T Y 3 8 6 5 X 2 0 P L U S U s e r s G u i d e ...
Page 2: ...EPSON E Q U I T Y 3 8 6 S X 2 0 P L U S USER S GUIDE X EQ386 20PLUS ...
Page 136: ......
Page 266: ...E Q U I T Y 3 8 6 S X 2 0 P L U S U s e r s G u i d e ...
Page 269: ...Epson America Inc 20770 Madrona Avenue Torrance CA 90503 ...

