5
5-12
Configuring the Switch
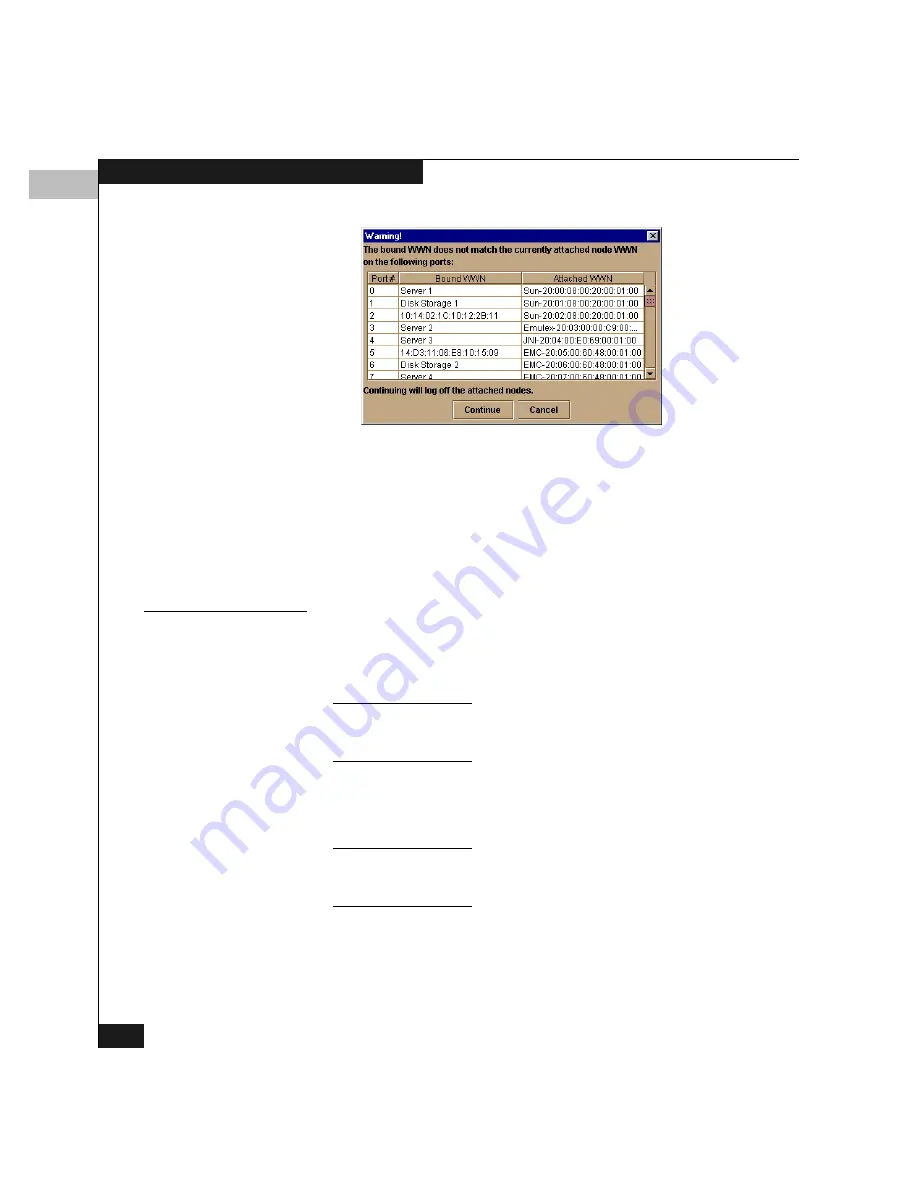
Figure 5-7
Bound WWN Mismatch Warning
If you click Continue, all the listed nodes will be logged off, and
the switch ports will attach to the repective devices identified in
the Bound WWN column.
4. If you are finished configuring the switch, back up the
configuration data. For more information, refer to Backing Up and
Restoring the Configuration on page 7-12.
Port Parameters
The port parameters are described below:
Port #
This is the physical port number: 0 through 31. You cannot edit this
field.
Name
Open Systems mode only; to name ports in S/390 mode, use the Configure
Addresses dialog box, described under Configuring Port Addresses on
page 5-18.
Port names appear in several Product Manager windows. Enter a
name here to identify the end device connected to the port. For
example, if the server name is XYZ, you might use XYZ Server.
To identify port numbers for which you want to provide names, move the
cursor over the ports in the Hardware view. As you move over a port, a
pop-up window identifies the slot number where the port is installed.
If you want to delete all port names from the switch, right-click
anywhere in the Name column; then click Clear All Port Names on
the pop-up menu.
Summary of Contents for Connectrix DS-32M2
Page 4: ...Connectrix DS 32M2 User Guide iv ...
Page 14: ...xiv Connectrix DS 32M2 User Guide Figures ...
Page 16: ...Connectrix DS 32M2 User Guide Tables xvi ...
Page 24: ...xxiv Connectrix DS 32M2 User Guide Warnings and Cautions ...
Page 42: ...1 1 18 Connectrix DS 32M2 User Guide Switch Operating Features ...
Page 72: ...3 3 24 Connectrix DS 32M2 User Guide Product Manager Overview ...
Page 226: ...B B 8 Connectrix DS 32M2 User Guide Configuring Network Addresses ...
Page 248: ...C C 22 Connectrix DS 32M2 User Guide Configuring the Switch from a Web Server ...
Page 332: ...F F 8 Connectrix DS 32M2 User Guide Customer Support ...
Page 351: ...Connectrix DS 32M2 User Guide g 19 Glossary ...
Page 352: ...g 20 Connectrix DS 32M2 User Guide Glossary ...


