5
5-2
Configuring the Switch
Configuring Switch Identification
This section describes the procedure for configuring parameters that
identify the switch in various displays.
To configure identification for the switch, follow these steps:
1. Click Configure on the Product Manager menu bar and select
Identification
on the drop-down menu.
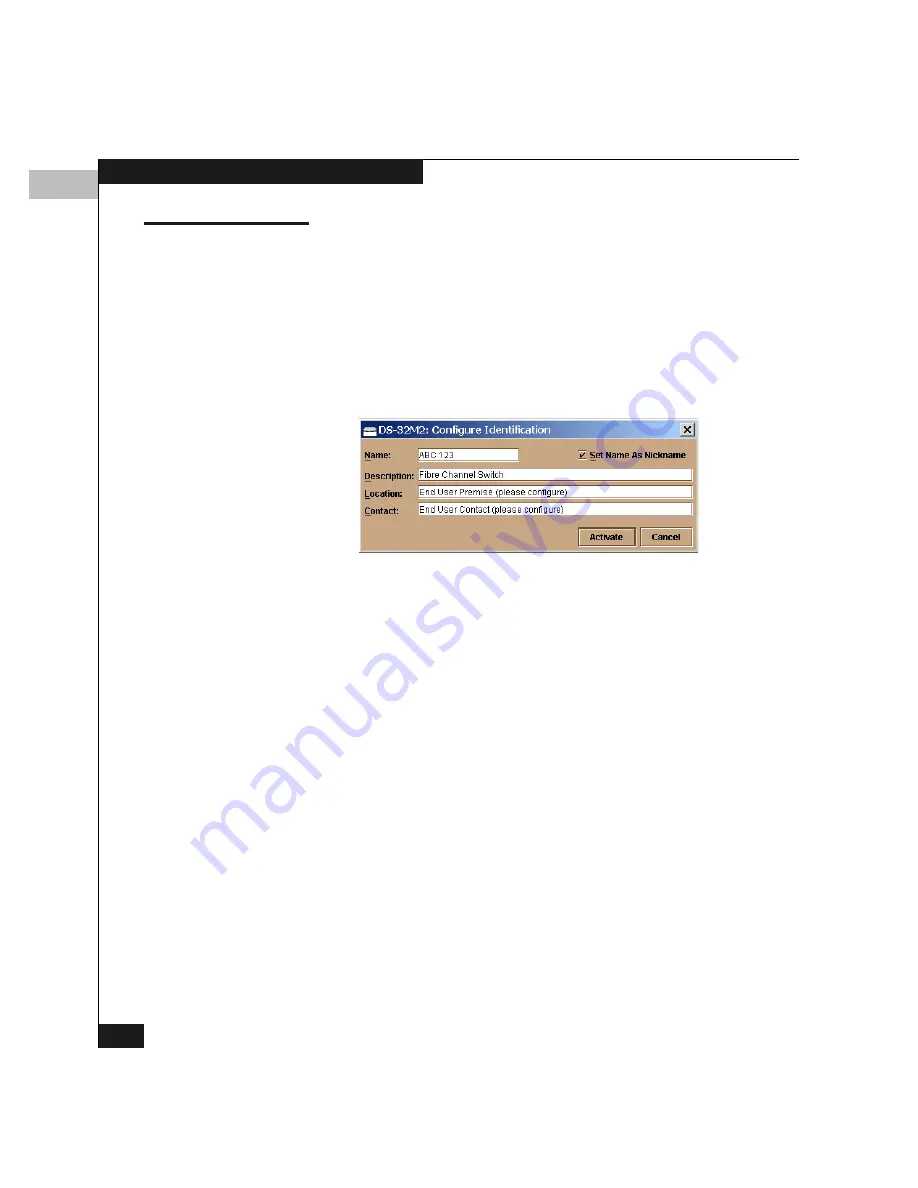
This displays the Configure Identification dialog box (Figure 5-1).
Figure 5-1
Configure Identification Dialog Box
2. Configure the parameters as follows:
• Name — Enter a name for the switch, up to 24 alphanumeric
characters. As an example, the name could reflect the
director’s Ethernet network domain name service (DNS) host
name.
This name will appear in the following locations:
– Switch icon label in the Connectrix Manager Products
view, if the display options are set to display product
names
– Product Manager window title panel
– Identification table at the top of the Hardware view
– Switch Properties window
• Description — Enter a description that will further identify
the switch. The entry can be longer than 24 characters;
however, the size of user’s display determines how much of a
lengthy entry will appear.
Summary of Contents for Connectrix DS-32M2
Page 4: ...Connectrix DS 32M2 User Guide iv ...
Page 14: ...xiv Connectrix DS 32M2 User Guide Figures ...
Page 16: ...Connectrix DS 32M2 User Guide Tables xvi ...
Page 24: ...xxiv Connectrix DS 32M2 User Guide Warnings and Cautions ...
Page 42: ...1 1 18 Connectrix DS 32M2 User Guide Switch Operating Features ...
Page 72: ...3 3 24 Connectrix DS 32M2 User Guide Product Manager Overview ...
Page 226: ...B B 8 Connectrix DS 32M2 User Guide Configuring Network Addresses ...
Page 248: ...C C 22 Connectrix DS 32M2 User Guide Configuring the Switch from a Web Server ...
Page 332: ...F F 8 Connectrix DS 32M2 User Guide Customer Support ...
Page 351: ...Connectrix DS 32M2 User Guide g 19 Glossary ...
Page 352: ...g 20 Connectrix DS 32M2 User Guide Glossary ...


