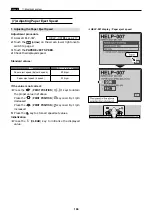
Standard value
160
,
Electrical system
chap.4
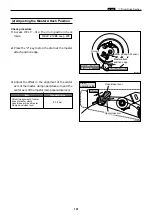
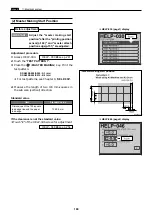
(2) Master Making Start Position
R8S04051
¡
Master making start position
Adjust the "master making start
position" after the "printing position
sensor(p.149)" and "master attach
position edge(p.151)" are adjusted.
IMPORTANT :
Before adjustment
If the clearance is not the standard value:
¡
Touch "
2
" of the HELP-046 screen for adjustment.
HELP - 046
\
see p.254
Item
Dimensions of the 100-square
lead edge line and the paper
lead edge
10
±
0.5 mm
Adjustment procedure
1.
Access HELP-030.
2.
Touch the "
TEST PATTERN 1
".
3.
Press the
(MASTER MAKING)
key. Print the
test pattern.
DP-S850/S650/S550 : A3
paper
DP-S620/S520/S510 : B4
paper
¡
For test patterns, see Chapter 8, "
HELP-030
".
4.
Measure the length of two 100 mm-squares in
the sub scan (vertical) direction.
Standard value
HELP - 030
\
see p.241
¡
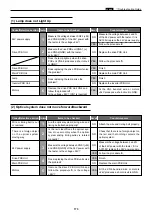
HELP-030 (page1) display
¡
HELP-030(page2) display
¡
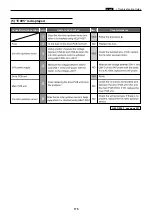
HELP-046 (page2) display
Summary of Contents for DP-S Series
Page 1: ......
Page 9: ......
Page 11: ......
Page 16: ...x Dimensions chap 1 15 R8S01001 xDimensions 622 1360 510 228 1080 710 980 688 370 mm...
Page 22: ...v Part Names and Their Functions chap 1 21 44000A1e 2A 2B 2C R8S01006a 2Detailed drawing...
Page 33: ...32 z Scanner Section chap 2 Circuit R8S02E03e...
Page 87: ...86 m Drum Section chap 2 2 Circuit R8S02E30...
Page 171: ...170 MEMO...
Page 193: ...192 MEMO...
Page 195: ...194 z Help mode List chap 7 z HELP Mode List...
Page 243: ...242 c HELP Mode Function and Operation Procedures chap 7...
Page 270: ...269 c HELP Mode Function and Operation Procedures chap 7...
Page 281: ...280 MEMO...
Page 293: ...292 z Electrical Parts Layout and Their Functions chap 9 MEMO...
Page 295: ...309 294 x Overall Wiring Layout chap 9 Overall Wiring Layout 1 Main PCB 2 2...
Page 297: ...311 296 x Overall Wiring Layout chap 9 Overall Wiring Layout 2 Drive PCB 2 2...

