| 81
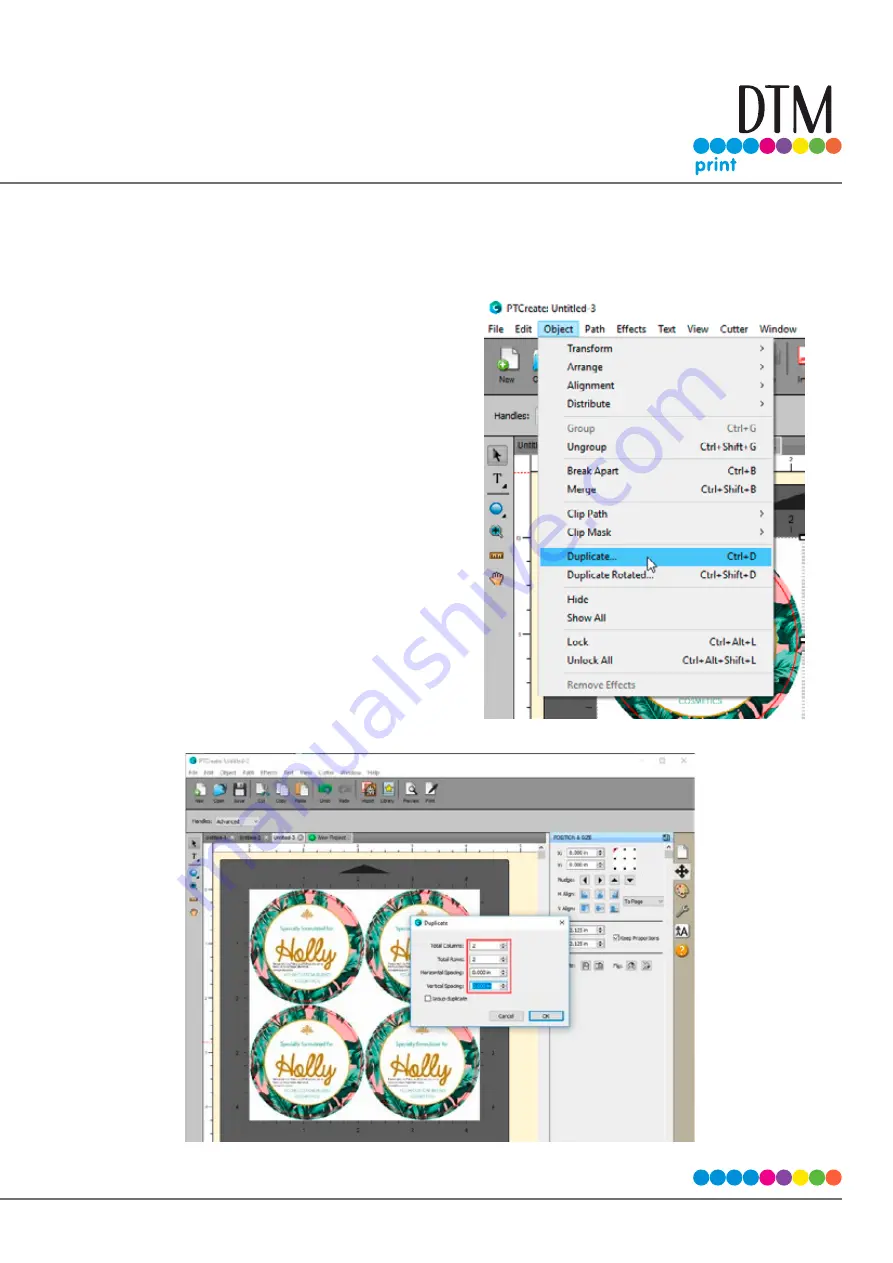
11. Now go to the Object Menu and click Duplicate. Make sure the image and cut line are still selected
otherwise the Duplicate item will not be available.
12. Set the number of rows and columns.
13. Set the gap between the rows and columns.
In this case we are setting the gaps to zero.
We already created a bleed so the cuts will
not intersect or be too close to each other
with zero gap between prints.
14. To print go to the File Menu and choose
Print or click the Print Icon on the shortcut
bar. The print dialog will appear. Make sure
Print+Cut is selected. Click the Properties
button to access the printer settings such
as Print Quality, Saturation and Color
Matching. For a full explanation of printer
driver settings see section 5F.
Summary of Contents for LX610e
Page 71: ... 71 5 Center the image horizontally and vertically to the Page ...
Page 88: ...88 1 Choose Start a new BarTender document ...
Page 89: ... 89 2 Select Blank Template Click Next 3 Select Color Label 610e Click Next ...
Page 109: ... 109 4 Prepare items needed for procedure 5 Soak the paper towels in water for 5 seconds ...


