


7.
Replace the computer cover (see
Replacing the Computer Cover
).
8.
Connect your computer and devices to electrical outlets, and then turn them on.
Installing a Floppy Drive
1.
Follow the procedures in
Before You Begin
.
2.
Remove the computer cover (see
Removing the Computer Cover
).
3.
Remove the drive panel (see
Removing the Drive Panel
).
4.
Remove the existing floppy drive, if applicable (see
Removing a Floppy Drive
).
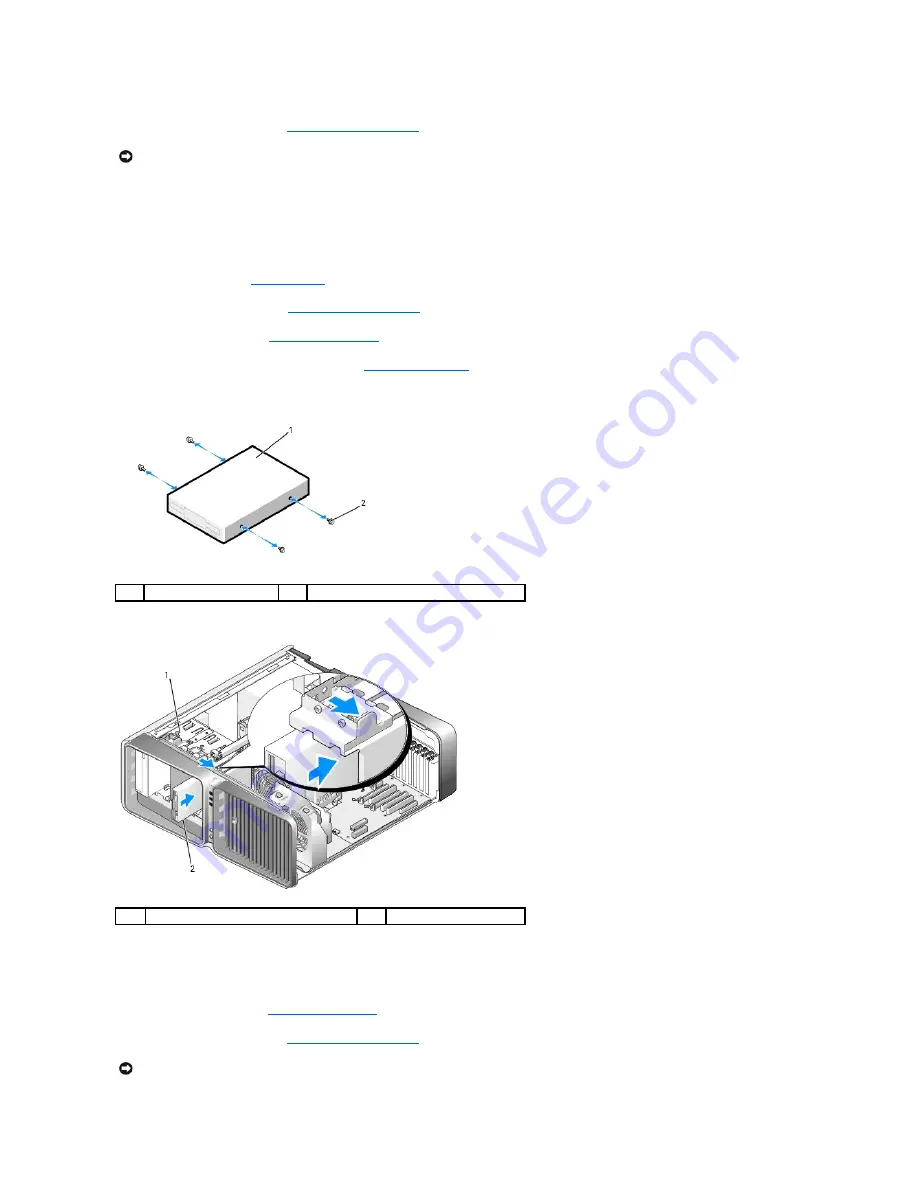
5.
If no screws are attached to the new floppy drive, check the inside of the drive panel for shoulder screws. If screws are present, attach the screws to
the new drive.
Slide the floppy drive into the drive bay until it clicks into place.
6.
Connect the power and data cables to the back of the floppy drive.
7.
Check all cable connections and fold cables out of the way to avoid blocking airflow between the fan and cooling vents.
8.
Replace the drive panel (see
Installing the Drive Panel
).
9.
Replace the computer cover (see
Replacing the Computer Cover
).
NOTICE:
To connect a network cable, first plug the cable into the network port or device and then plug it into the computer.
1
floppy drive
2
shoulder screws (4)
1
drive release latch
2
floppy drive
NOTICE:
To connect a network cable, first plug the cable into the network port or device and then plug it in to the computer.
Summary of Contents for XPS M2010
Page 20: ...Back to Contents Page ...
Page 25: ...Back to Contents Page ...
Page 39: ......
Page 47: ...2 Tighten the captive screw Back to Contents Page ...
Page 57: ......