Back to Contents Page
Replacing the Computer Cover
Dell™ XPS™ 700 Service Manual
1.
Ensure that all cables are connected, and fold cables out of the way.
2.
Ensure that no tools or extra parts are left inside the computer.
3.
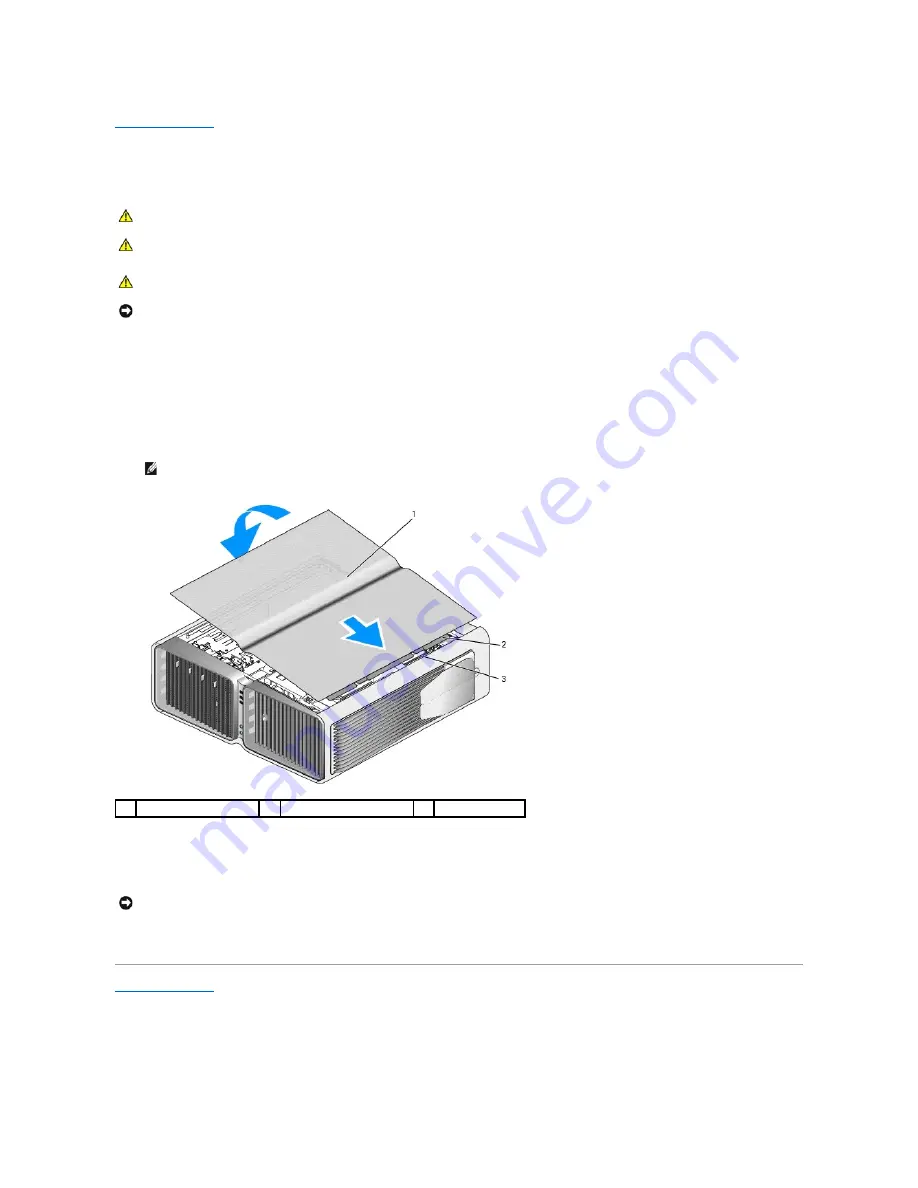
Pivot the cover down and into position.
4.
Press down on the cover until it clicks into place.
5.
With the help of an assistant, carefully set the computer upright.
6.
Carefully, lift the rear of the computer and rotate the stabilizing feet outward into the open position.
7.
Connect your computer and devices to electrical outlets, and turn them on.
Back to Contents Page
CAUTION:
Before you begin any of the procedures in this section, follow the safety instructions in the
Product Information Guide
.
CAUTION:
Your computer is heavy and can be difficult to maneuver. Seek assistance before attempting to lift, move, or tilt the computer and
always lift correctly to avoid injury; avoid bending over while lifting.
CAUTION:
The computer stand should be installed at all times to ensure maximum system stability. Failure to install the stand could result in the
computer tipping over, potentially resulting in bodily injury or damage to the computer.
NOTICE:
To avoid electrostatic discharge and damage to internal components, ground yourself by using a wrist grounding strap or by periodically
touching an unpainted metal surface on the computer chassis.
NOTE:
The computer cover should easily snap into place; however, if necessary, pull back on the cover release latch until the cover is completely
closed, then slide the release latch forward to secure the cover.
1
computer cover
2
cover hinge tabs
3
hinge slots
NOTICE:
To connect a network cable, first plug the cable into the network port or device and then plug it into the computer.
Summary of Contents for XPS M2010
Page 20: ...Back to Contents Page ...
Page 25: ...Back to Contents Page ...
Page 39: ......
Page 47: ...2 Tighten the captive screw Back to Contents Page ...
Page 57: ......


