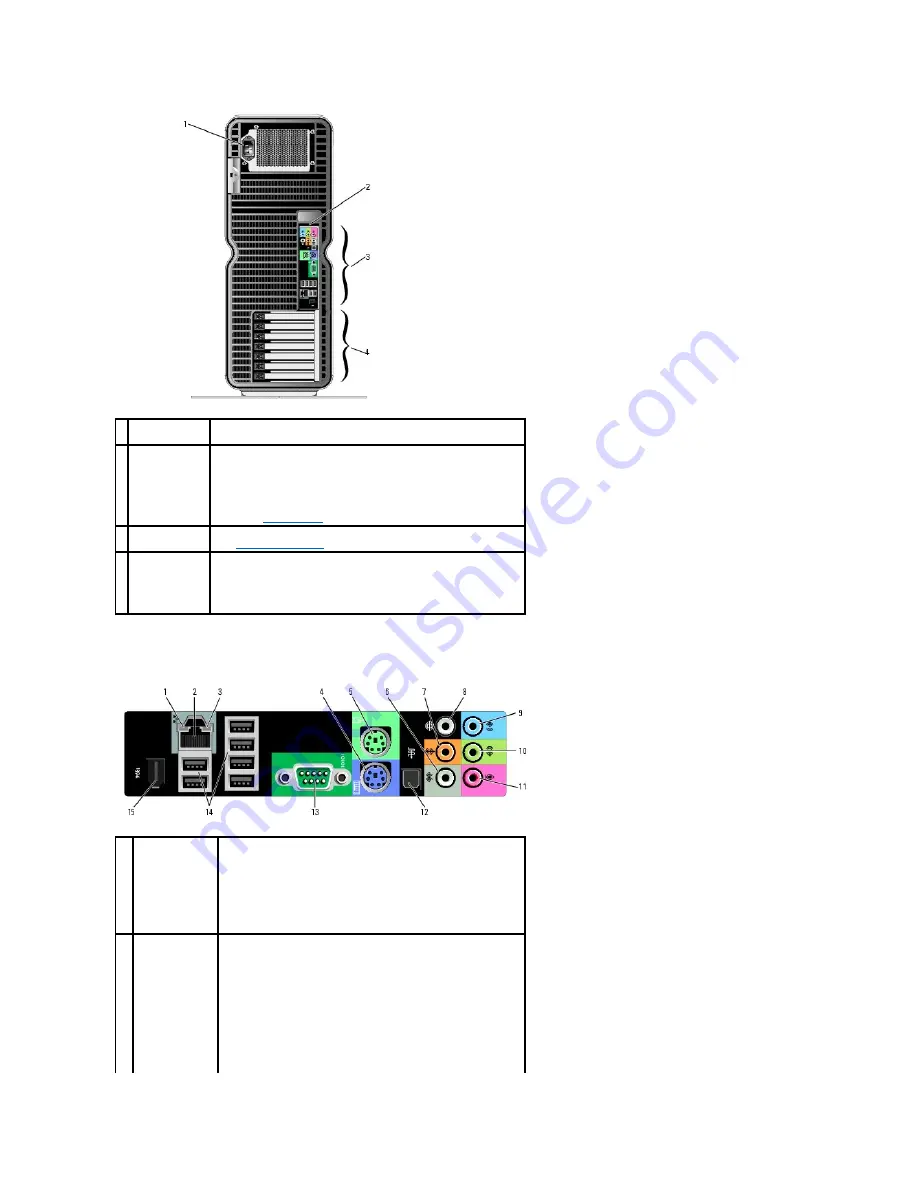
Back I/O Connectors
1 power connector Insert the power cable. The appearance of this connector may differ
from what is pictured.
2 back panel LEDs
(2)
Multi-colored lights provide illumination for the I/O panel on the back of
the computer.
NOTE:
The color of the back panel LEDs can be adjusted in system
setup (see
System Setup
).
3 back I/O
connectors
Plug serial, USB, and other devices into the appropriate connectors
(see
Back I/O Connectors
).
4 card slots
Access connectors for any installed PCI or PCI Express cards.
NOTE:
Some connector slots support full-length cards.
1
link integrity light
l
Green
—
A good connection exists between a 10-Mbps
network and the computer.
l
Orange
—
A good connection exists between a 100-Mbps
network and the computer.
l
Yellow
—
A good connection exists between a 1000-Mbps (1-
Gbps) network and the computer.
l
Off
—
The computer is not detecting a physical connection to
the network.
2
network adapter
connector
NOTICE:
Do not plug a telephone cable into the network adapter
connector.
Use the network adapter connector to attach your computer to a
network or broadband device. Connect one end of a network cable
to either a network jack or your network or broadband device, and
then connect the other end of the network cable to the network
adapter connector on your computer. A click indicates that the
network cable has been securely attached.
On computers with an additional network connector card, use the
Summary of Contents for XPS M2010
Page 20: ...Back to Contents Page ...
Page 25: ...Back to Contents Page ...
Page 39: ......
Page 47: ...2 Tighten the captive screw Back to Contents Page ...
Page 57: ......


