•
When you use Global View, you must log in to the DR Series system using your domain credentials; for example, you
must log in as DOMAIN\Administrator instead of Administrator.
Configuring Active Directory Settings
You need to configure the Active Directory setting to direct your DR Series system to join or leave a domain that
contains a Microsoft Active Directory Service (ADS). To join an ADS domain, complete steps 1 through 4 in the following
procedure (to leave an ADS domain, skip to step 5). When you join the DR Series system to an ADS domain, this disables
the Network Time Protocol (NTP) service and instead uses the domain-based time service.
To configure the DR Series system for a domain using ADS, complete the following:
1.
Select System Configuration
→
Active Directory.
The Active Directory page is displayed.
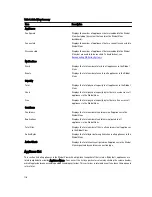
NOTE: If you have not yet configured ADS settings, an informational message is displayed in the Settings
pane in the Active Directory page.
2.
Click Join on the options bar.
The Active Directory Configuration dialog is displayed.
3.
Type the following values in the Active Directory Configuration dialog:
– In Domain Name (FQDN), type a fully qualified domain name for the ADS; for example, AD12.acme.com.
(This is
a required field.)
NOTE: Supported domain names are limited to 64 characters in length and can only consist of a
combination of A-Z, a-z, 0-9, and three special characters: a dash (-), a period (.), and an underscore (_).
– In Username, type a valid user name that meets the user name guidelines for the ADS.
(This is a required field.)
NOTE: Supported user names are limited to 64 characters in length and can only consist of a combination
of A-Z, a-z, 0-9, and three special characters: a dash (-), a period (.), and an underscore (_).
– In Password, type a valid password that meets the password guidelines for the ADS.
(This is a required field.)
– In Org Unit, type a valid organizational name that meets the organization name guidelines for the ADS.
(This is
an optional field.)
4.
Click Join Domain to configure your system with these ADS settings (or click Cancel to display the Active Directory
page).
The Successfully Configured dialog is displayed when successful.
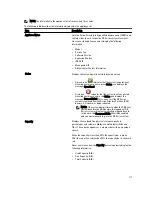
NOTE: If you configure CIFS container share paths, these will be displayed in a CIFS Container Share Path
pane in the Active Directory page.
5.
To leave an ADS domain, click Leave in the Active Directory page.
The Active Directory Configuration dialog is displayed.
6.
Leaving the configured ADS domain requires that you enter the following:
a) In Username, enter a valid user name for the ADS domain.
b) In Password, enter a valid password for the ADS domain.
7.
Click Leave Domain to direct your DR Series system to leave the ADS domain (or click Cancel to display the Active
Directory page).
The Successfully Configured dialog is displayed when successful.
Adding a Login Group in an ADS Domain
After you configure your DR systems within the same ADS domain, you must ensure that a login group exists and add it
to the domain.
Adding a login group is only possible when the DR Series system is already joined to a domain. Also, you must be logged
in as a domain user that is part of an enabled login group.
114
Summary of Contents for DR series
Page 1: ...Dell DR Series System Administrator Guide ...
Page 10: ...10 ...
Page 34: ...34 ...
Page 138: ...138 ...
Page 160: ...160 ...

