


BigIron RX Installation Guide
37
53-1001811-01
Installing a BigIron RX-4 switch
2
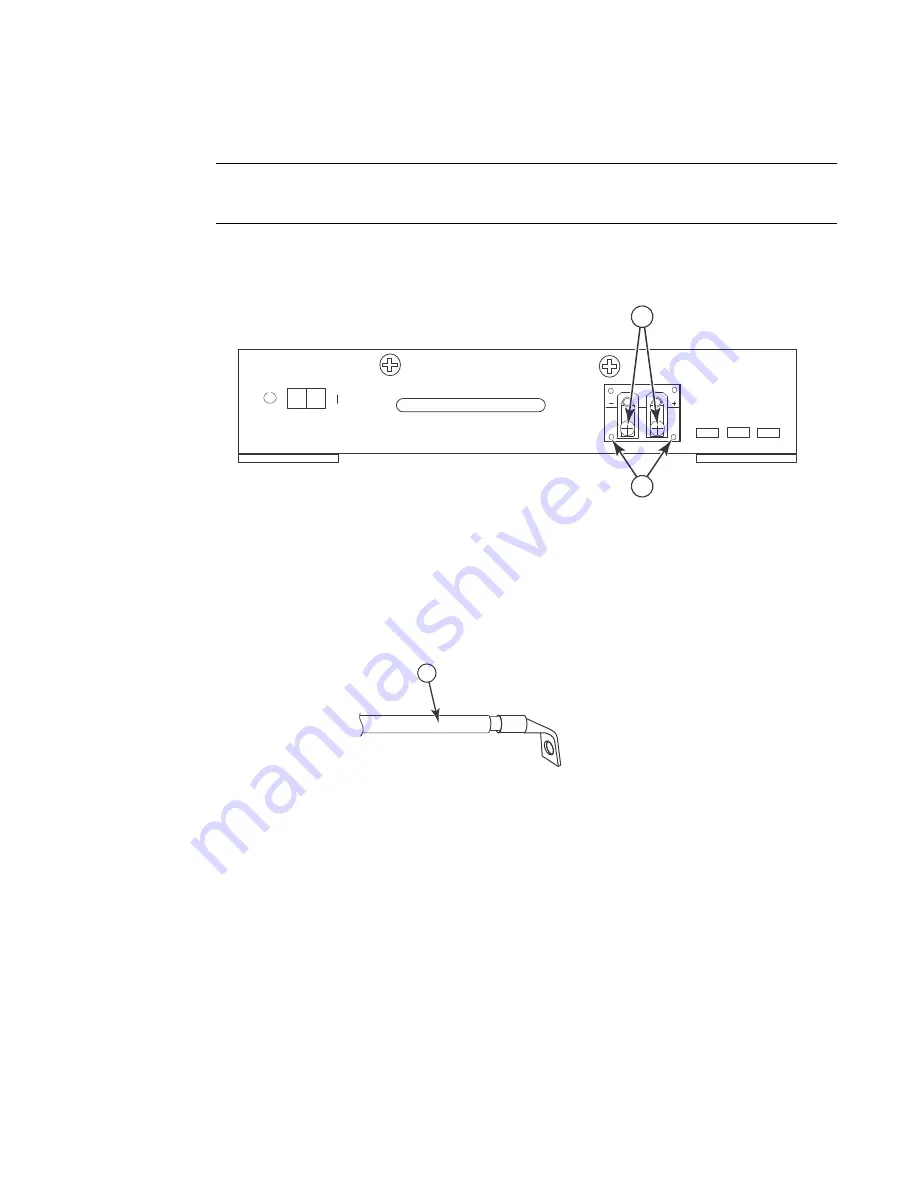
Follow the steps given below to connect a DC power source.
NOTE
The layout of the LEDs on your BigIron RX-4 DC power supply may be different from what is shown
in
Figure 23
, due to multiple vendors; but the function is the same.
1. Use a flat-blade screwdriver to remove the two screws holding the transparent cover over the
power supply lugs.
FIGURE 23
The BigIron RX-4 DC power supply
2. Use a Phillips head screwdriver to remove each of the power lugs.
3. Crimp #8 AWG power supply wire into the power lugs and reconnect the power lugs to the
power supply unit.
FIGURE 24
Crimping the power supply wire in the lug
4. Re-attach the transparent cover over the power supply lugs that was removed in Step 1.
5. Connect the wire to your DC power source making sure to connect the -48V cable to the
negative terminal on the power supply and the 0V cable to the positive terminal.
Final steps
Follow the steps listed below to complete the installation:
•
“Attaching a management station”
•
“Powering-on the power source”
•
“Verifying proper operation”
1
Screws holding power lugs
2
Screws holding transparent cover
1
#8 AWG power supply wire
DC
IN
DC
OK
ALM
1
2
1
Summary of Contents for BigIron RX-16
Page 12: ...xii BigIron RX Installation Guide 53 1001811 01 ...
Page 36: ...24 BigIron RX Installation Guide 53 1001811 01 Supported software features 1 ...
Page 100: ...88 BigIron RX Installation Guide 53 1001811 01 Verifying proper operation 2 ...
Page 110: ...98 BigIron RX Installation Guide 53 1001811 01 RJ 45 procedures 3 ...
Page 148: ...136 BigIron RX Installation Guide 53 1001811 01 Removing MAC address entries 5 ...
Page 240: ...228 BigIron RX Installation Guide 53 1001811 01 Internet drafts C ...


